Fenland photography workshop with Andrew Bartram

One of my photographic resolutions for 2022 was to spend less money on gear, focusing my attentions instead on education to better my skills. During the various Covid lockdowns in 2020 and 2021 I’d already begun to look beyond digital photography, using a selection of pinhole cameras to explore this simplest of photographic genres. While I love the process of taking pinhole photos, and the end results too, it’s proved to be a very solitary experience pursuing such a niche genre. To rectify this I’ve sought out other pinhole photographers who offer workshops and this led me to Andrew Bartram.

Andrew is a film photographer based in the Cambridgeshire Fens who has recently started offering very reasonably priced (at the time of writing £65 for one day and £100 for two) workshops on photography and darkroom developing/printing. I also knew of him as 50% of the presenting team on the Lensless Podcast so this seemed like a excellent way to continue my pinhole education.  Doing one of Andrew’s two day workshops would bring me the chance to go out and shoot with someone who shared my interest in lensless photography, as an opportunity to dip my toes into the realm of home developing and printing. I chose to focus on black and white film but for a small supplement (to cover the additional costs) Andrew also offers colour development and printing.

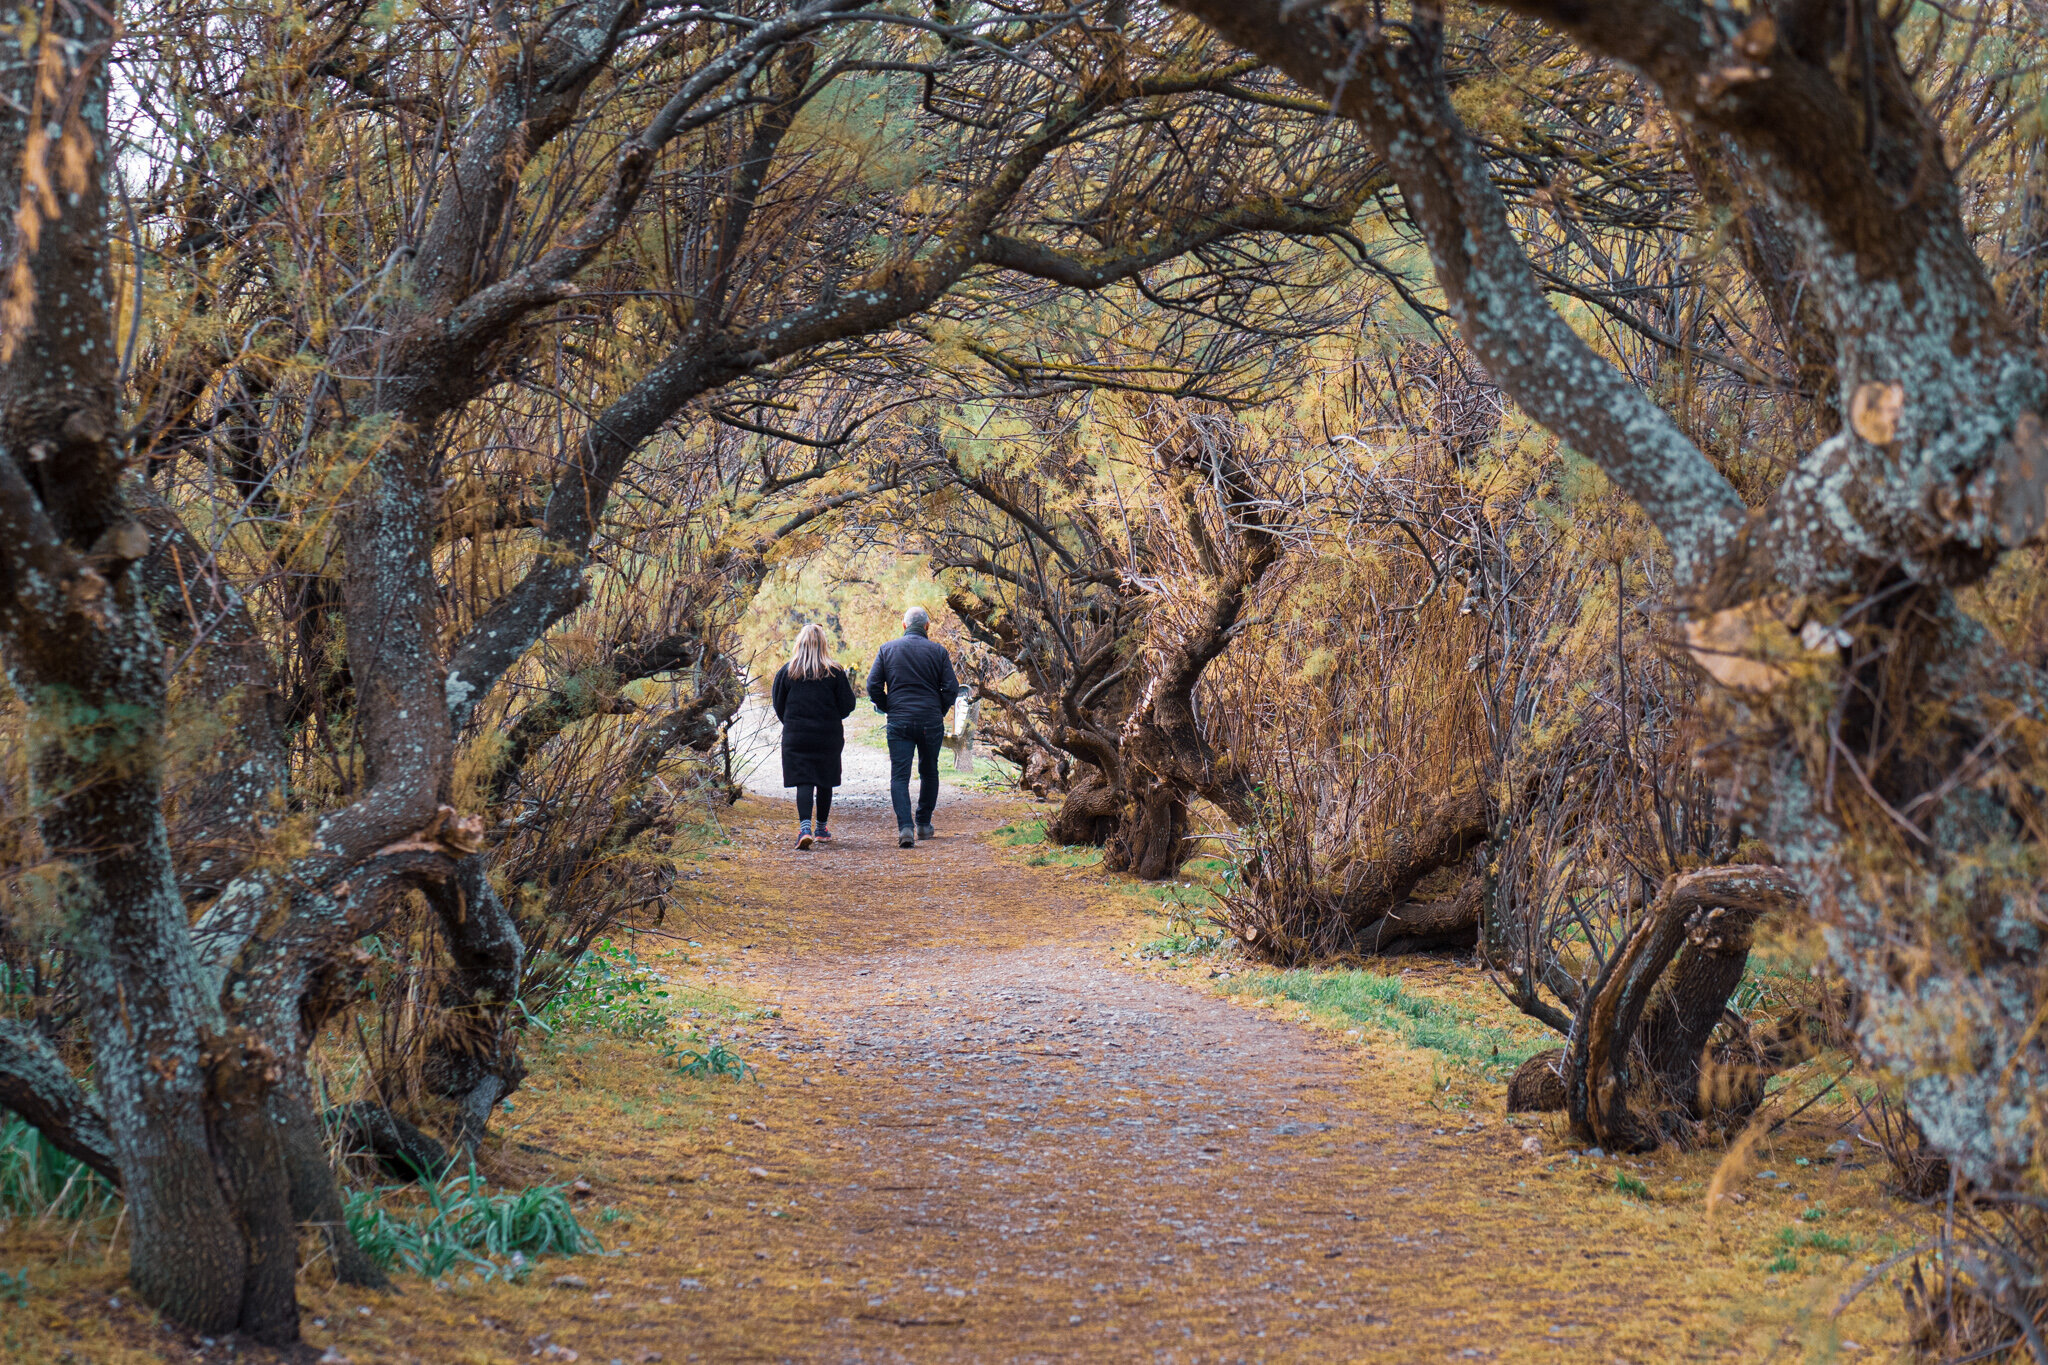
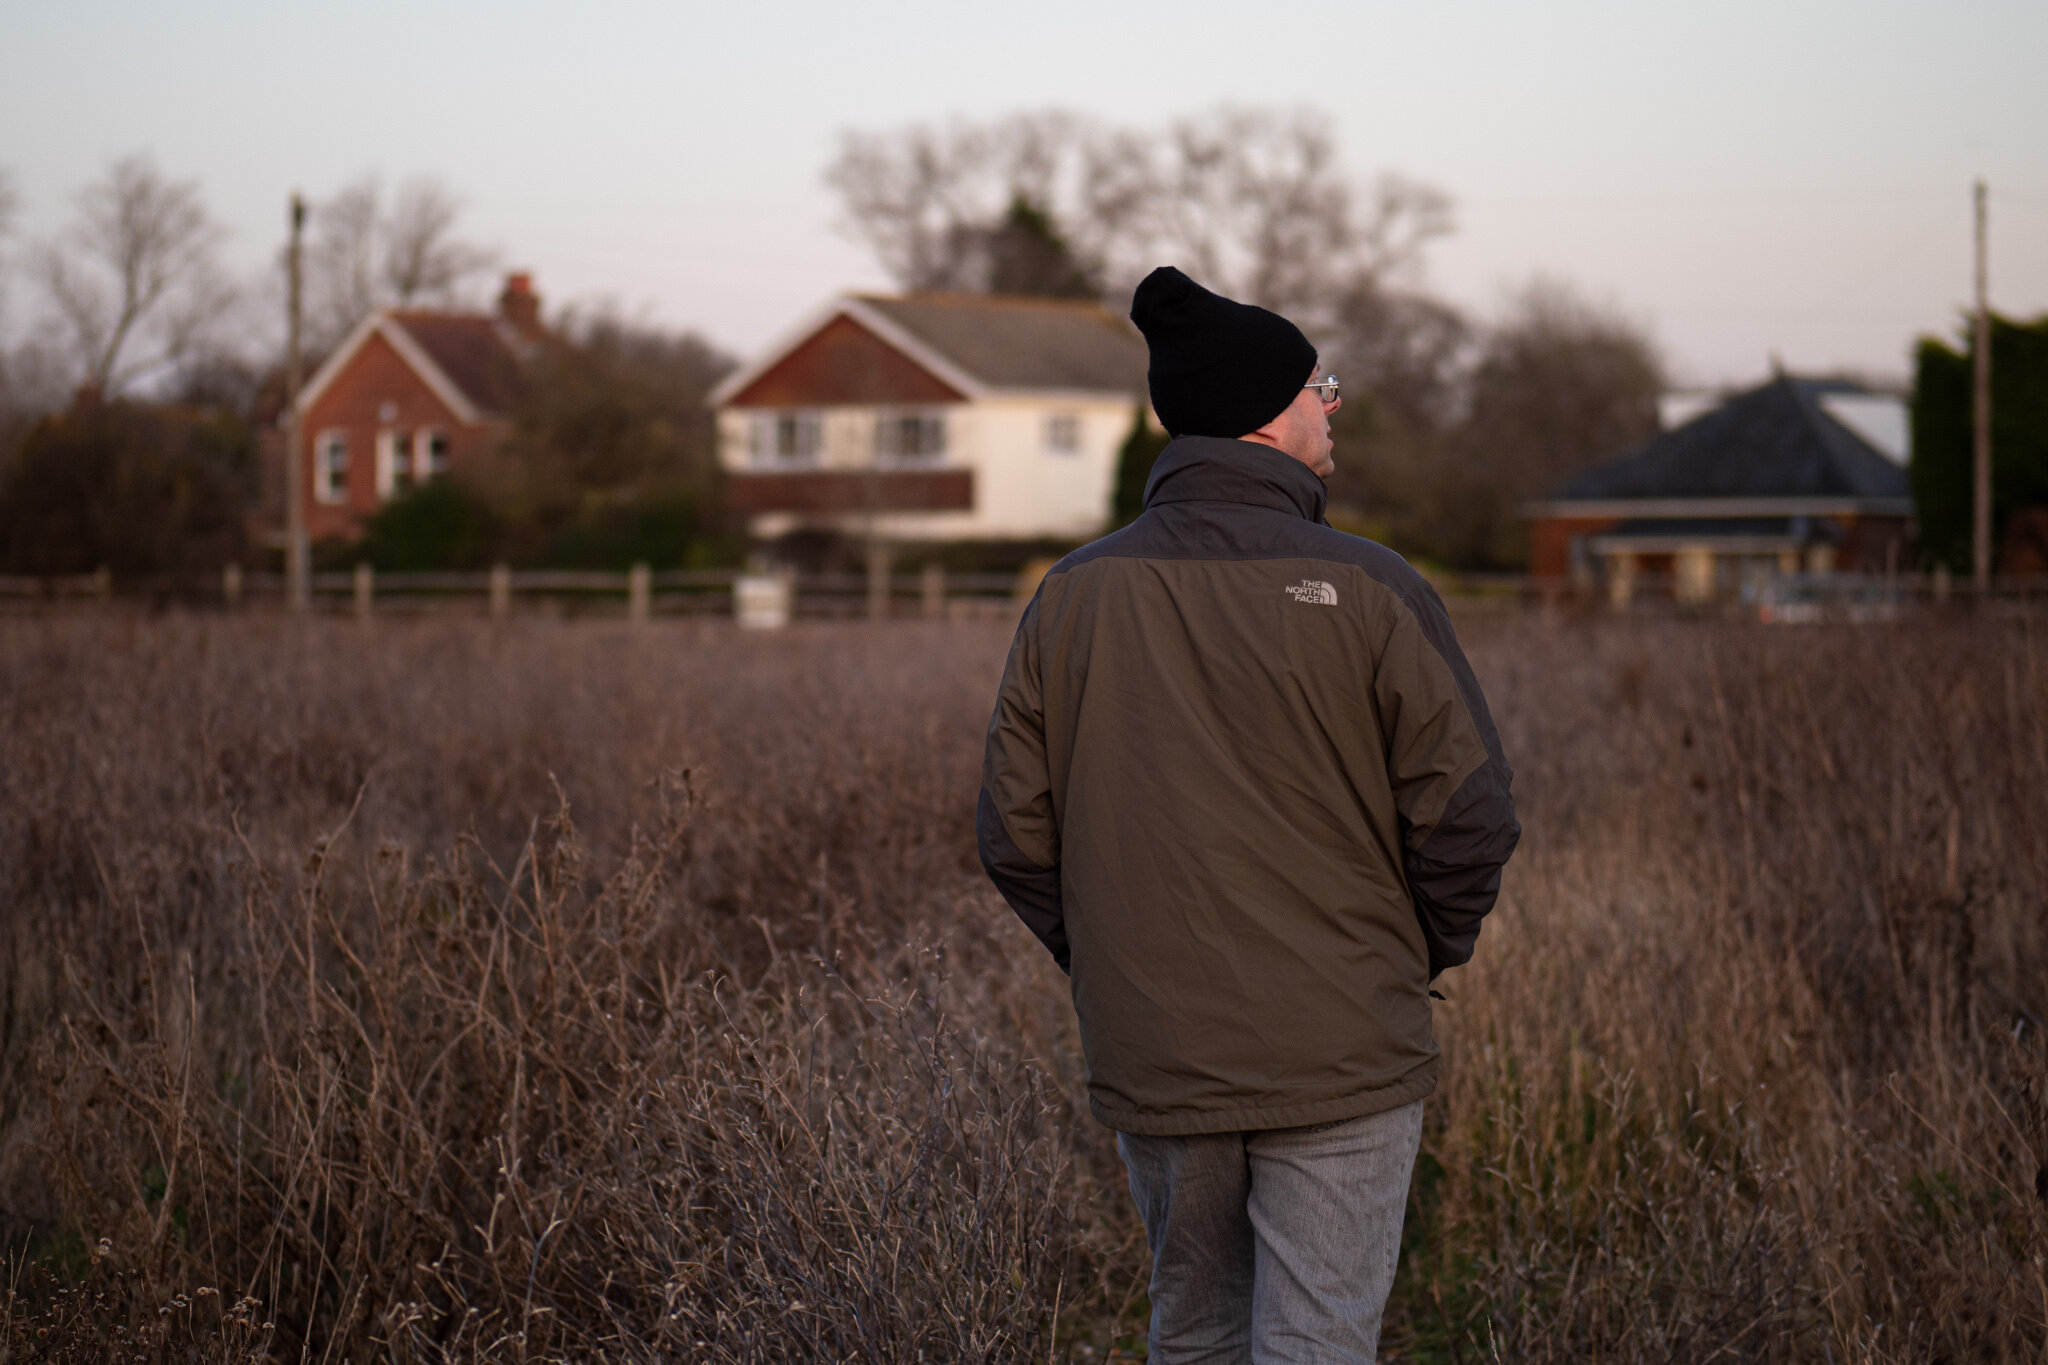
In early April I headed over to Andrew’s home in Cambridgeshire for the first of two days. We began with a chat, discussing our plans for the workshop. Our conversation also covered photographers whose work Andrew particularly admires, the intricacies of exposure metering, particularly in high contrast settings, and some of the places we’d visit shoot.

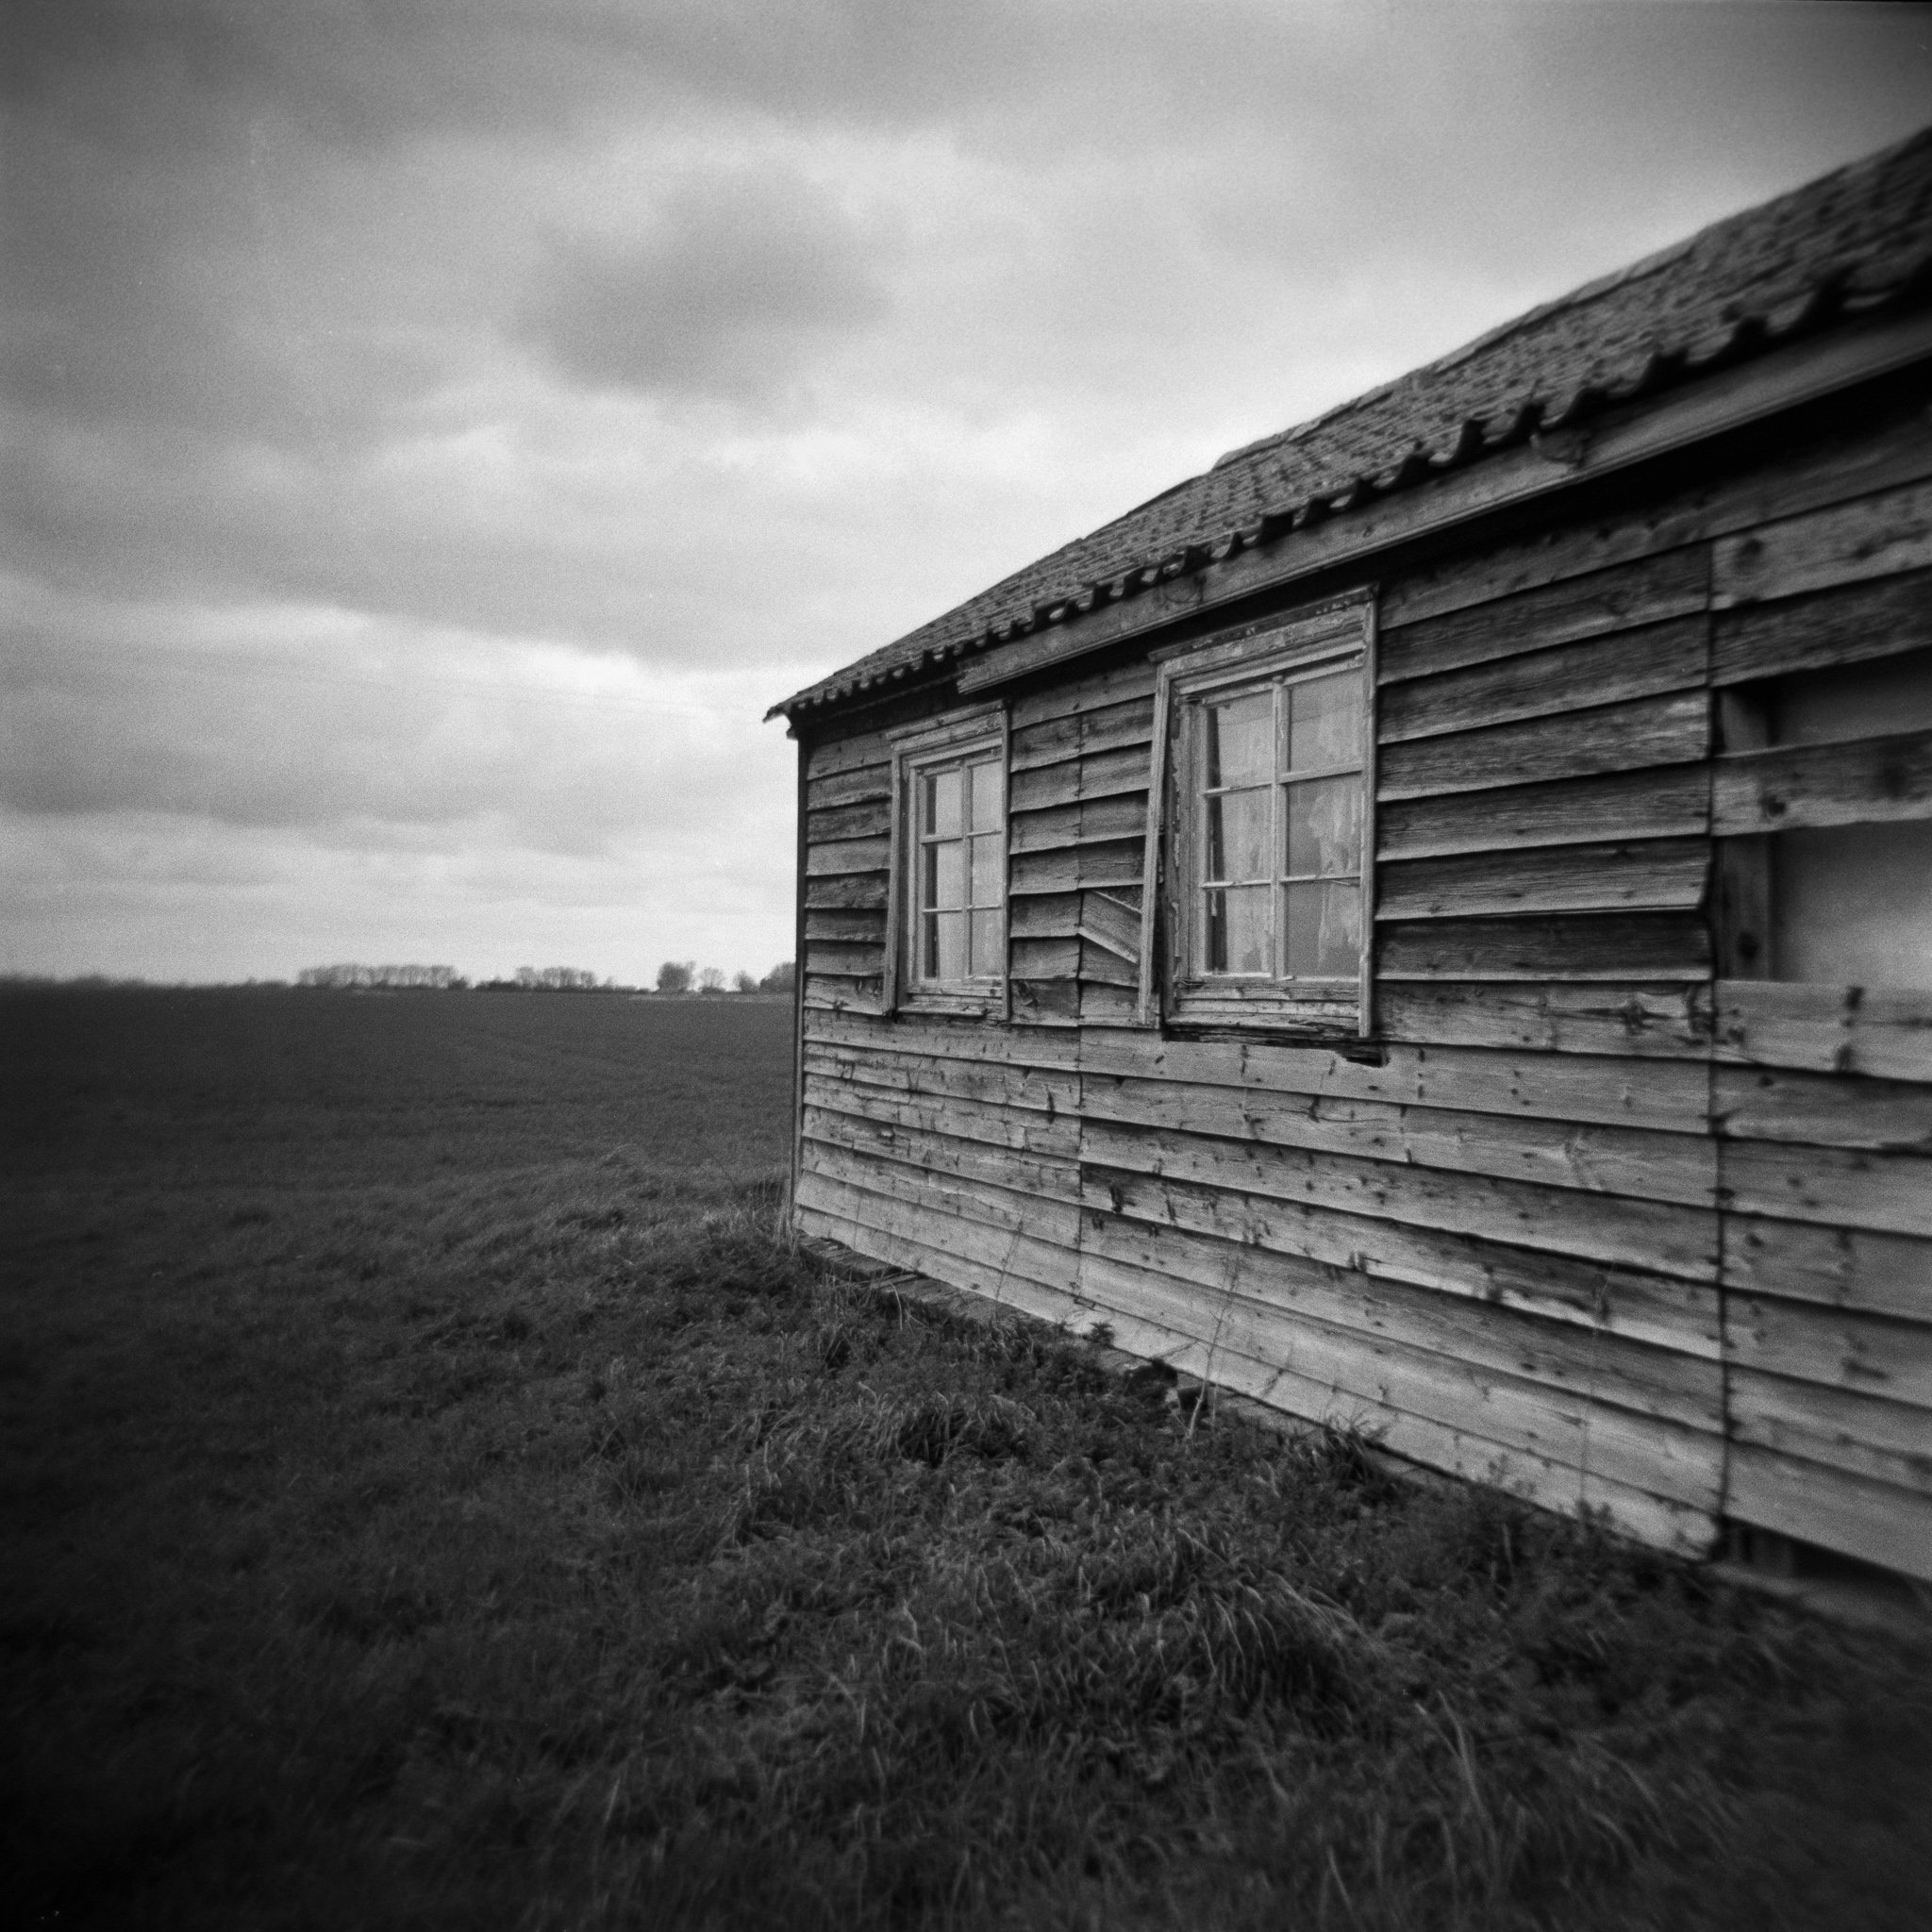
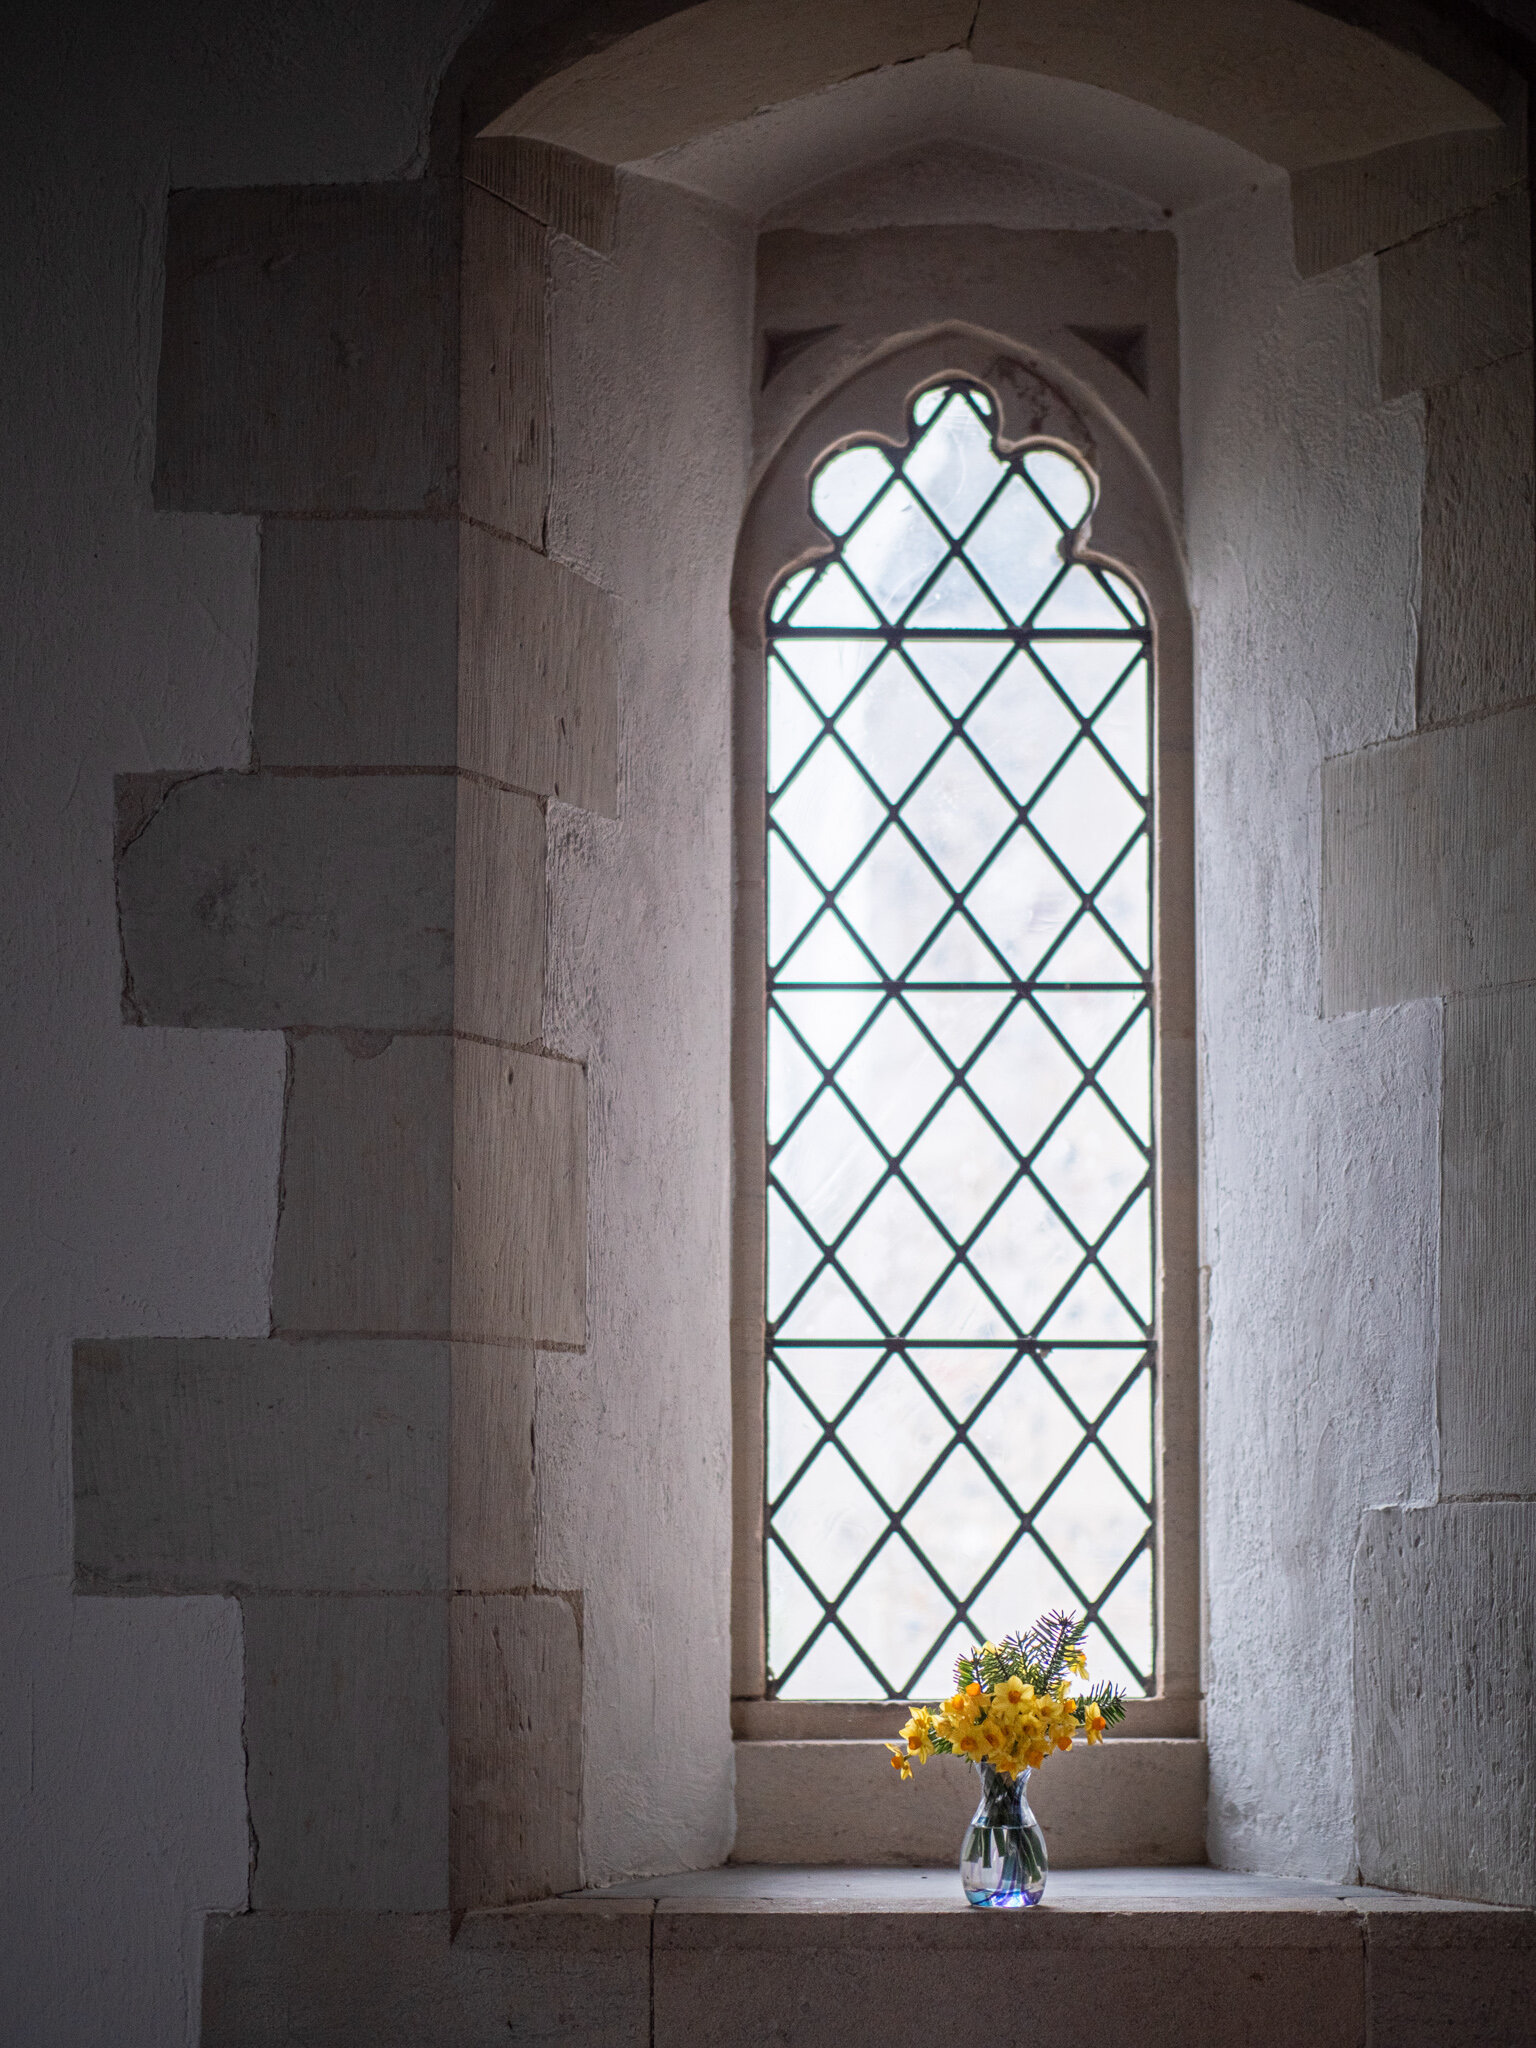
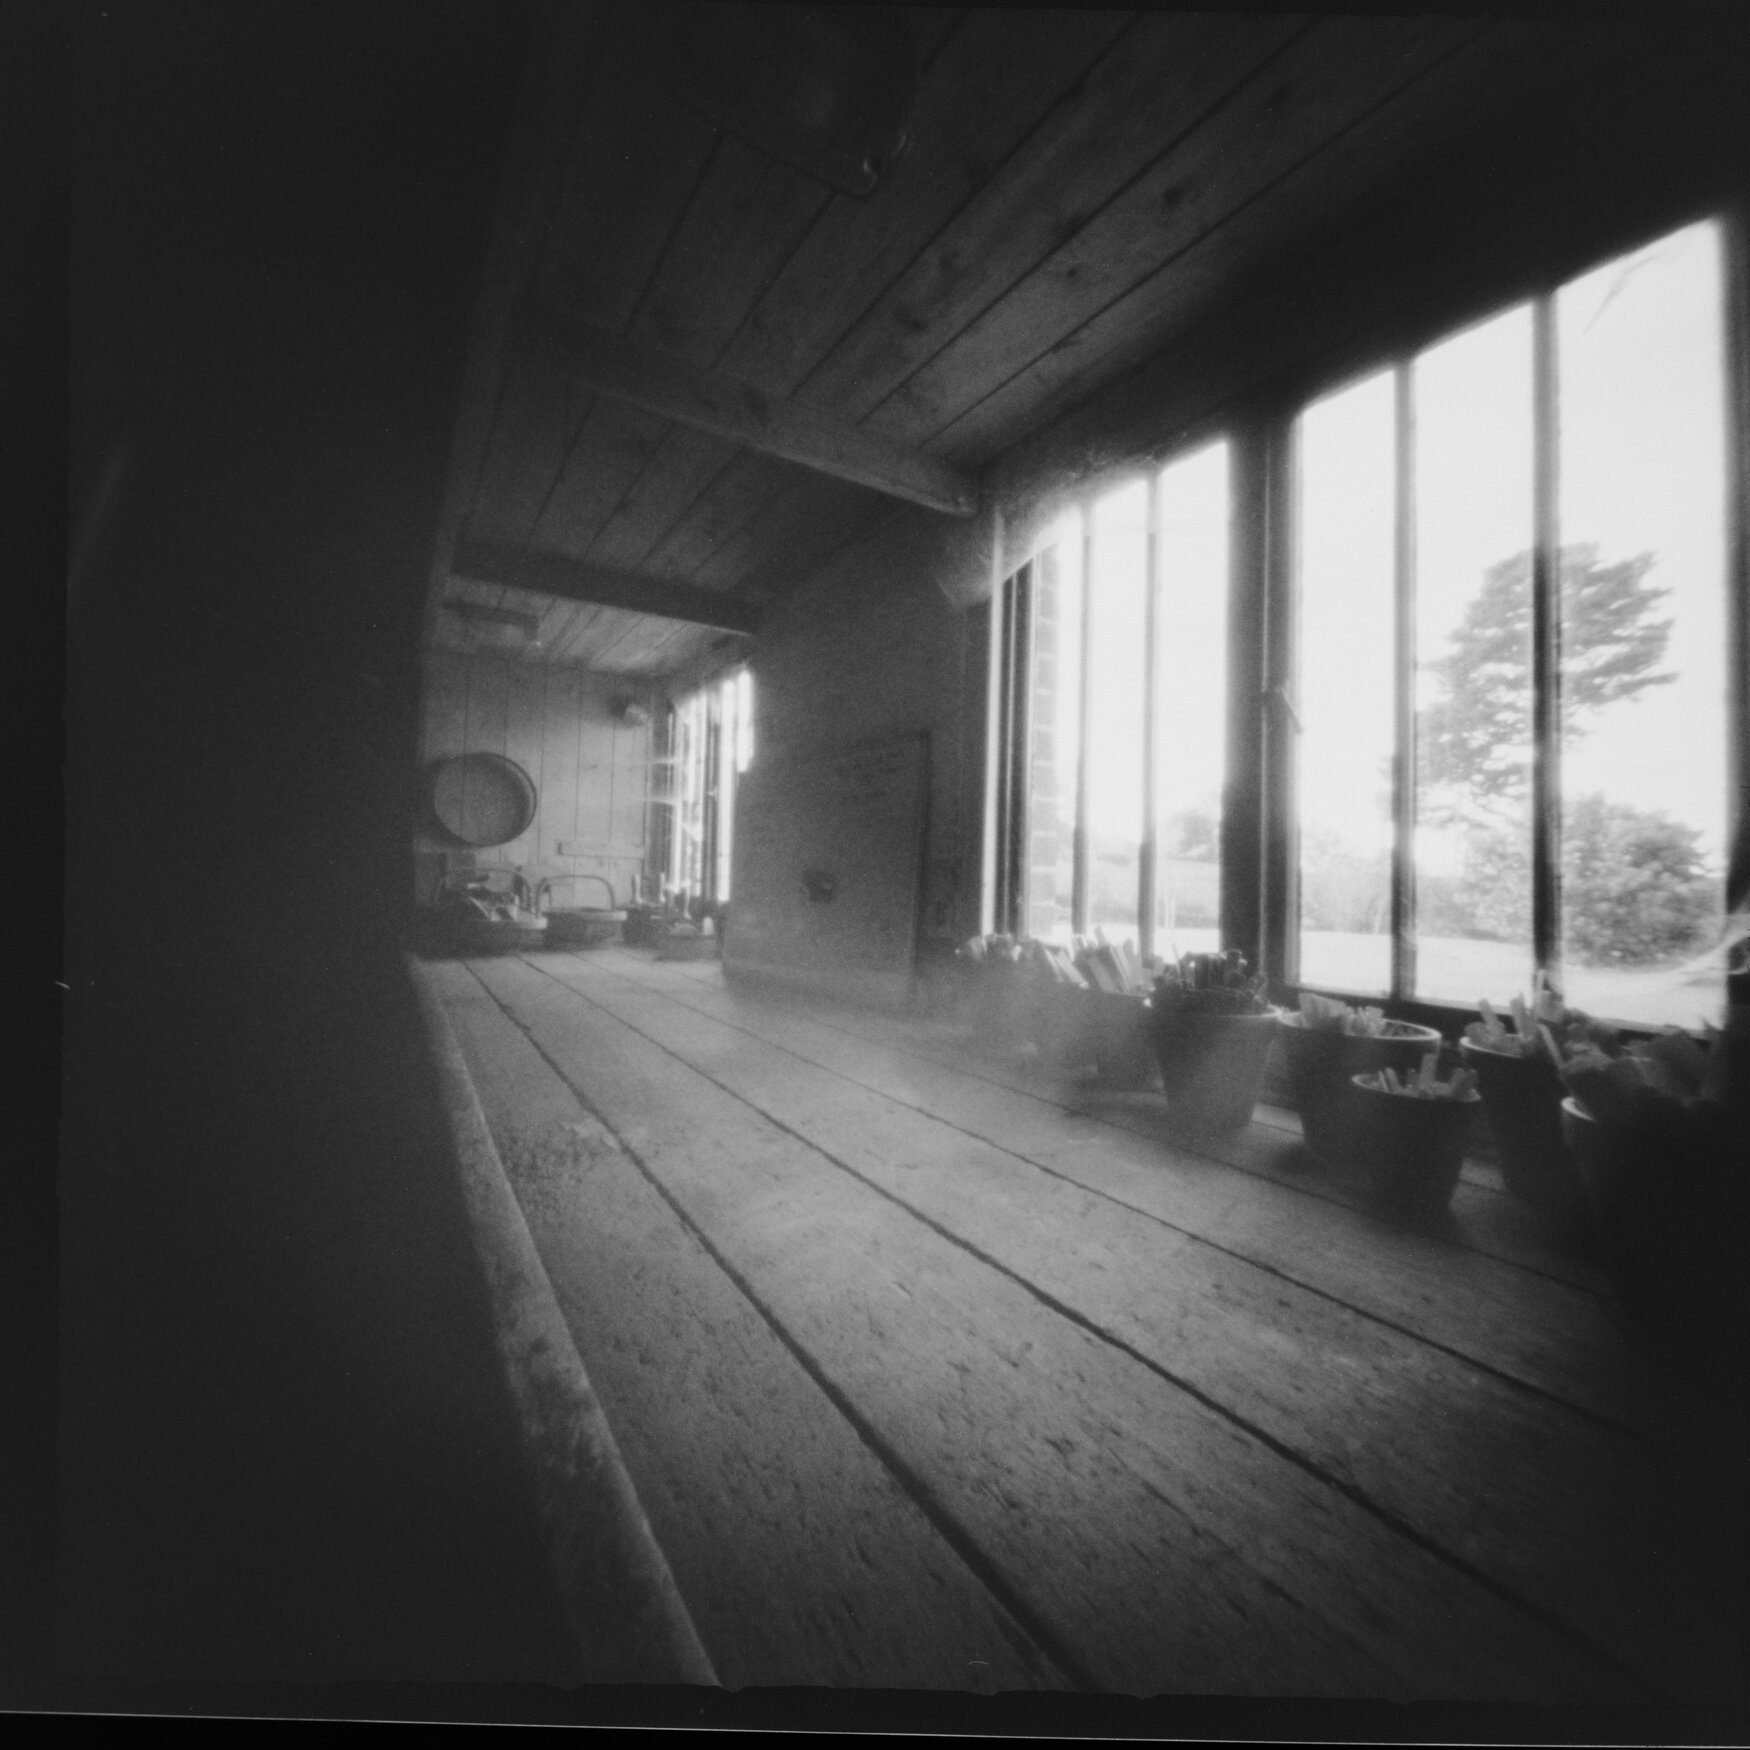
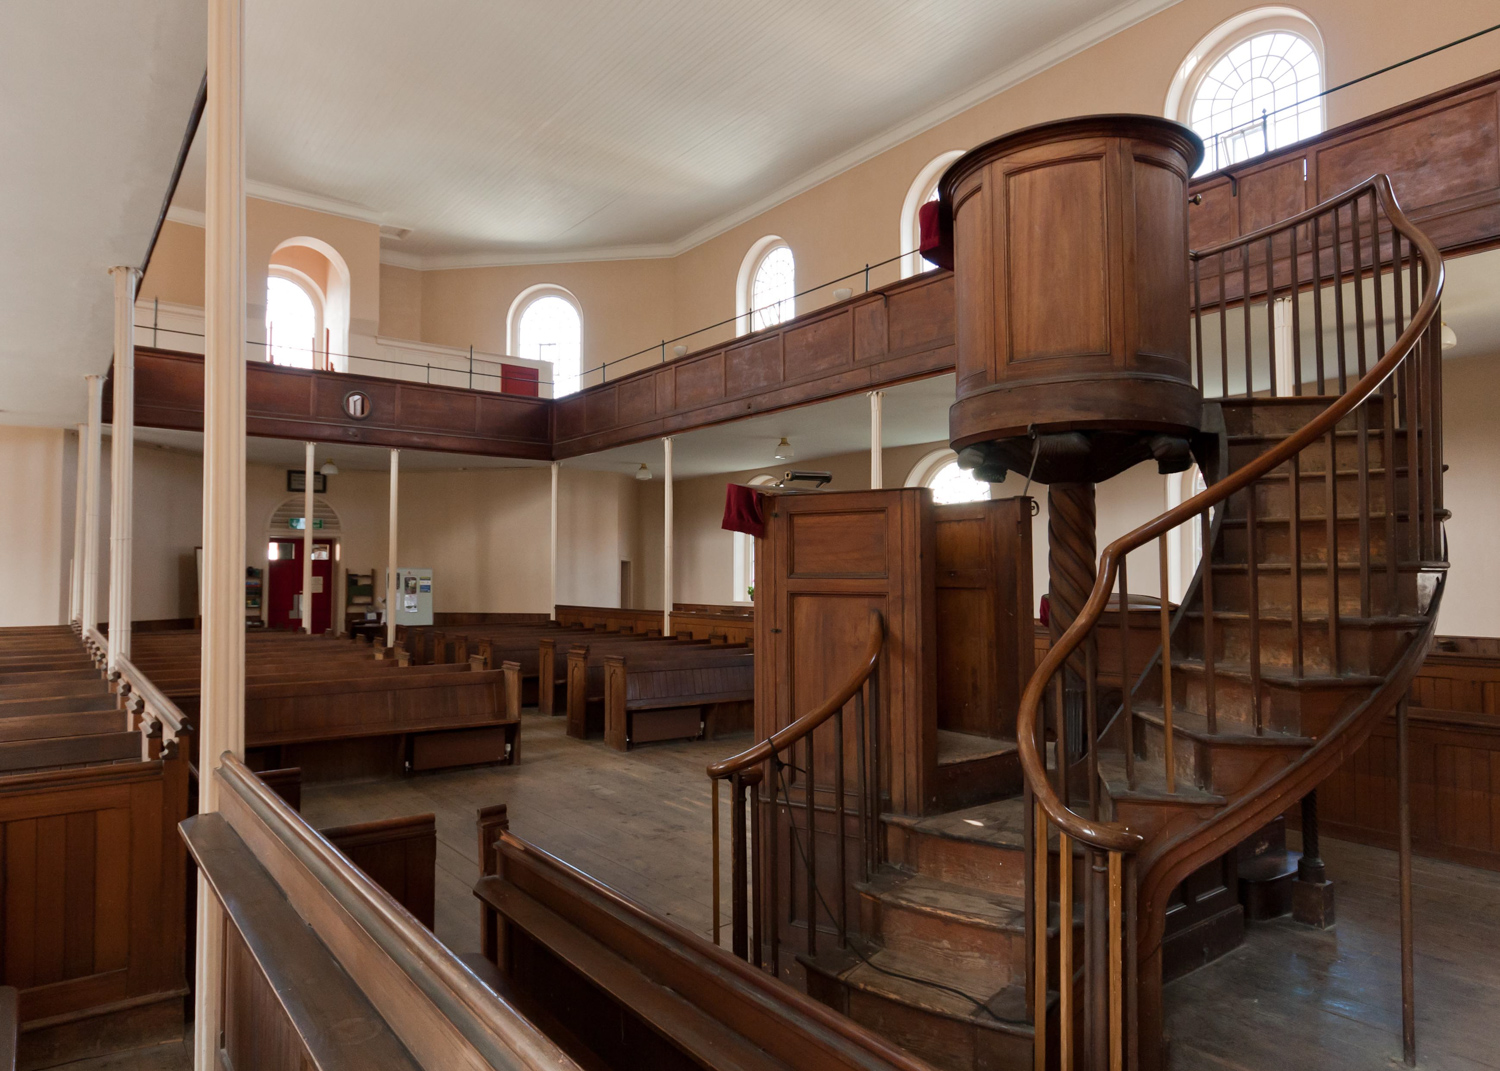
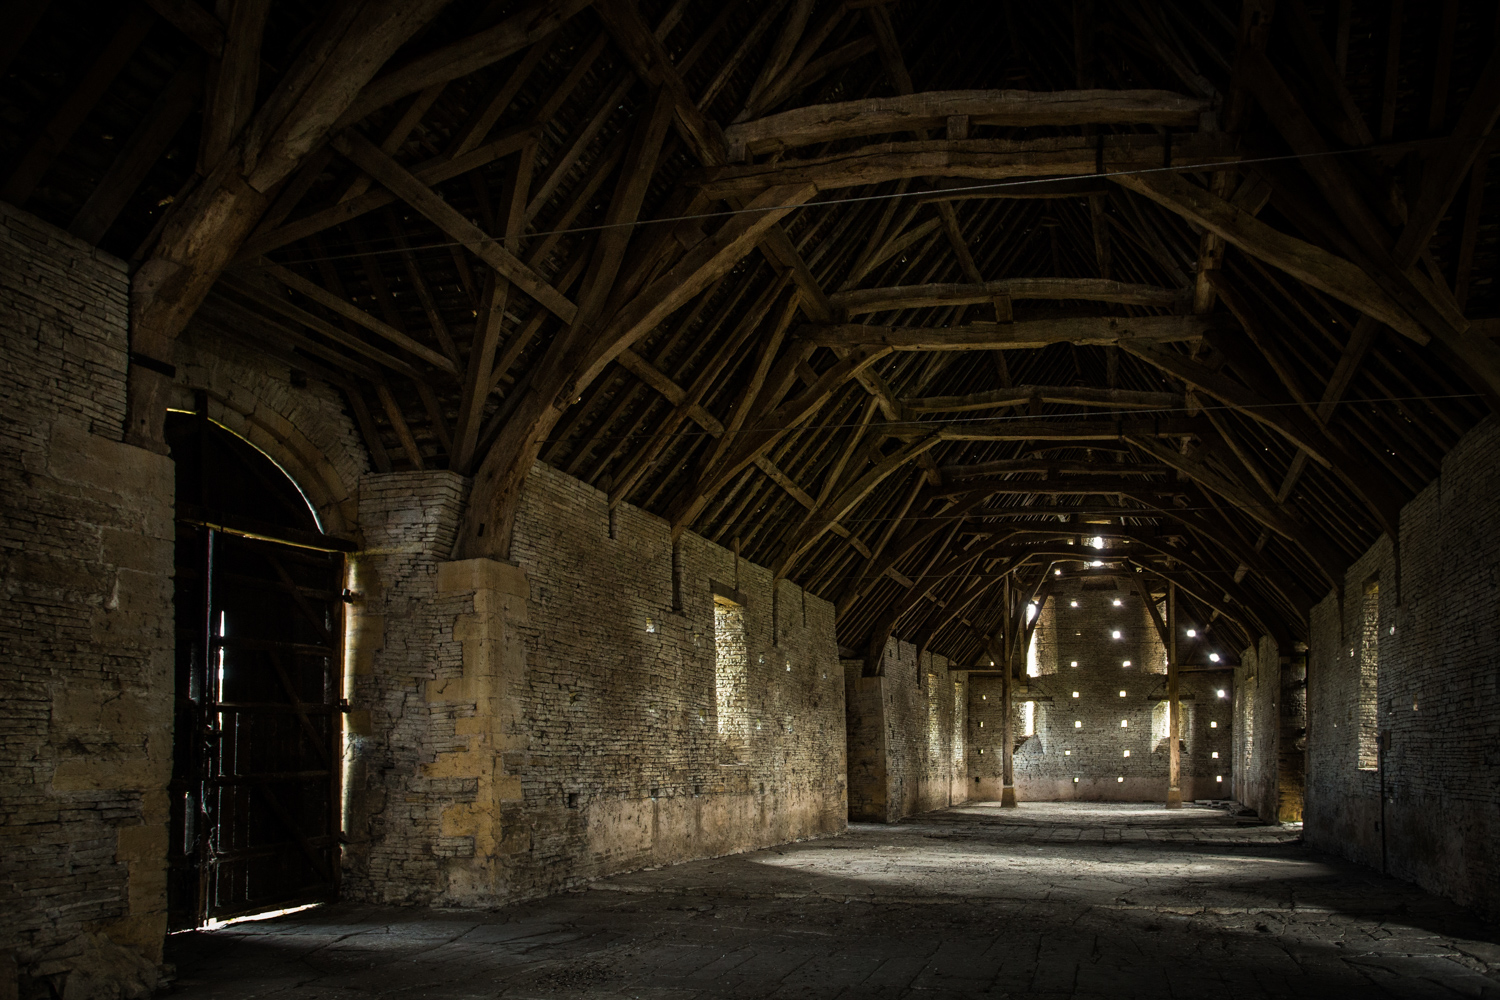
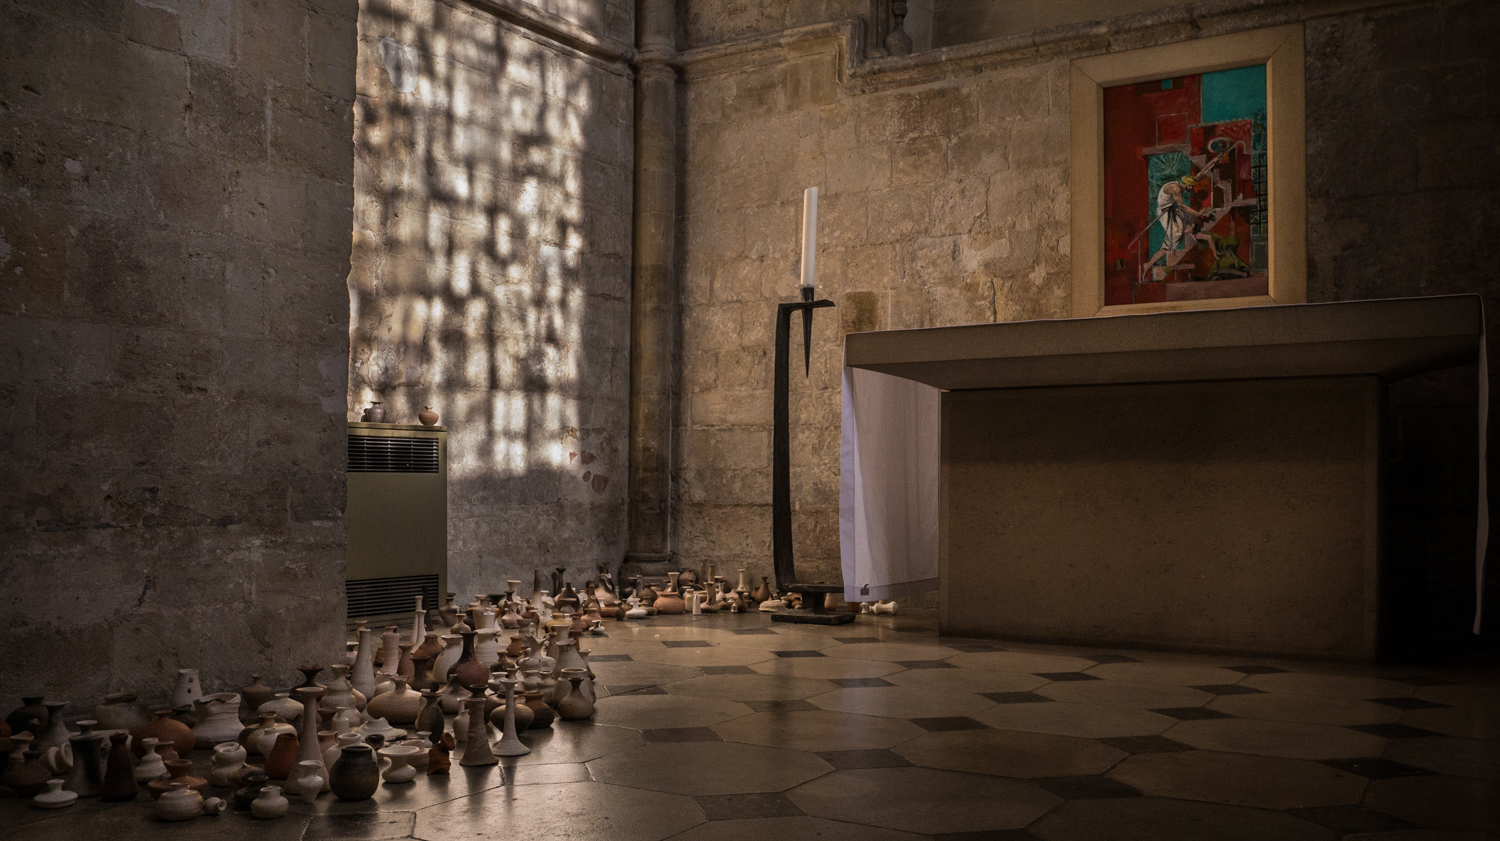
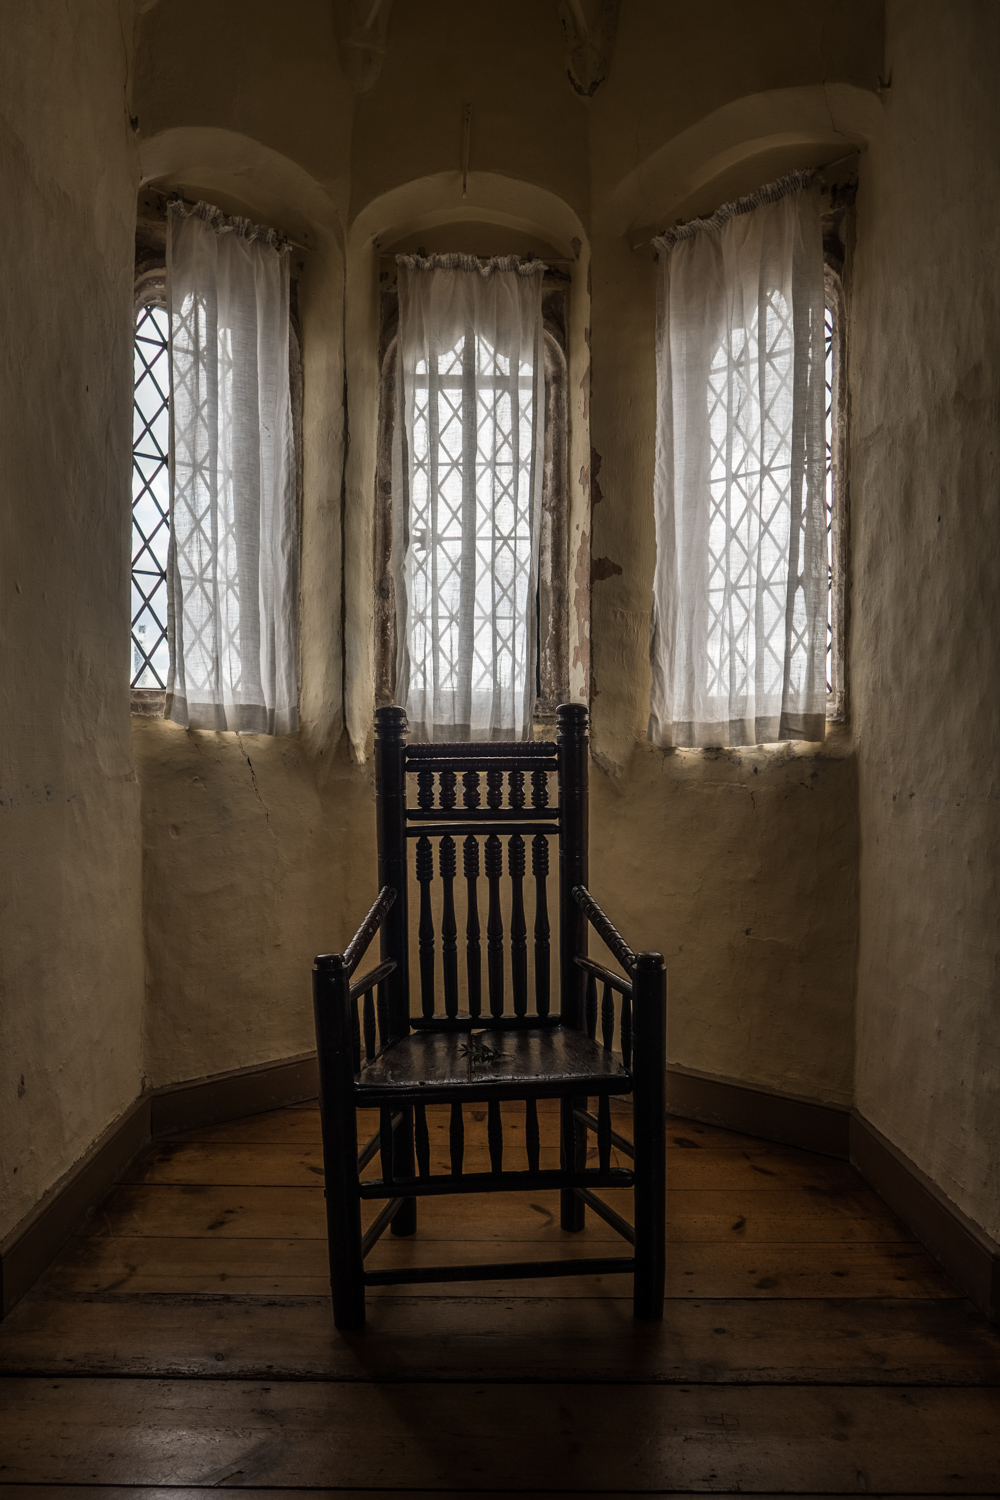
I found the remains of a windowsill on which to balance my Ondu pinhole camera to photograph the interior of this decaying room

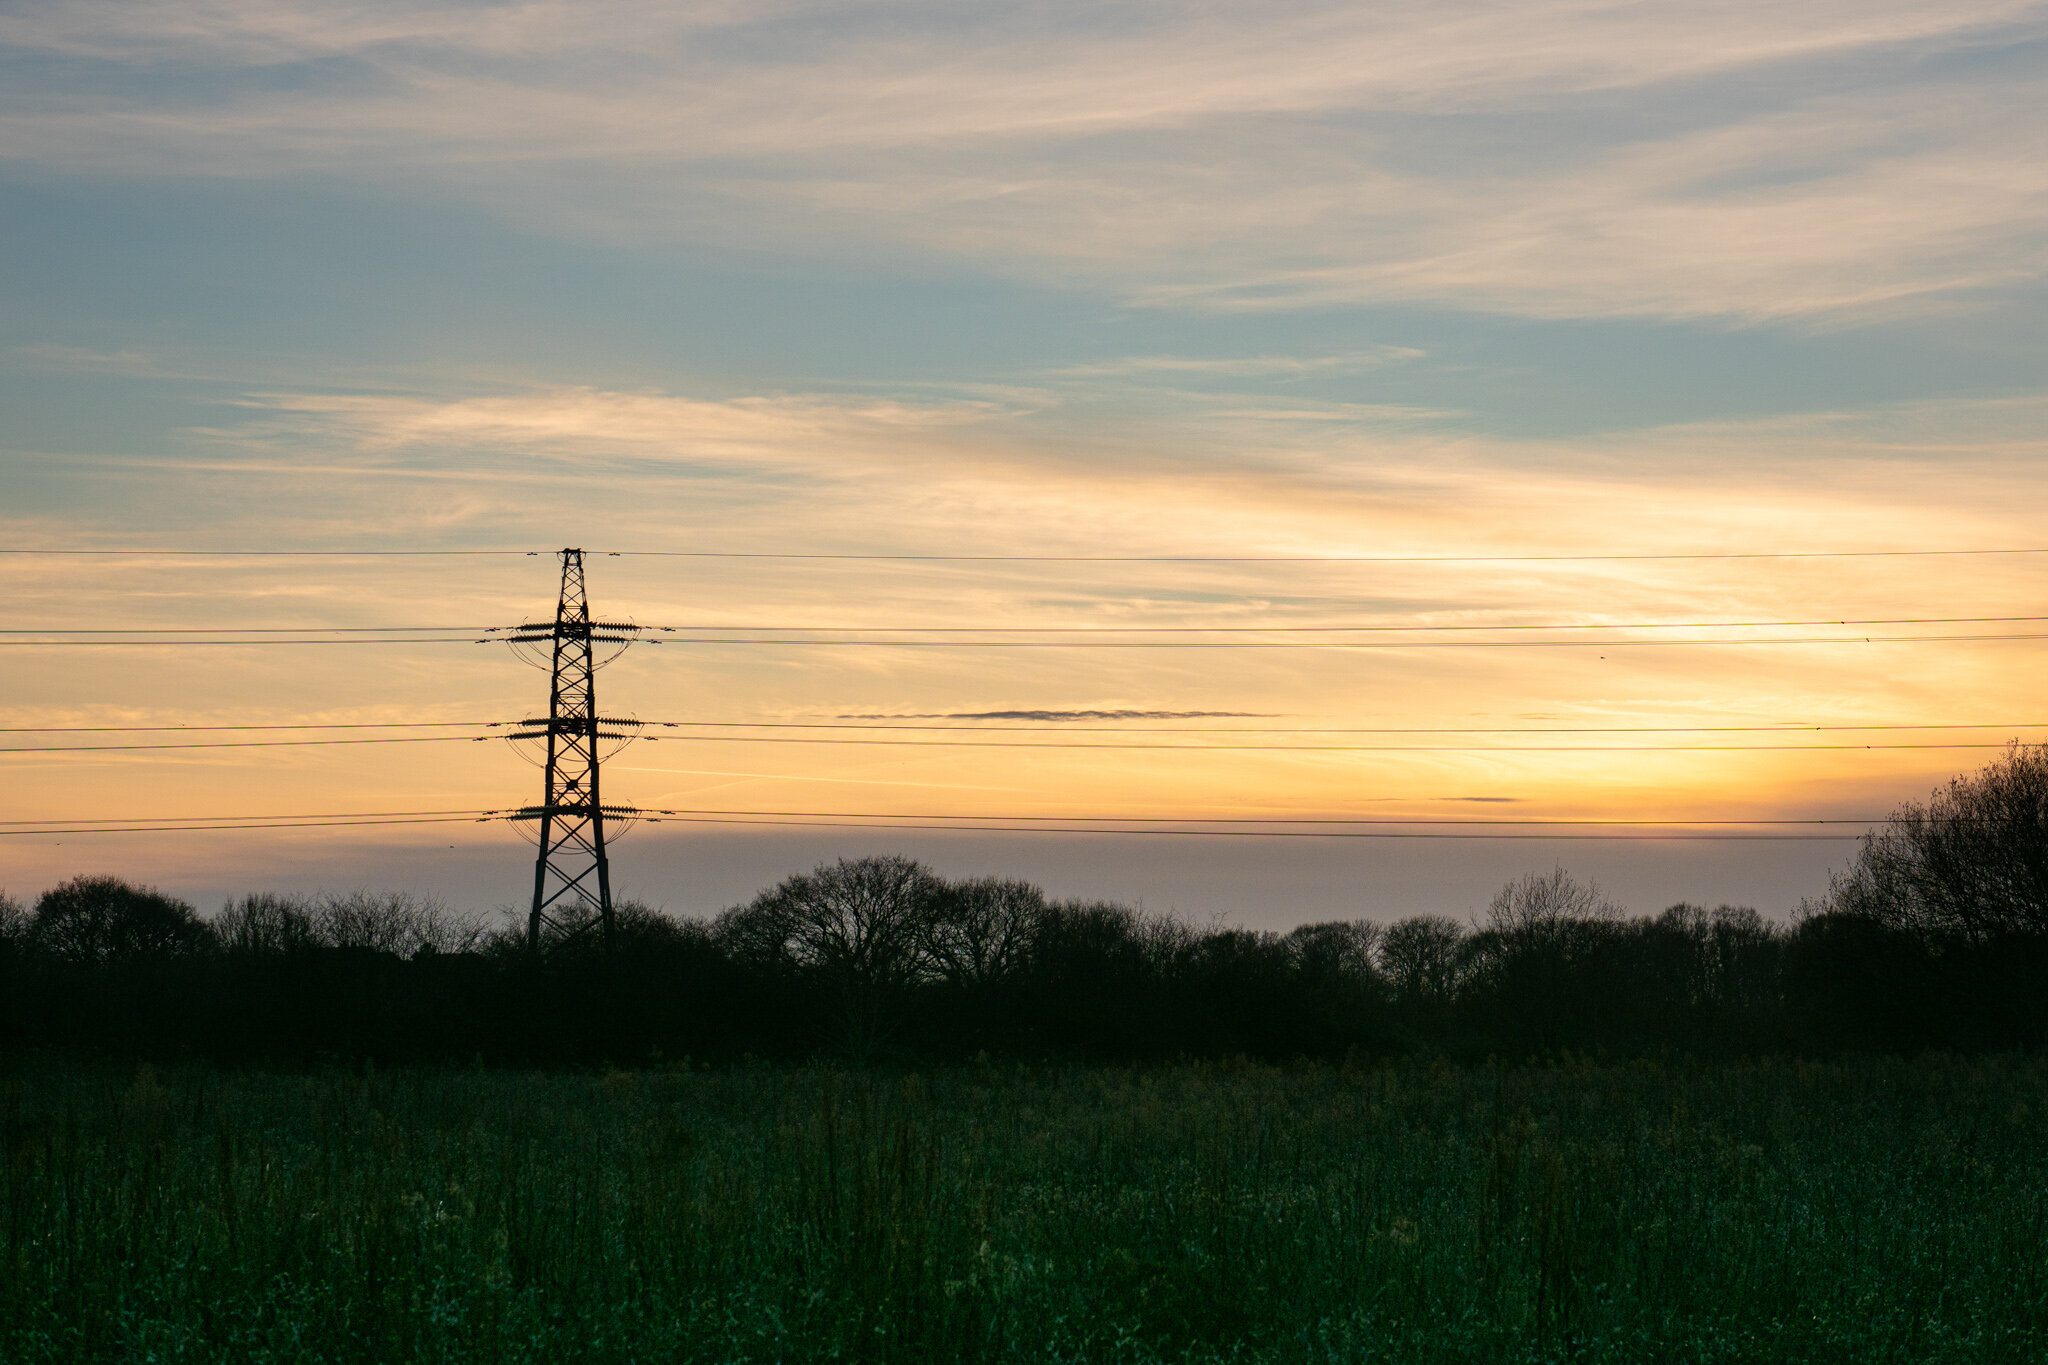
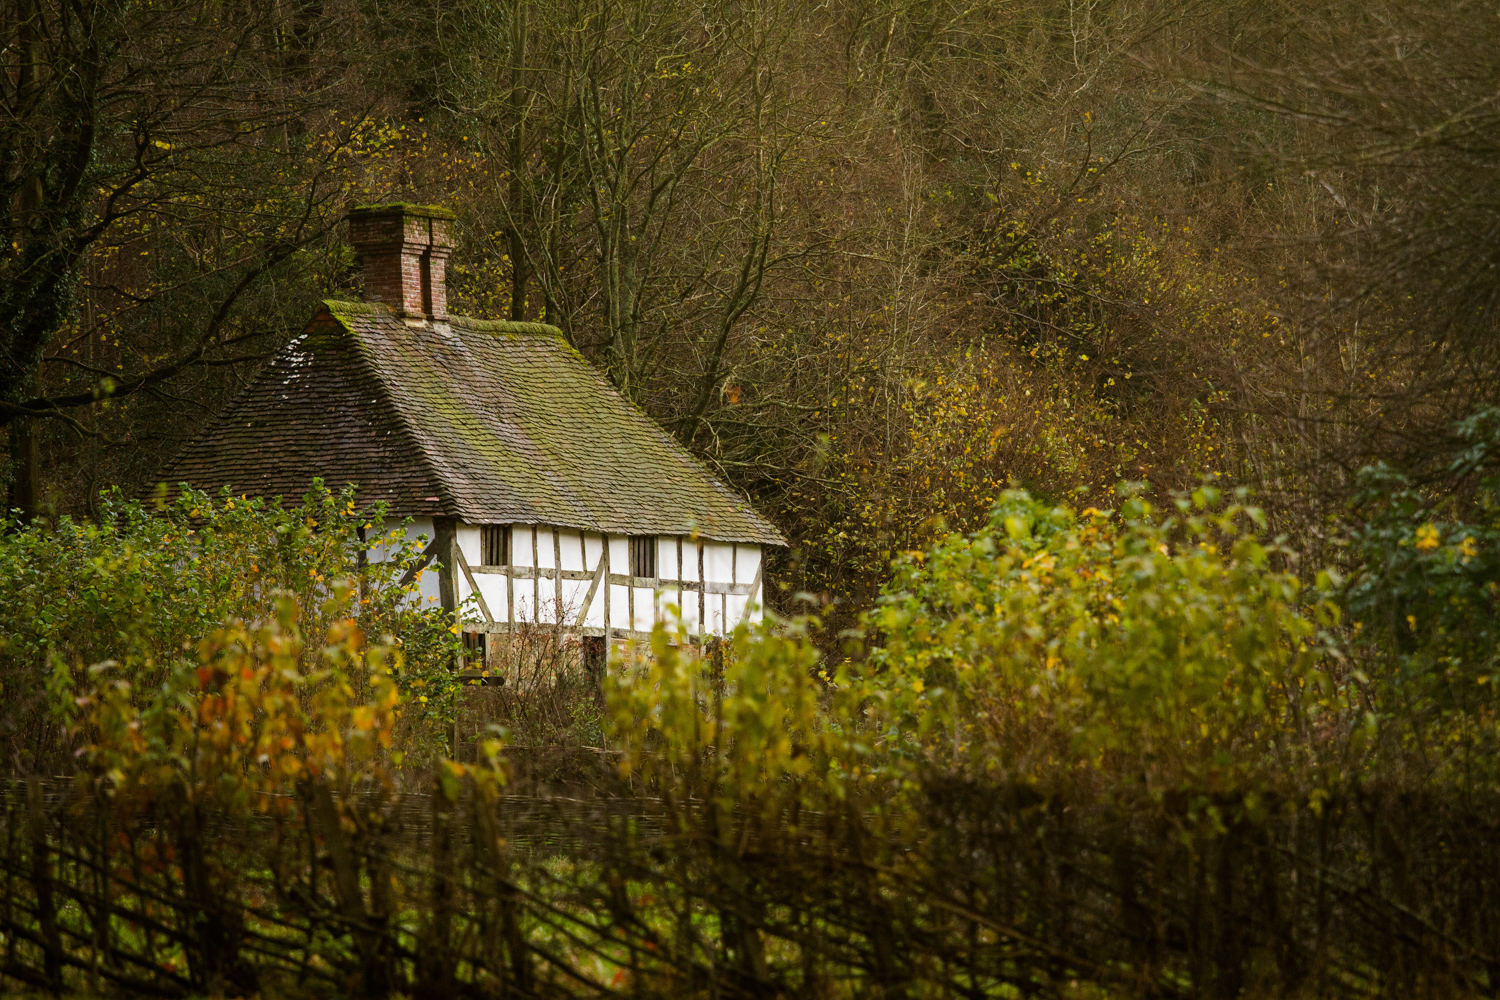
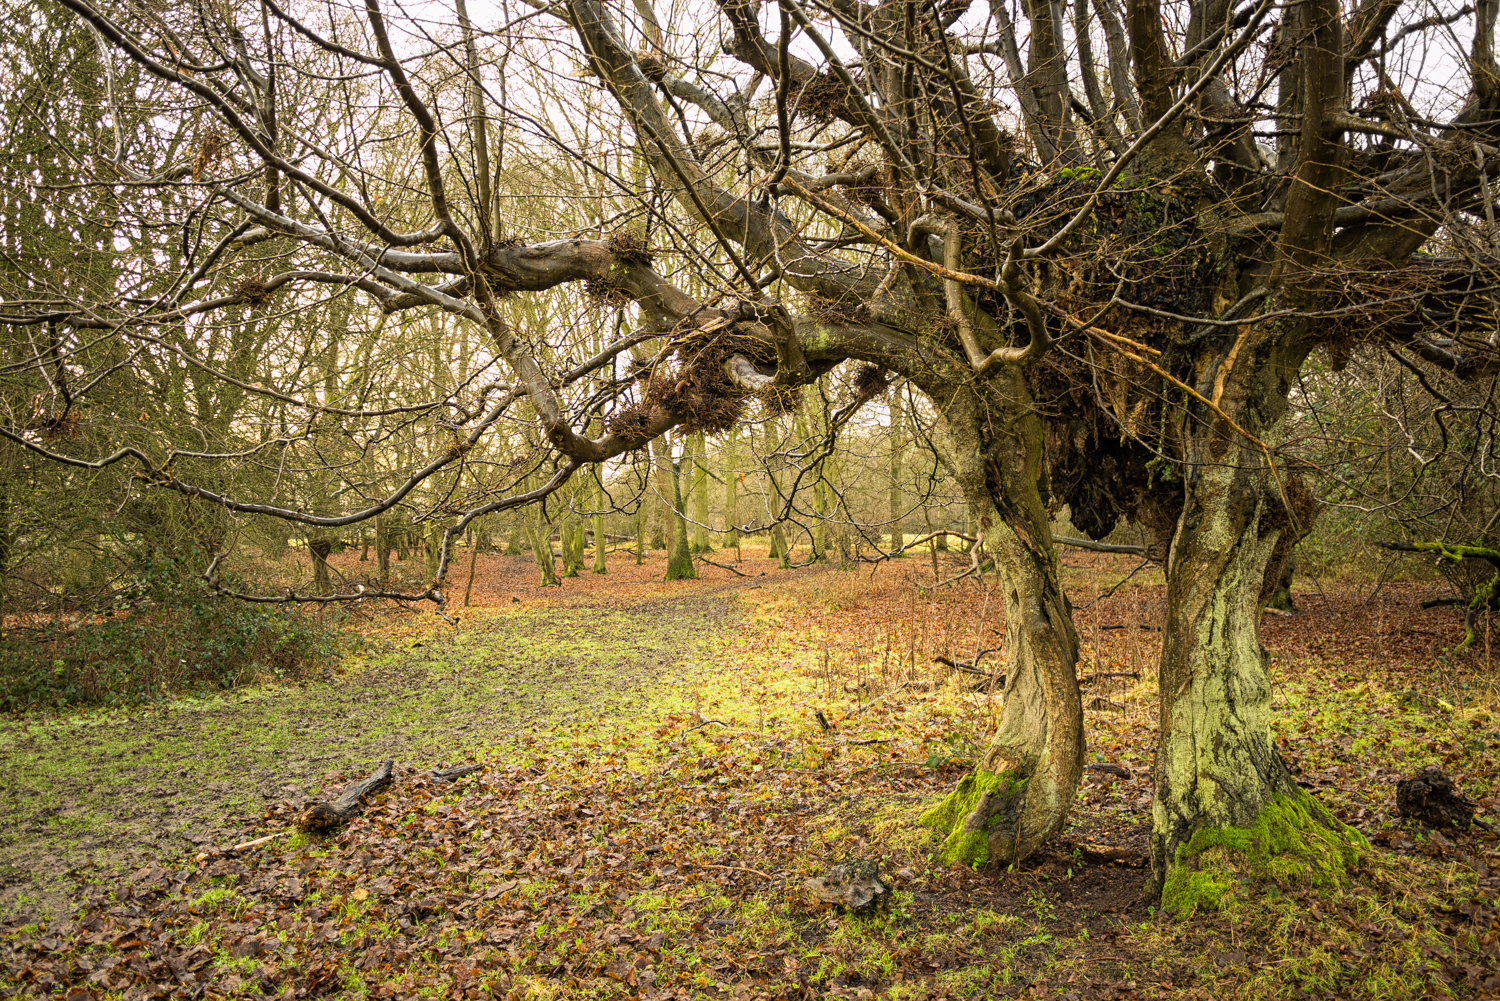
When we were ready we headed out into the Fens to take some photos. I’d brought my Ondu 6x6 pinhole camera along, but also threw in a Holga with a plastic lens I’d recently bought on eBay for good measure. Andrew went lens free too, with his Harman Titan 4x5 pinhole camera. We visited some of his favourite Fenland locations, looking for simple compositions among the flat lands and poker straight waterways. You’re never going to find dramatic mountainous vistas in Cambridgeshire, but this otherworldly landscape has a uniquely minimalist charm. One particular highlight for me was a decaying wooden cottage which sits alongside Forty Foot Drain. The textures of decay are irresistible to most photographers and I was so taken with the possibilities of this dilapidated old building I logged the location on Google Maps to return again at a later date!

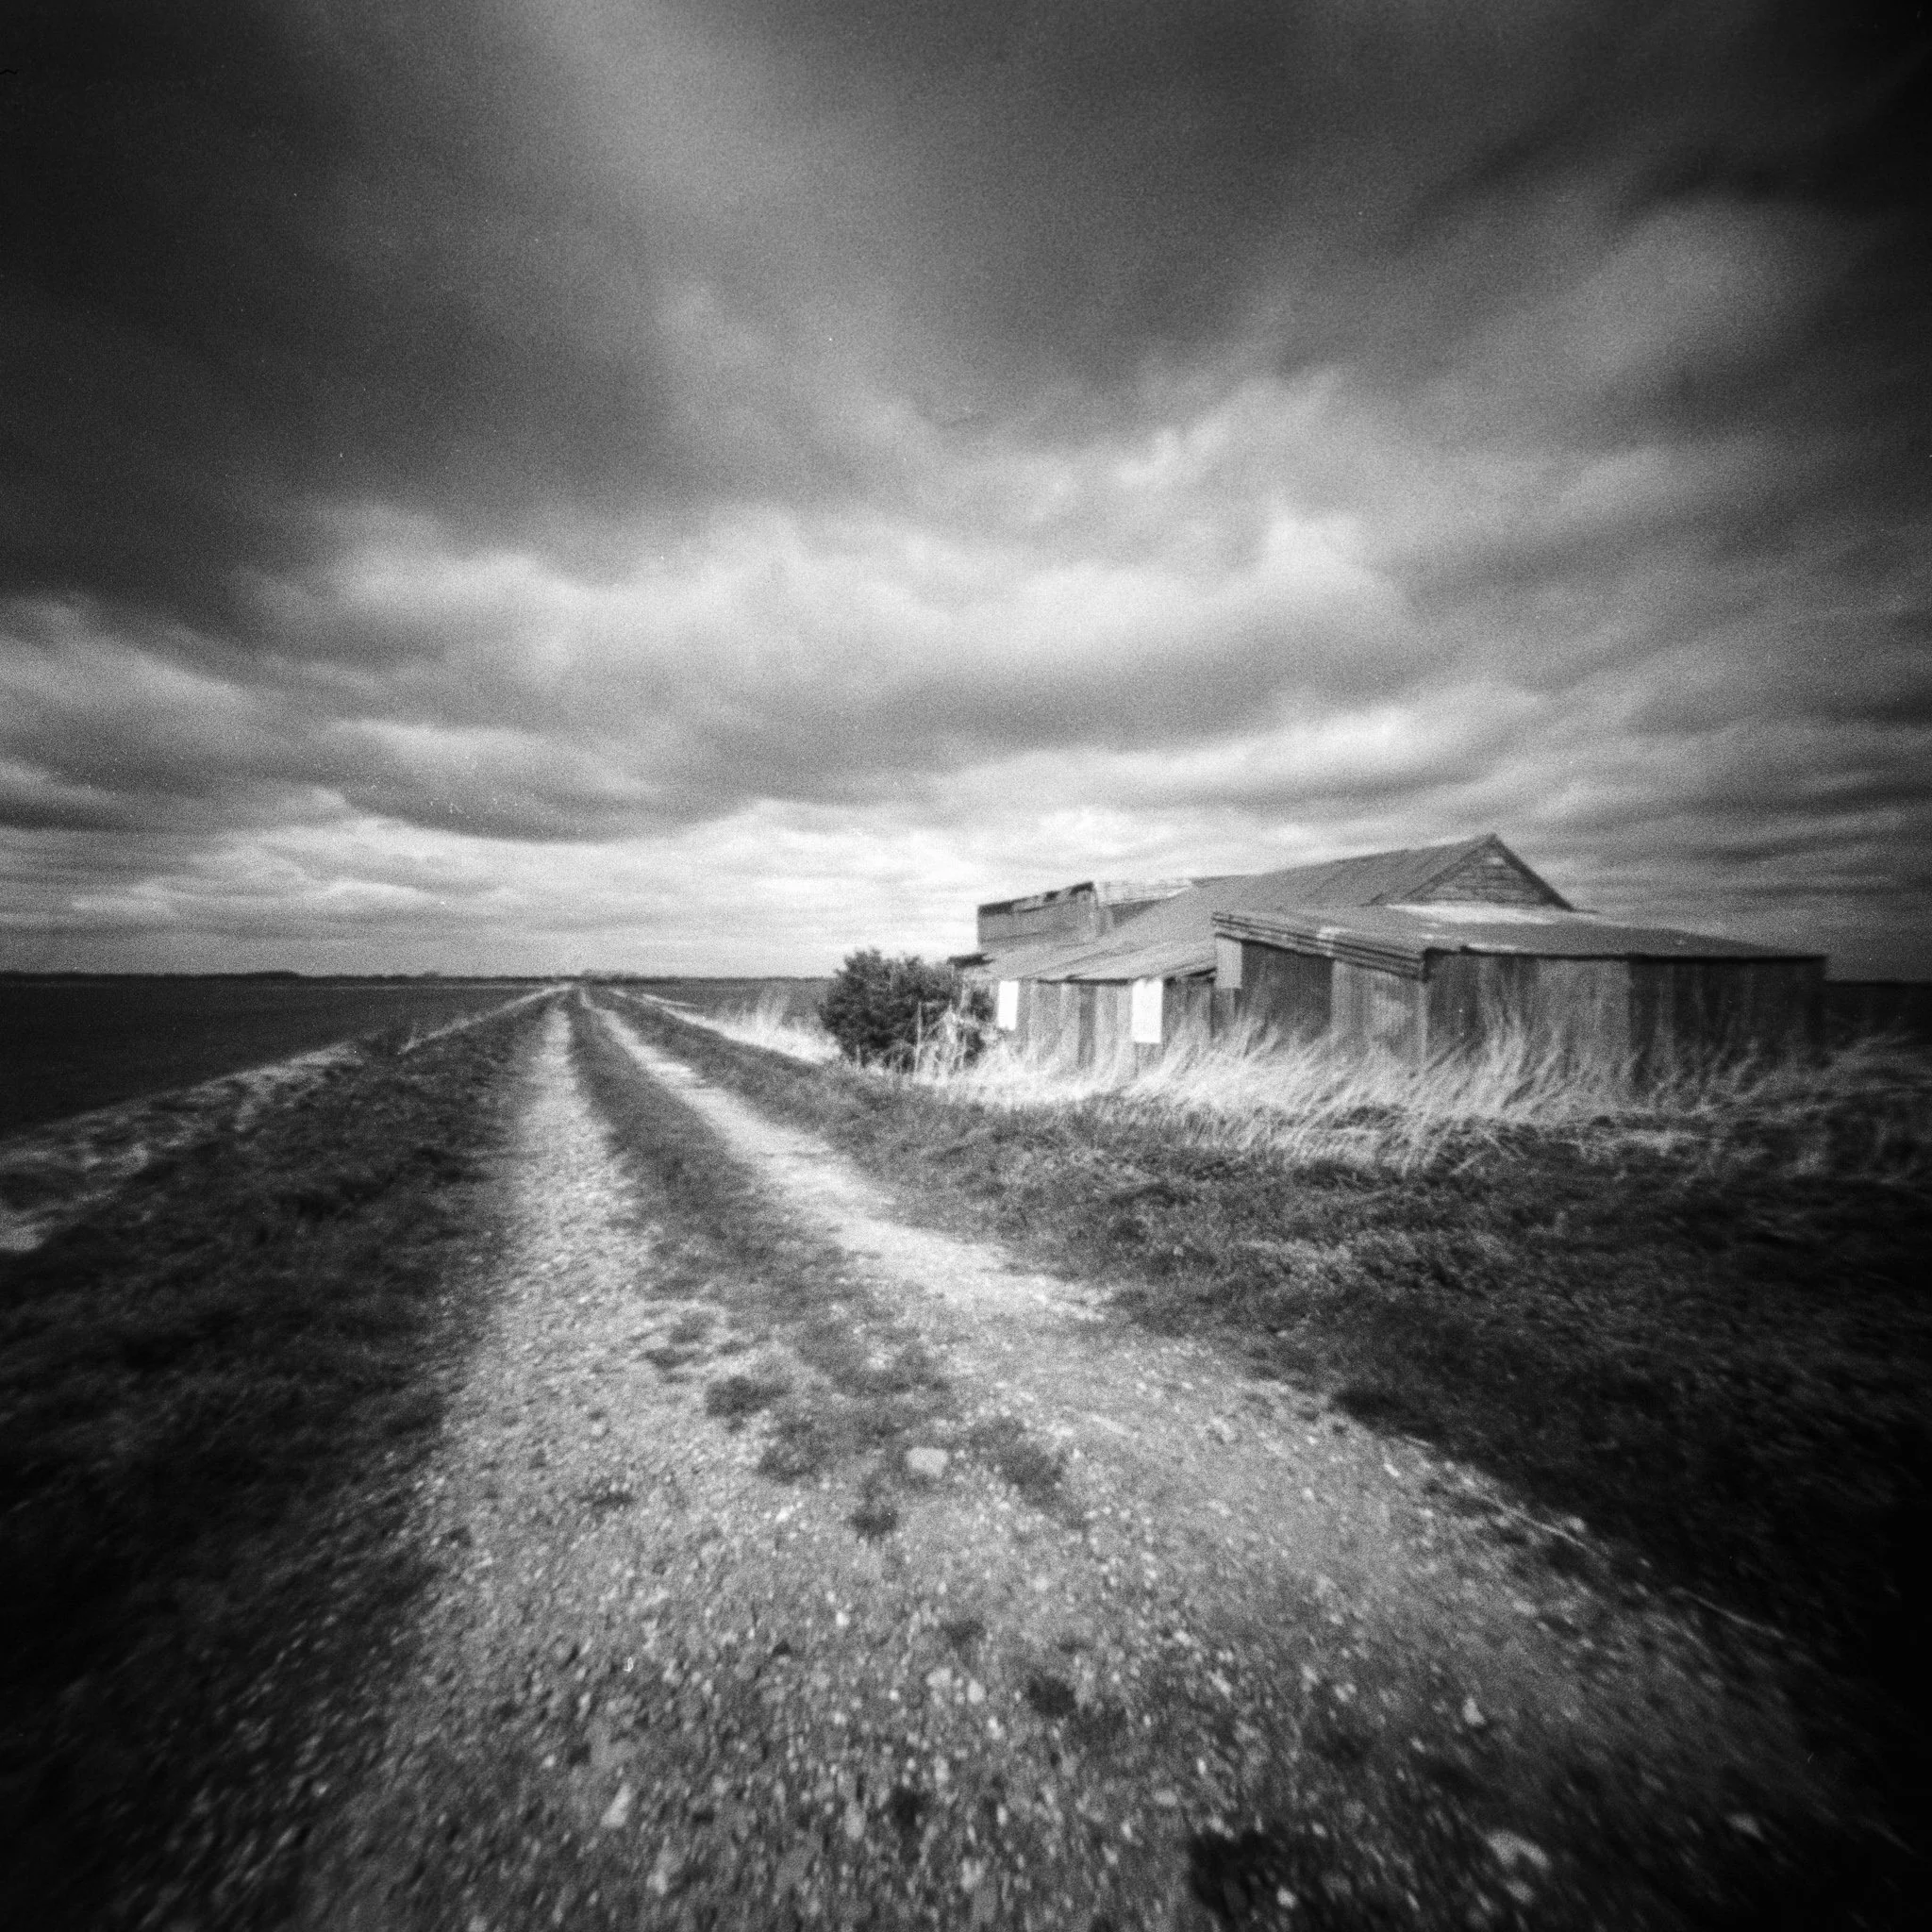
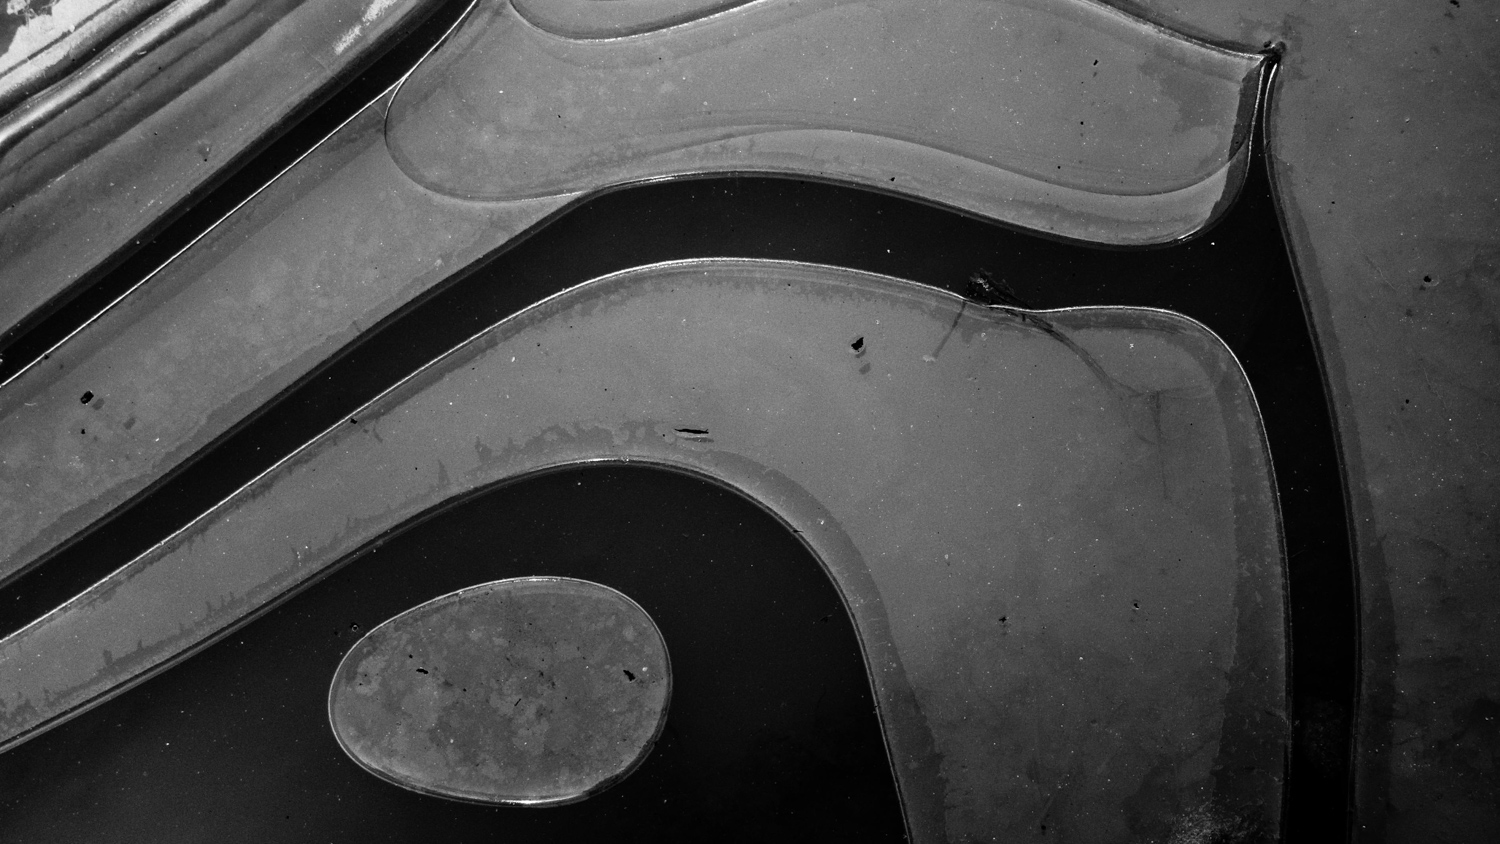
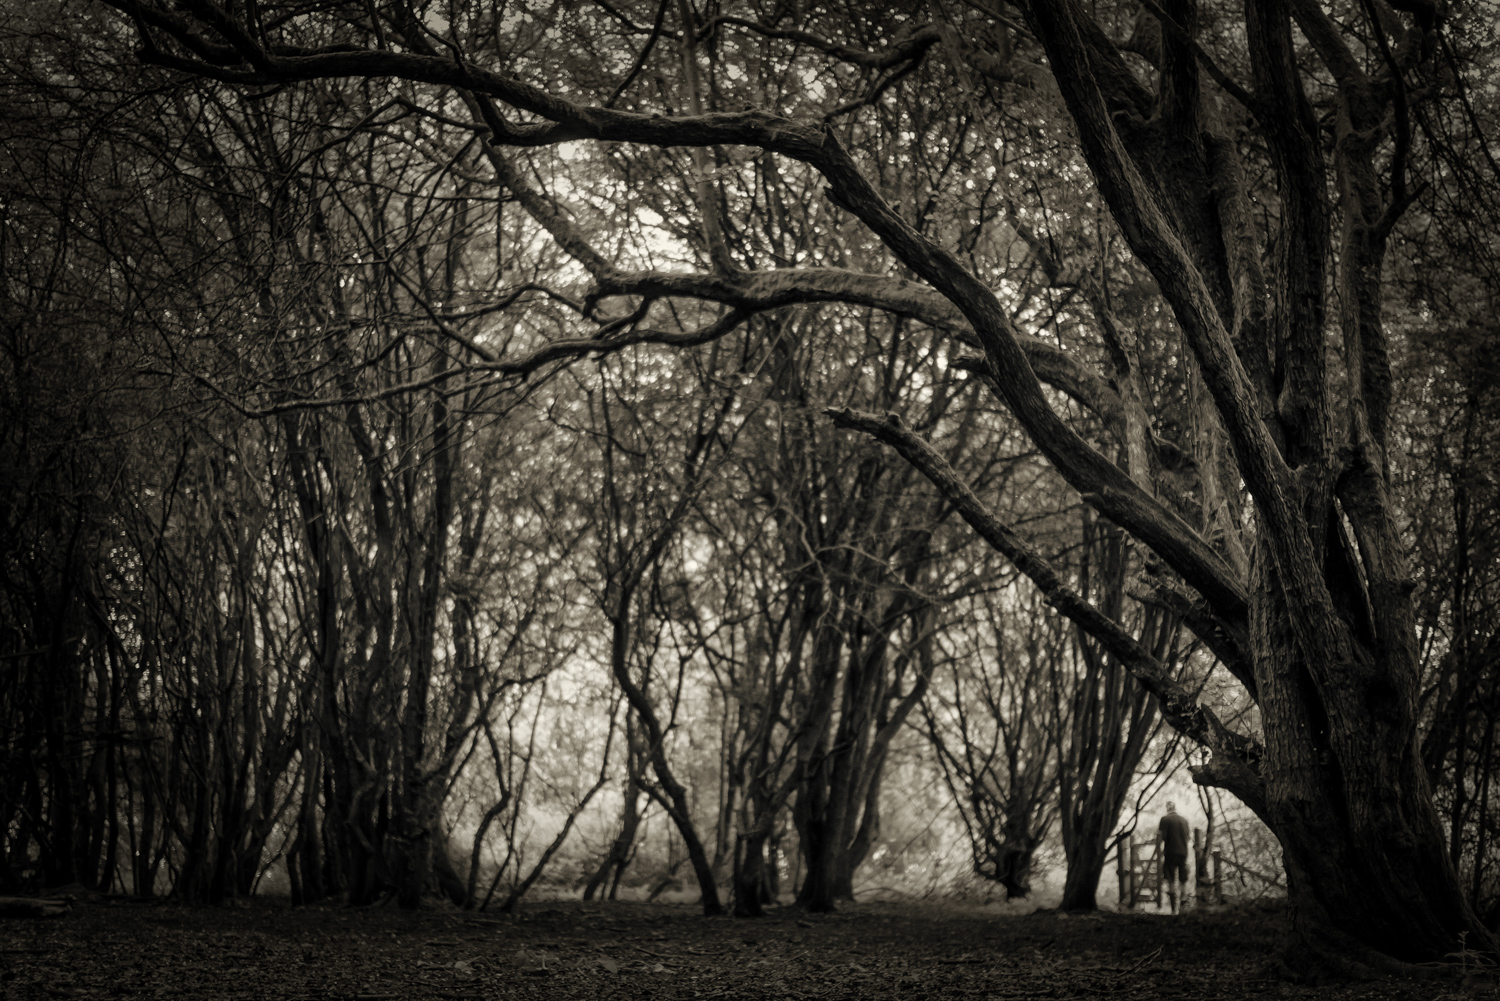
The Holga image I chose to print

With two rolls of film exposed we headed back to Andrew’s house for lunch and a crash course on how to load film onto a spiral, ready to go in the developing tank. I’d tried my hand at developing 4x5 film a few times before, but this was mainly in order to avoid bankrupting myself. Unlike roll film, sending sheet film away to be commercially developed is eye wateringly expensive (around £3 per sheet last time I checked) so this was the only way to go when I got my large format pinhole camera. I’d never tried developing 120 film though - largely because I was too scared too scared of messing up the business of getting the film into the spiral reel.

Andrew started me off practising with a roll of sacrificed film and a Paterson spiral - the type most commonly used for home developing. I didn’t find it particularly natural but had an ‘aha’ moment when instead I tried a Hewes stainless steel spiral. This seemed much more intuitive for me. After a few more practice runs with my eyes closed it was time to load up my own film in the darkroom, ready to be developed. Andrew told me that most of his students chicken out of doing this themselves during the workshop but I decided to go for it, figuring that if I made a complete hash of things Andrew would at least be able to leap in and untangle things for me! Miraculously, I loaded both rolls in double quick time - that meant I was either a natural or it was beginner’s luck - my money was firmly on the latter….

Preparing to develop…

With both rolls of film loaded up it was time to develop them. We used Ilford ID11 developer - a chemical I’d tried previously on my 4x5 negatives. On those occasions I’d successfully revealed some photos, but was disappointed to find my negatives covered in lots (and I mean lots!) of tiny dots. I hadn’t been able to figure out why this was (even when using deionised water instead of the hard water from our taps) so until this point I’d more of less given up trying. Andrew’s suggestion was to ditch my stop bath and use water instead because he thought perhaps the stop bath might be shocking the film. This seemed an elegantly simple solution, not to mention cheaper too! To my relief the developed rolls revealed 24 photos, all pretty well exposed so I finished the day a happy bunny. Even my Holga pics looked great, proving the £21 I’d spent buying the camera on eBay hadn’t been a waste. The only fly in the ointment was a mark on the first negative on each roll where I’d clipped that end of the roll to the spiral. This was a useful learning experience though, and easily rectified by loading the film from the other end next time.

My negatives contained pictures!

All in all, day 1 of the workshop had been a big success. It was great to go out pinholing with a fellow enthusiast and I’d overcome my fear of home developing. Next step printing, but first my negatives needed to dry and I needed a good night’s sleep!

By the time I reached Andrew’s house on day 2 I’d already taken the plunge and ordered a Hewes spiral and a stainless steel developing tank online - so convinced was I that home developing was something I wished to pursue. So much for not spending money on gear in 2022!

~ ~ ~

The following morning…

Day 2 began with a tour of Andrew’s darkroom and he carefully explained about the equipment within and how it worked. I’m pretty certain I exhibited a glazed look at times, especially once we got onto the mathematics relating to using the enlarger and how long the photographic paper would need to be exposed to the light. Fortunately there was no end of course exam to worry about - just as well as I’m pretty sure I would have failed spectacularly! If you’ve never printed from negatives before, or even considered how it’s done, there’s a lot of information to take in. Andrew was incredibly patient though, explaining the principles clearly, so if I ever have the chance to do this at home I’m pretty sure I could figure it out with the help of a quick refresher.

Our task before lunch was to make contact sheets of my negatives, so I could choose which photos to print later. Two of them jumped out at me immediately - one from the Holga and a second from the Ondu. Starting with the Holga image we made some test strips to figure out exposure times and decide on choice of coloured contrast filters. Here I relied heavily on Andrew’s huge experience. He instinctively had a good idea what would work, which made the process much quicker than if I’d had to take the lead.

My contact sheets

After lunch we set about making prints of my two photos. We made three or four copies of each one until we had a pleasing result. Making tweaks to the contrast filters and exposure times resulted in a basic print that looked good and then we began on the principles of dodging and burning. This is the process of selectively exposing the photographic paper to more light to brighten them, or depriving areas of light to darken chosen areas.

At times this seemed a little counterintuitive to me. I’m a person who likes simple rules to remember things by - for instance, when I began getting into photography my way of remembering the effect of different apertures on depth of field related to their f numbers. An aperture with a large f number (f16 for instance) equalled lots of my photo in focus, while a small f number resulted in very little in focus. I didn’t need to understand the complexities of the maths if the rule worked!

I’m this situation I remembered what to do by knowing that adding shadow for the surface of the paper below my hands made the end result lighter and vice versa. Andrew seemed perplexed by my logic, but it made sense to me!

The final version of my two prints

Actually applying the dodging and burning to the right areas of the image was another unexpected challenge. I like to think I’m good with my hands. As a professional musician I’ve developed my fine motor control from decades of practising, but here I failed spectacularly! I spent many of my early years playing with Lego and later doing hours and hours of recorder practice, but sadly this didn’t help me coordinate my movements precisely enough for dodging and burning. Evidently I should have spent more of my childhood practising making puppet shadows to prepare - if only I’d known I was going to be doing lots of film photography later in life!

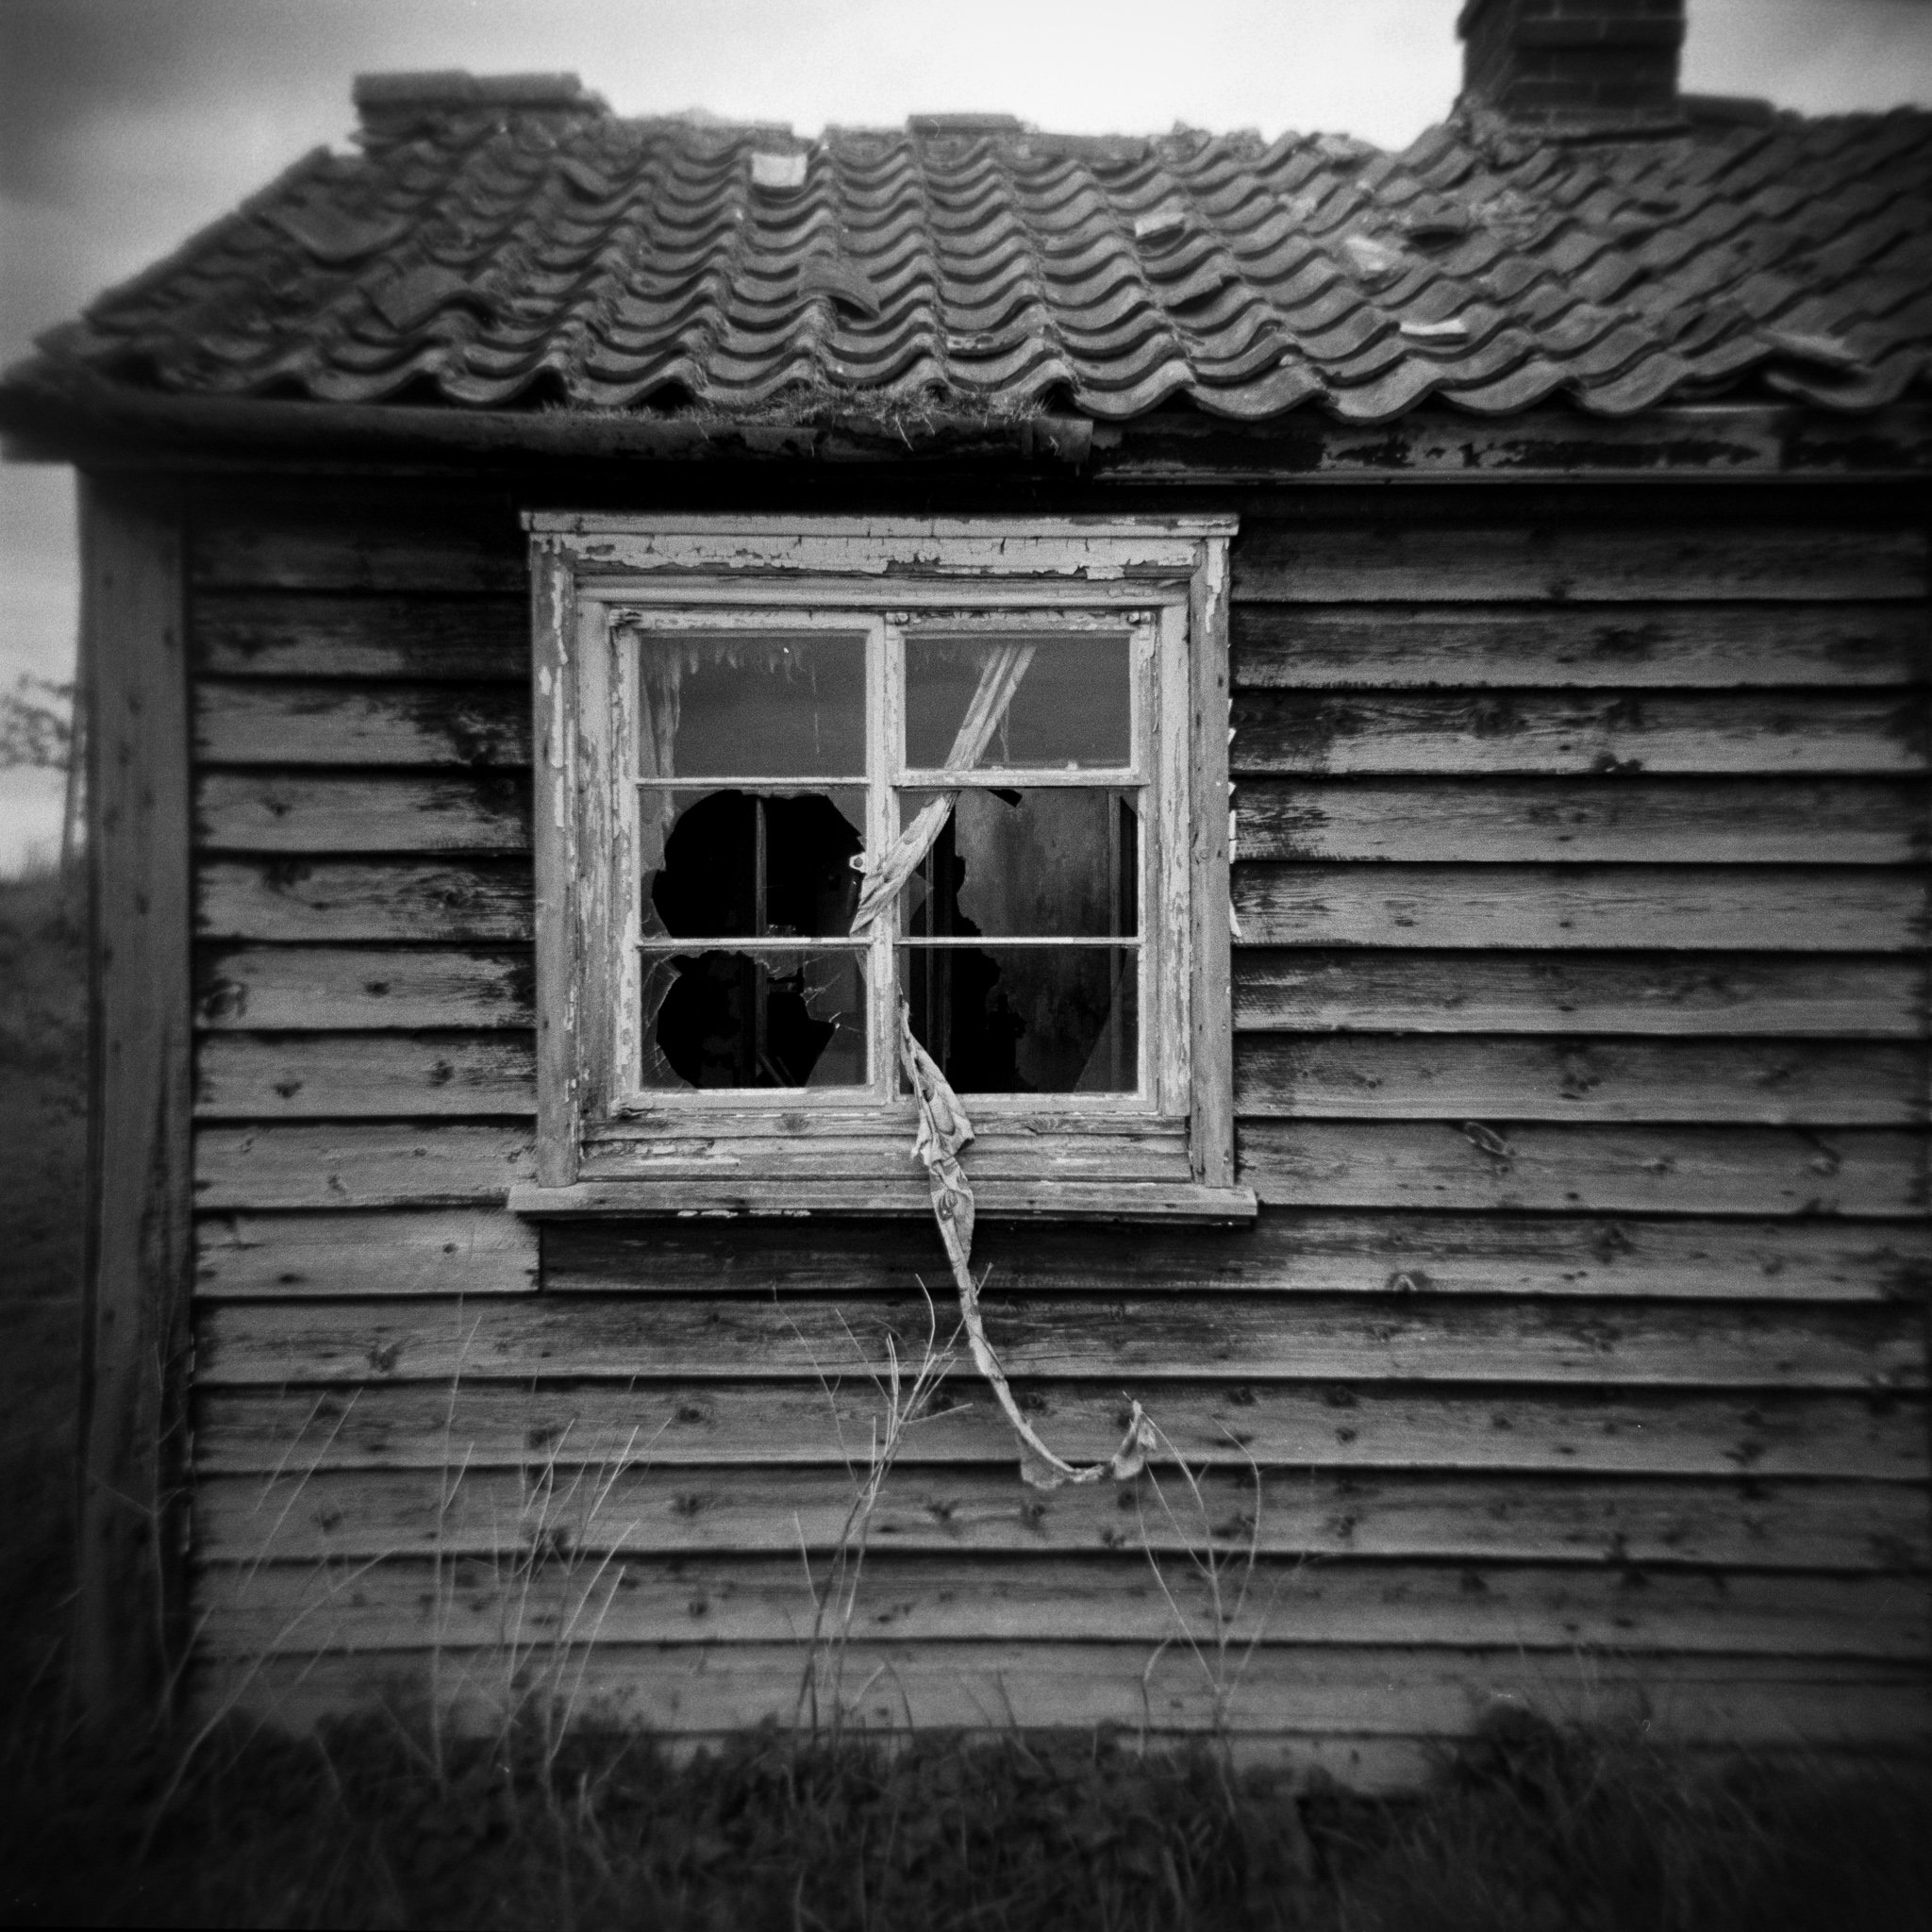
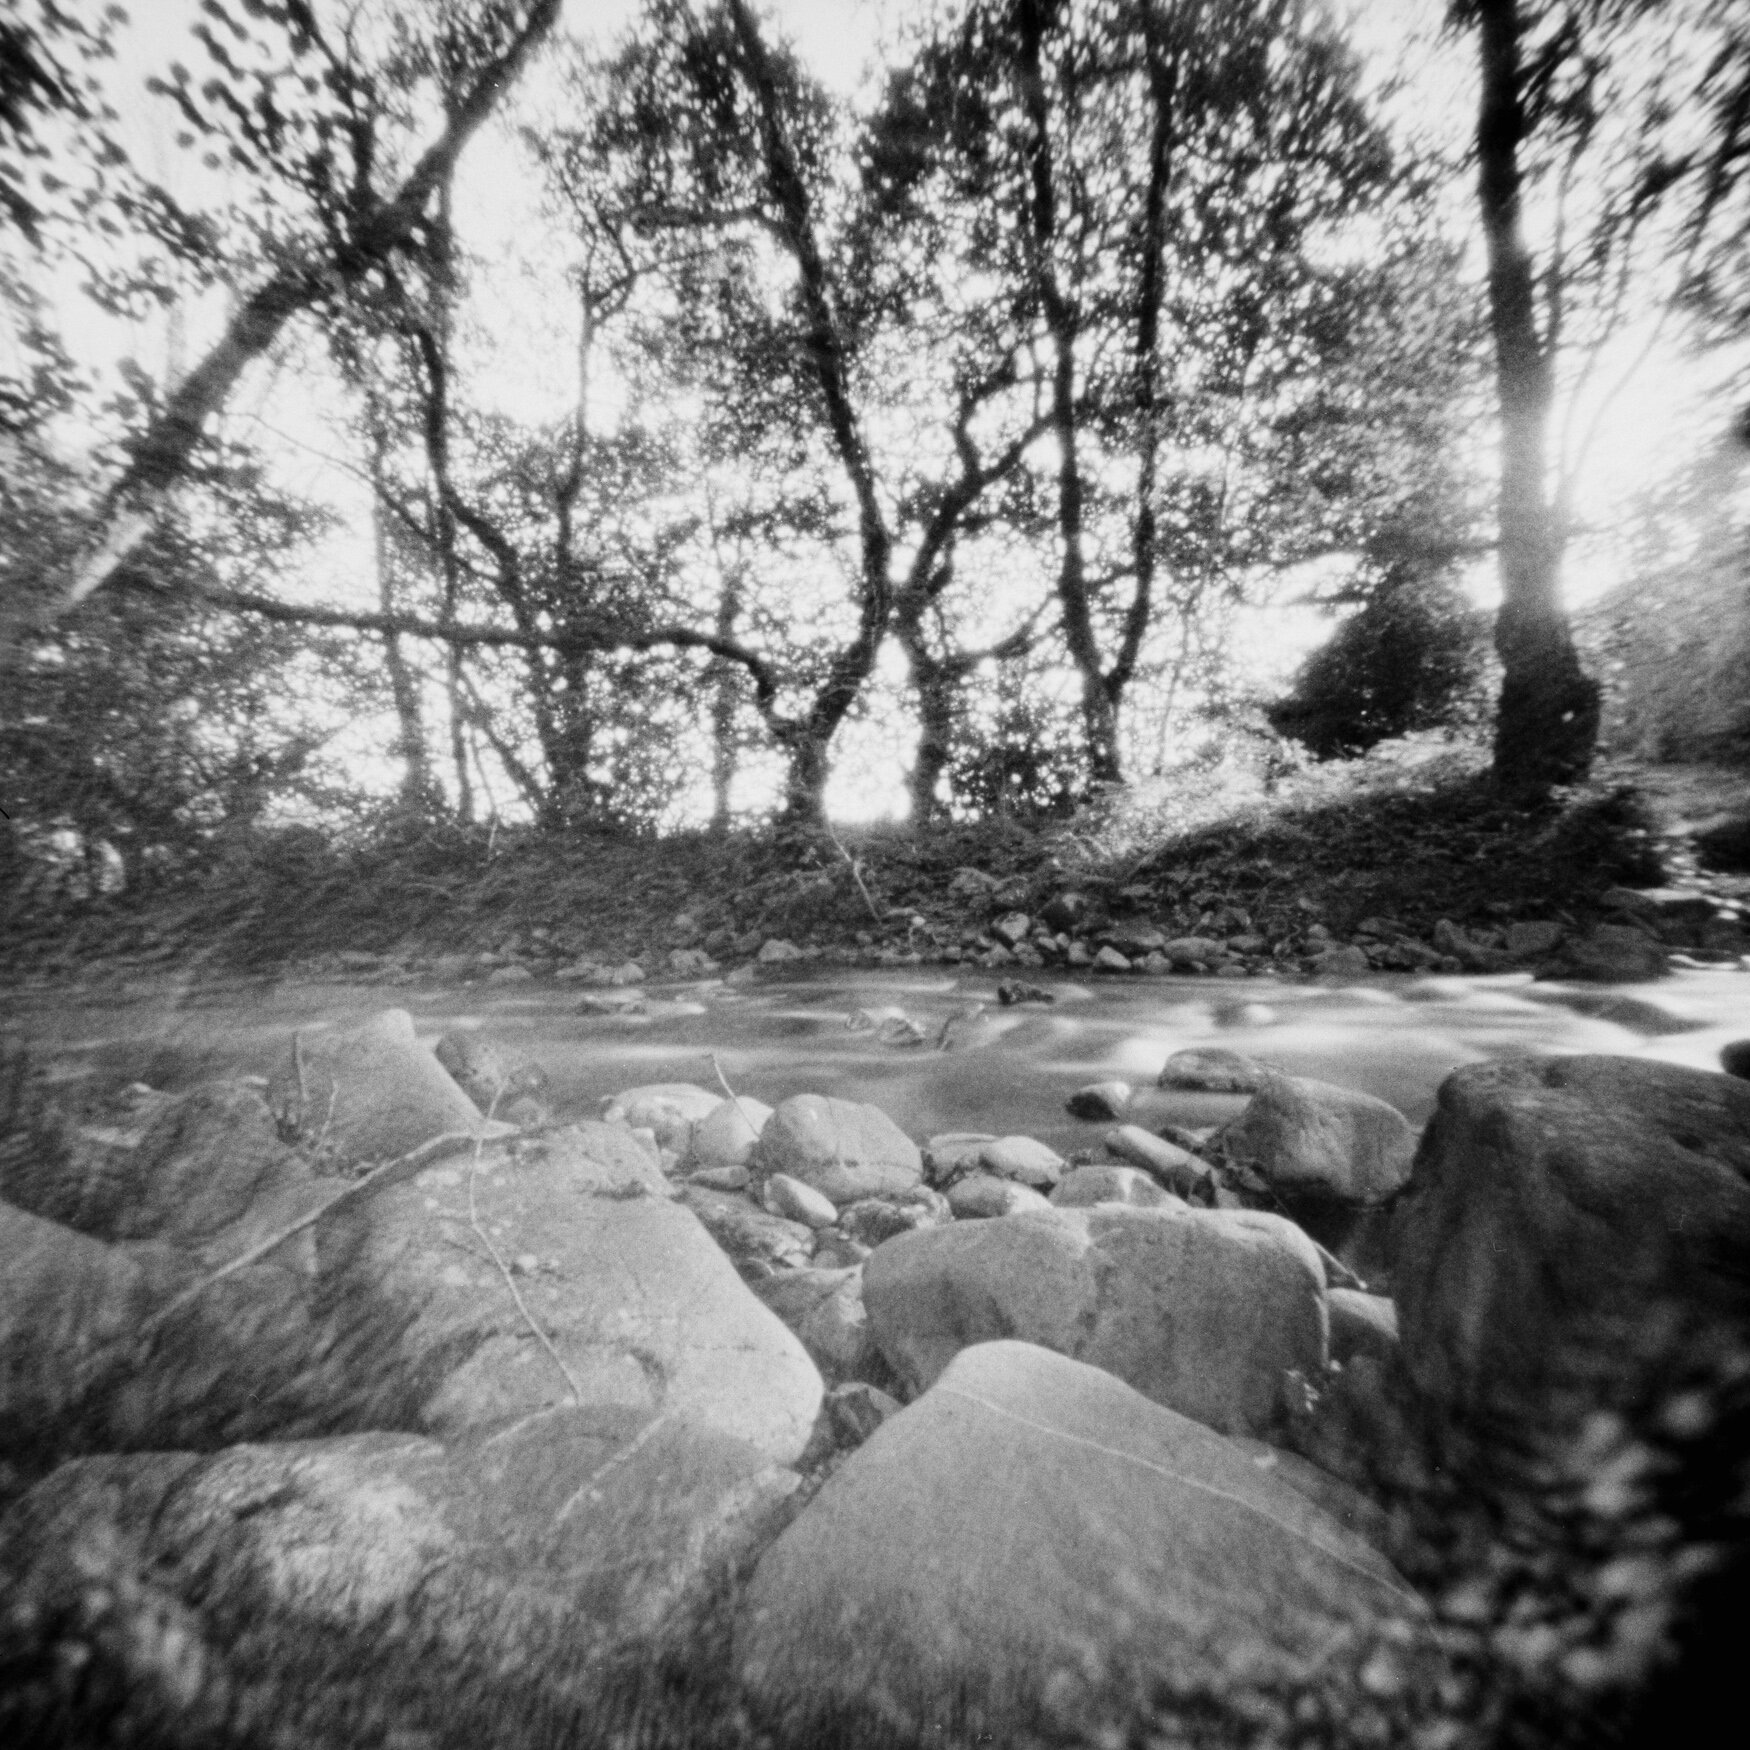
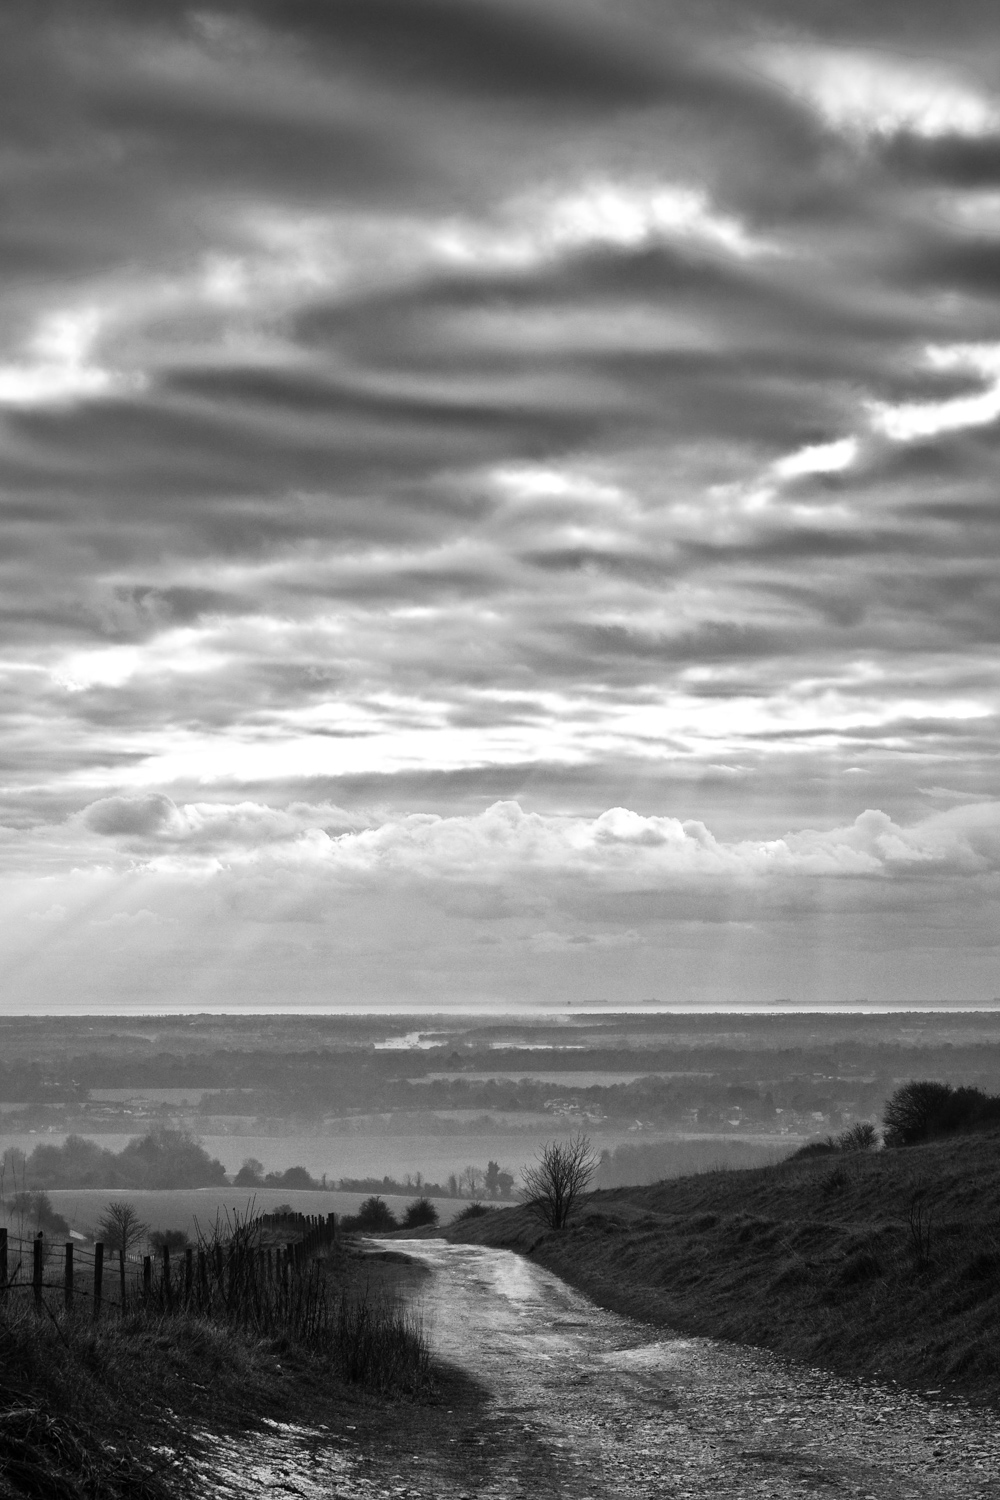
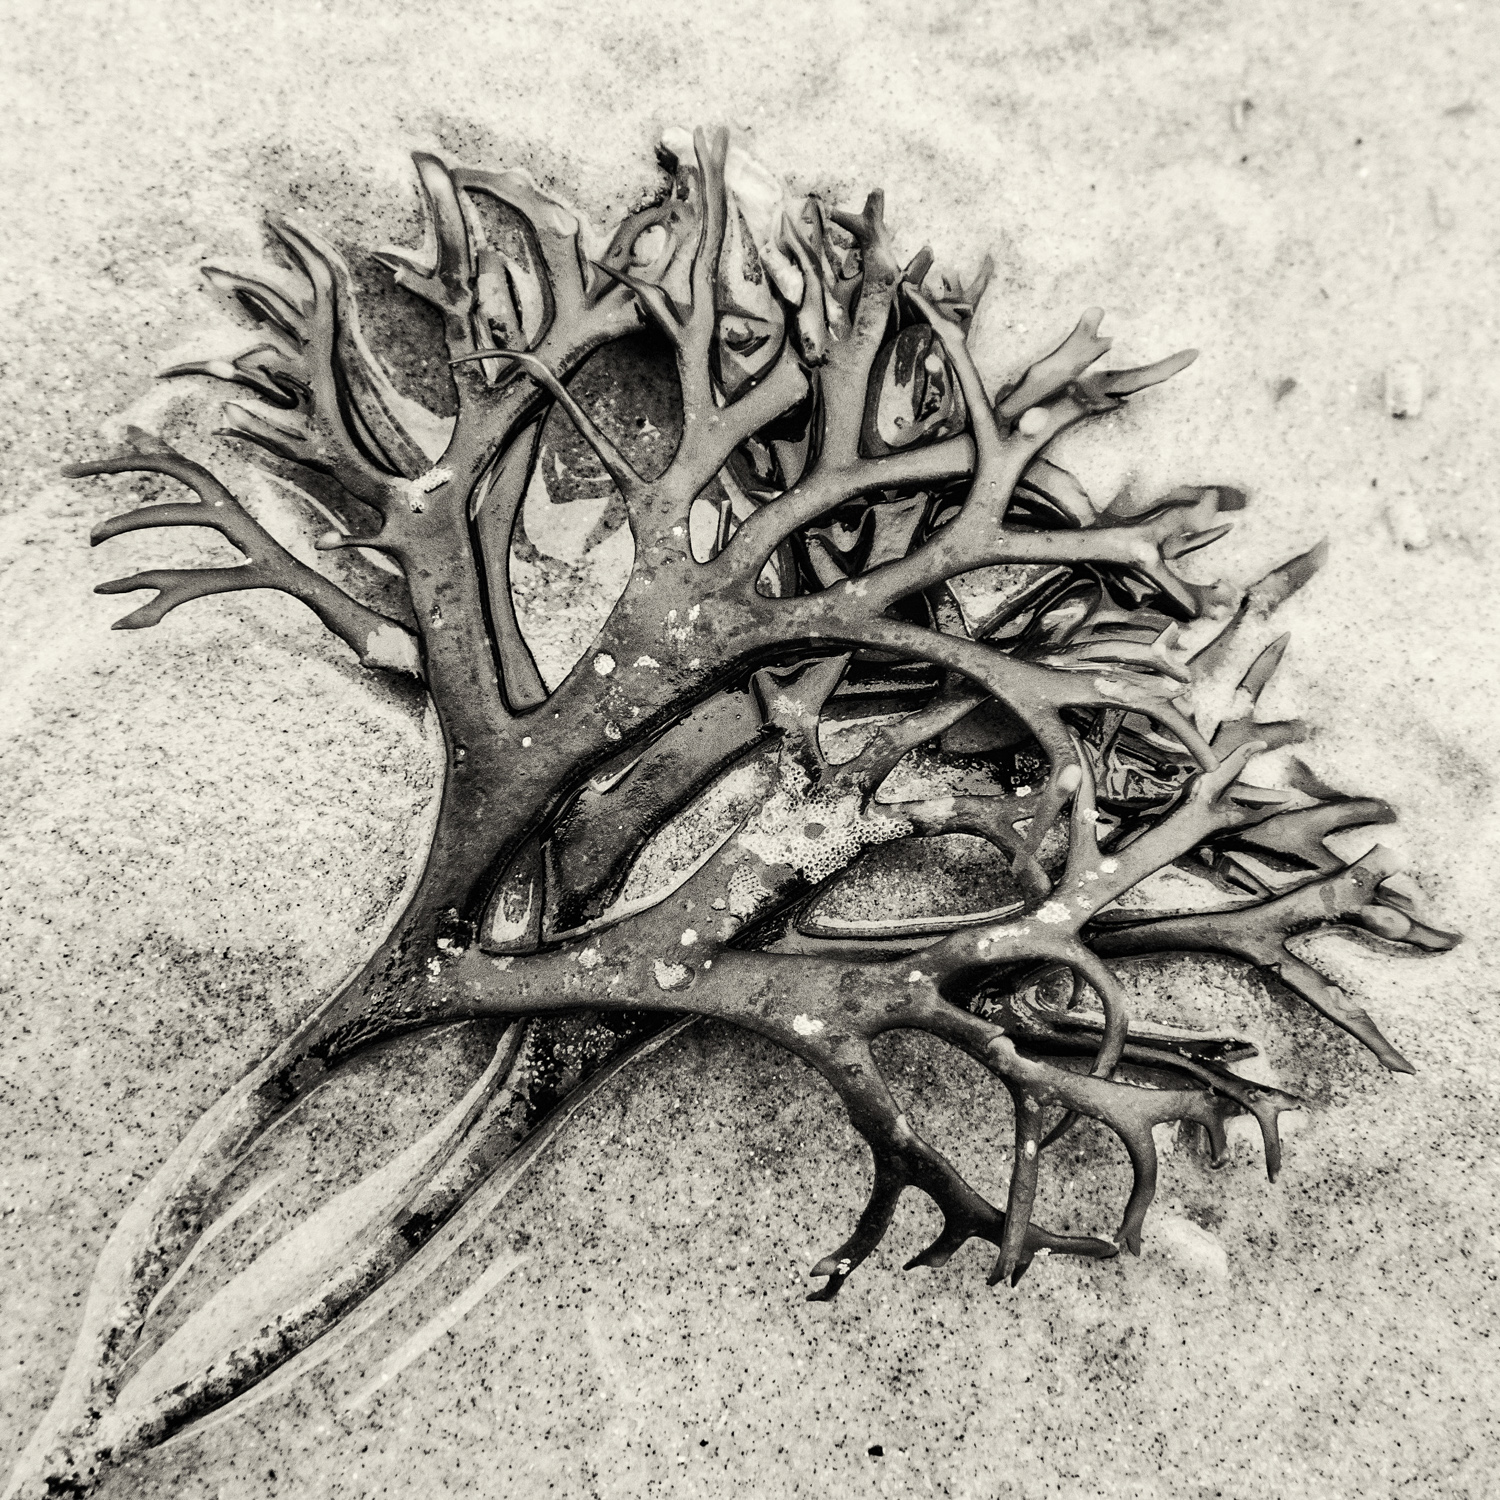
My pinhole image from the decaying cottage, scanned into digital form

Despite the challenges of dodging and burning I ultimately ended the day with a pair of prints which make me smile. Yes, I had lots of help from Andrew in making them, but as a complete darkroom novice they gave me a great sense of achievement.

So will I continue my adventures in the darkroom? Yes, and no. Darkroom printing isn’t yet destined to be part of my plans. I love the idea of printing at home, but the truth is my working life just doesn’t allow enough time to make that possible. My current hybrid process of developing, scanning, post processing in Lightroom (dodging and burning) before printing with an inkjet printer is something that can be done around my work in short bursts. Never say never though - who knows what may be possible come retirement!

Home developing is a different matter though… Having realised how straightforward a process it can be I’ll definitely continue practising the skills I’ve learnt from Andrew.  There’s a definite appeal to being able to turn things around more swiftly and I can see being able to take control of the development process to get the best out of my negatives will be a real plus. Add in the frisson of excitement when you first pull the  negatives from the developing tank and see they contain real photos and I’m hooked! For now I’ll continue sending my colour films out for development, but who knows, I may yet book another day with Andrew to try my hand at colour processing too!

My complete set of contact sheets and prints from the two day workshop

Two months later….

A couple of months on from my workshop with Andrew I’m pleased to say home film developing has become a regular occurrence. My first attempt had mixed reviews, largely because I made a mess of loading up my spiral. A couple of loops of film stuck together so I lost a handful of frames. Fortunately I’d been out and shot some photos for the occasion which were easily replicated if it all went horribly wrong so I wasn’t devastated by the loss. Aside from this, the surviving photos were fine and I made sure to practise loading with a sacrificial roll of Fomapan film before I tried again.

Aside from a metal spiral and tank I made one other purchase - a length of blackout material. Our downstairs toilet is windowless so this is all I need to seal the light leaks around the door frame and make the space completely dark - a much easier environment in which to load up film than in a dark bag. I’ve also followed Andrew’s advice and done away with my stop bath, using water instead. Even with our hard tap water that has stopped the problems I had previously with white dots on my negatives, and I simply use deionised water for my final rinse to avoid watermarks.

I’m quickly coming to love the methodical process of develop, stop and fix at the kitchen sink (usually to an accompaniment of music - anything from Brahms Symphonies to Robbie Williams!) and I get the satisfaction of knowing each roll of film now costs me no more than about £1.50 to develop, compared to the £7 I paid previously. That’s a very handy saving with my prolific film habit! I will of course  continue to send occasional rolls of colour film away for developing but in every other respect I’m a convert!

If you’re thinking about taking your first steps into developing and printing I can’t recommend Andrew’s workshops enough. It was wonderful to have one to one tuition at a pace that suited me and it didn’t break the bank either. Even better, I gained a new found appreciation for the Fens and I’ll be back soon to explore further.

2020 - a year with a difference....

What can I say about 2020? It certainly wasn’t the year we all expected it to be!

My life as a working musician took a big hit when the Covid-19 pandemic struck in earnest. A never-ending stream of work cancellations left me with more time on my hands and the perfect excuse to get out and take photos. Fortunately, when we were plunged into our first lockdown no one said I couldn’t take a camera with me for my permitted daily exercise so I had one with me every step of the way!

Initially I got back into the habit of shooting and sharing new photos every day - an echo of my decade long 365 project. However, by the beginning of June I’d started a new music project, creating videos to help the amateur musicians I would usually work with to keep playing. That took up more of my time and photography reverted back to being something I did frequently, but not necessarily every single day. Even so, I’ve shared over 1500 photos on my blog through the year - not bad for a year when my travel opportunities have been so limited.

Starting to finish

I began the year with a push to complete my longstanding City of London Churches project. With only ten churches left to visit, it seemed entirely feasible to tick these off through 2020. In January and February I photographed four new churches, plus a handful of derelict towers and made a much needed revisit to my first church, St Botolph-without-Bishopsgate.

Bevis Marks Synagogue

Bevis Marks Synagogue

One major success was receiving permission to photograph inside Bevis Marks Synagogue, which is usually off limits to photographers. I spent a happy couple of hours there, exploring every little architectural detail, not realising it would be my last for the year. In mid-March the government’s directive to stay at home came into force, putting paid to my plans. I did make it back into London a couple of times later in 2020, when the restrictions eased, but sadly the City churches remained shut.

Going back to basics

The purchase of a medium format Ondu pinhole camera in 2019 reignited my interest in this back to basics form of photography and I’ve shot no fewer than 26 rolls of film in this medium in 2020. I was thrilled to receive a message from Elvis Halilović at Ondu Cameras in the spring to say that, as one of their favourite pinhole people, I should look out for a gift from them in the post. I thought perhaps it might be a roll or two of film so when I opened the box to find a 6x9 format pinhole camera I was overjoyed! The delivery was timed to coincide with Worldwide Pinhole Photography Day, so I immediately put it to work.

A derelict Nissen hut, one of my discoveries during a walk on Worldwide Pinhole Photography Day in April

A derelict Nissen hut, one of my discoveries during a walk on Worldwide Pinhole Photography Day in April

Using the 6x9 has given me new impetus and I quickly realised there’s nothing more therapeutic during a global pandemic than pottering around with a pinhole camera, doing some very slow photography! The simple process of selecting a composition (no easy thing without a viewfinder), figuring out your exposure time and then just waiting while the shutter is open is all consuming and the troubles of the world just disappear for an hour or two.

Photography with a focus

Back in 2019 I made a decision to focus my photography in a more specialised way, concentrating on the genres which really interested me – architecture and street photography.

This has had mixed results in 2020. Street photography is a big challenge – largely because of the guidance to stay at home and avoid other people. As the restrictions eased I ventured out in Cambridge and London but still struggled as there are simply far fewer people on the streets these days. I’m sure this will change as the various vaccines are rolled out and we return to something approaching normality. This will take many months though, so I think my adventures in street photography will be a slow burn even in 2021.

One of my street photos from a pre-pandemic trip to Cambridge in January 2020

One of my street photos from a pre-pandemic trip to Cambridge in January 2020

Architecture has been more of a success this year, although not without its frustrations. In the spring, when it became clear I wouldn’t be able to visit London for a while, I began a new Essex Churches project. My logic was that every village has a church, most of which are frankly deserted, so I could visit these without having to travel long distances and without the risk of human contact. The logic was sound, but I hadn’t banked on the diocese which covers Essex being super cautious about Covid-19. As a result, while churches in areas around us opened for private prayer and visits, almost all Essex churches remained firmly locked!

Photographically speaking this was incredibly frustrating. I’ve found a few gems in surrounding areas though and even managed to visit Lincoln and Ely Cathedrals, both of which were photographic goldmines. Away from churches, I’ve looked for architectural interest around me. As the first lockdown eased in May I ventured into Cambridge for the morning, interested to see what had changed. What I found was astonishing – a deserted city. There was the odd walker or cyclist, but no throngs of people outside the usual tourist hotspots. It was utterly surreal, but brought with it the opportunity to get a clearer view of the architecture – something I’ll probably never experience again.

Ely Cathedral

Ely Cathedral

Looking into 2021

So what should we expect of 2021? Frankly, all bets are off! My hope is that the rollout of the vaccines will allow us all some more freedom. If that happens my music work may resume and I may get to travel again. I’m not holding my breath though as it will inevitably take several months for anything close to normality to resume.

With that in mind I’ve dreamt up a project to at least keep me taking photos in January. I did briefly consider another 365 project, but my heart’s really not in it when I’m stuck at home so much. However, I had a brainwave this week for a pinhole photo a day project. My plan is to shoot one pinhole photo (perhaps more!) each day for January and see where that takes me. If weather and the virus allow me I can head out into the surrounding villages in search of images, but if it’s pelting with rain I’ll just have to get creative indoors.

This morning I’ve checked my stock of film and I’ve started jotting ideas in a notebook so I can refer to that for inspiration if I run short of ideas. This may turn out to be an utterly bonkers plan, but it’s going to be fun trying and without a specific subject matter in mind I can shoot whatever is available to me under whatever Covid restrictions happen to be in force.

My favourites from 2020

Normally I’d share a gallery of my ten best photos from the year at this point, but given the challenges of 2020 I’m instead sharing a gallery of my favourite photos. Very few will ever make it into my portfolio, but they are some of my favourite moments in a very challenging year.

All that remains is to wish all my readers a happy and healthy 2021 and here’s hoping that by this time next year the last twelve months will be nothing but a distant memory!


Prime Lens Project, Month 6 - the home stretch

The final month of my prime lens project has been mostly devoted to getting closer to the subjects I’ve photographed. My chosen lens was my Olympus 60mm f2.8 macro lens - the perfect tool for getting up close and personal. I’d always intended to save it for April as I figured we’d have more flowers blooming in our garden. Little did I realise when I started this that all my photos this month would be taken within about a mile of home!

I started the month with flowers, using a fallen tulip from our garden as an indoor still life subject, through its various stages of decay. A very welcome bonus was the early blooming of the bluebells in our local woods, which put on a fabulous display.

Inspired by a friend who specialises in photographing Lego minifigures I also dug out my Lego photographer, who I christened Henri, as an assistant on my macro missions. He tagged along with me on various walks around the village and added a different slant to my images.

This is a gallery of my pictures from the month, all taken with the macro lens, although not all of them are, strictly speaking, macro photos.

Please click on any of the thumbnail images to see the pictures full size. All images taken around Elsenham.

That brings my prime lens project to an end. Strictly speaking, I could continue for one more month, shooting with my fisheye lens. However, I’m not sure I can face a month of shooting with such a specialised lens when I can only photograph around our village. Perhaps it’s something I can return to later in the year when I can get out and shoot a greater variety of subject.

So what have I learnt from this project?

Fundamentally it’s confirmed to me the strengths of shooting with prime lenses. When using a single focal length I work much harder to find my compositions, often walking around a subject until I find the right angle and shooting distance. Yes, there are shots I have missed out on because the lens I was carrying wasn’t suitable. However, if I know my ability to move around is going to be limited I will take a zoom lens with me for flexibility.

Shooting with one focal length for extended periods has made me appreciate the qualities of the various lenses and helped me to learn which ones suit my style of photography best. I’ve grown to love my 42.5mm lens, even though I’m not a portrait photographer, and I was surprised how easily I adjusted to shooting wide angle when I used the 12mm lens in March. The hardest month was definitely February, as I wrestled with my 75mm lens. It’s an absolute gem of a lens, but rather specialised and not one I would select as a sole lens for a photographic outing.

I will of course continue to shoot with primes, but that’s not to say there isn’t a time and a place for zoomability! All I need to do now is figure out which lens to take when I got for my lockdown walk today now I have no restrictions….

Photographic life under lockdown

As I write this, at the beginning of May, we’ve been confined to our houses by the Covid-19 virus for around six weeks. It’s been a difficult and scary time, but also a liberating one in terms of having some time to take stock.

My working life is quieter than it has ever been at the moment, so I’ve taken the opportunity to focus on my photography. I’m lucky living here in rural Essex as I can get out into the countryside on foot in just a few minutes for my daily permitted exercise. As no one has said we’re not allowed to take cameras with us while exercising I’ve been shooting new imagery every day. This gallery is a small example of the subjects I’ve been aiming my camera at since the 24th March. Click on any thumbnail to see the image larger.

One flash of excitement during this period has been Worldwide Pinhole Photography Day, on the last Sunday in April. I’m still waiting for the negatives I shot that day to return, so I’ll write a separate post about the event in a few days. However, I’ve also been shooting some images around our village for a pinhole photography exhibition themed around the lockdown later this year. I got some very strange looks walking around Elsenham toting a wooden box on a tripod, but I had fun and here you can see a handful of the resulting images.

I’ll share further information about the exhibition both here and in my newsletter when I have it.

If you’d like to subscribe to my newsletters to hear about my workshops, exhibitions and more please visit my contact page.

Prime Lens Project, Month 4 - the challenging one!

I’ve really enjoyed my prime lens project…. until I decided to go telephoto!


All the lenses I’ve used so far are ones I was already fairly familiar with - they tend to be the ones I instinctively put in my bag when I’m heading out and about. For February I picked the Olympus 75mm f1.8 lens - an absolutely jewel but not the most natural focal length for me. For street photography I naturally gravitate to standard or wide angle lenses, while for wildlife I’ll often be found toting my 100-400mm lens (an effective focal length of 200-800!).

The 75mm (EFL 150mm) lives slap bang in the centre of this range. Were I a portrait photographer it would be invaluable for its flattering effect and ability to create soft, blurred backgrounds. The nearest I get to this is candid street photography and I quickly discovered it’s just too long for that purpose. It’s helpful to be able to see your moving subject in the viewfinder before you shoot, so you can plan where in the frame to capture them. At 75mm the field of view is narrow and I often found the person I was aiming for had left the frame again before I’d even pressed the shutter button!

So what about other genres of photography? A few times I used the 75mm when I was out and about in the countryside and in town. Here it came in handy for capturing distant details, and the way it apparently compresses the scene is undeniably lovely.

Don’t get me wrong, I love this lens and the look it gives me in the right situation. I’ll often use it when I’m doing event photography, usually capturing people at musical gatherings. Here it’s brilliant for pulling individual people out of a large crowd as you can reach into the scene and blur the surrounding individuals. Sadly I didn’t have any such opportunities during February!

By the end of February I’d developed something of a love/hate relationship with my 75mm lens. I knew this one would always be a challenge as it’s a more specialised optic than the others. I will continue to use it where there is a specific use case, but I don’t think it’s ever going to be a lens I naturally select as my soul focal length for a whole day.

So where next? We’re already well into March and I’ve gone to a different extreme for month five - a rather wide 12mm. You’ll have to wait until the beginning of April to hear more about that though!

Please click on any of the thumbnail images to see the pictures full size.

Images from Watchet harbour in Somerset, Thaxted, Saffron Walden, Hatfield Forest, Epping Forest and the City of London.


Prime Lens Project, Month 3 - getting closer

I can’t quite believe I’m three months into my prime lenses project now - where does the time go?!

My chosen lens for January was the Panasonic Leica 15mm f1.7 - an effective focal length of 30mm in full frame terms. Using a wider lens than in December meant I’ve had to shoot in a different way and I’ve enjoyed the challenges that has brought.

A moderately wide angle lens is great for architecture, one of my favourite subjects. You can fit a decent amount of the building into the frame, but the distortion is less dramatic than with a shorter focal length.

I’ve heard many people rave about this lens for street photography - its combination of sharpness, quick focusing, a fast aperture and the focal length are all helpful. However, my comfort zone for street work is a 25mm lens. I wasn’t going to let that stop me though and I spent a day in Cambridge working hard to get closer to people. It never fails to amaze me how few people even notice my camera - I guess it’s a sign of the times as everyone carries one these days, even if only on their smartphone.

Over the last few days I also had a work trip to Somerset and spent some time messing around on Minehead beach. Again, the crucial technique was to get close to my subjects and I was pleased with the mini-landscapes I was able to shoot.

Please click on any of the thumbnail images to see the pictures full size.

Images from Caernarfon Castle, walking the neighbour’s dog, Cambridge, Sheffield, Waltham Abbey, the Natural History and V&A Museums in Kensington and Minehead Beach.

So for month four I have a very different challenge ahead of me. I’ve chosen my 75mm lens. With an effective focal length of 150mm I’m going to have to either shoot entirely different sorts of subjects or get much further away. Either way, I’m going to have to re-calibrate the way my eyes see to make the best of the compression and magnification a telephoto prime can offer - watch this space for the results!

If you want to follow my Prime Lens Project as I publish my photos and perhaps even join in, please do follow the hashtag #primelensproject on Instagram.

Ondu 6x6 Mark III Pinhole Camera review

Camera technology is so sophisticated these days that it’s easy to forget about the possibility of taking photos without even so much as a lens. The phenomenon of the camera obscura, where rays of light are focused by a small aperture to create an image on a surface, was recognised at least two millennia ago and was later harnessed in the form of a pinhole camera.

You’d think in these days of super-sharp lenses there would be little point in using a pinhole camera – after all, how could such a basic concept produce images of any worth? Such technology has an appeal for many photographers though. There’s something enticing about the simplicity and the infinite depth of field these cameras produce -  a look no lens can yet replicate.

Ondo 6x6 III Pocket Camera in ash

Build your own or buying off the peg

Many people build their own pinhole camera, from a box or tin and photosensitive paper. My introduction though came with an Ondu 135 Pocket camera last year. Created by Elvis Halilović and his team in their Slovenian workshop, I was enchanted by the craftsmanship of these delightful wooden cameras. When mine arrived I could see the potential from the first roll of film, but my photos never had quite the sharpness I was after. Research soon showed me that the size of the negative is crucial in pinhole photography and I realised I should perhaps have chosen a larger model. In October 2018 Elvis and his team launched the Mark III version of the Ondu on Kickstarter so I took the plunge and backed the campaign, selecting a 6x6 Pocket camera to shoot medium format film.

The simple film winding knobs, with engraved arrows to show the direction to wind

What’s changed in the Mark III camera?

The newest Ondu cameras have the same beautiful craftsmanship as their predecessors, but this time with a sharper silhouette. The corners are a little crisper and each camera is made from a single type of wood, rather than a combination of two. I went for ash, in contrast with the walnut of my original Ondu, with silver film winding knobs. The biggest change though is the shutter mechanism.

Previous generations of Ondus had a wooden shutter which you flipped upwards to reveal the pinhole beneath. This time it’s triggered with a metal shutter, which pops up and down with the flick of a finger, and a satisfyingly definite click. This is a big improvement. With an aperture of f125, exposure times are always going to be lengthy, so keeping everything still is crucial. The new shutter action makes for less camera shake and I’ve found it much easier to achieve still shots.

The mark III’s new shutter mechanism

How does the Ondu work?

Put simply, it’s a wooden box, with a very fine pinhole to focus the rays of light. No need for focusing – with a pinhole camera everything is in focus, whether you like it or not!

Achieving the perfect exposure

Of course, modern cameras have in-built light meters, so exposing photos perfectly is easy. The Ondu take this back to basics, with just a simple wooden exposure chart. To use this all you need is a digital camera or a smartphone metering app set to f22. Once you’ve got your f22 meter reading, the chart converts this into something suitable for the Ondu’s f125 aperture and you’re good to go.

Even the exposure chart is beautifully made from wood

As a relative newcomer to pinhole photography, I didn’t take reciprocity failure into account with my first film. This is a quirk of shooting on film, where long exposures must sometimes be considerably longer than expected to achieve a good exposure. Some films suffer from this more than others, but my solution is to use the fantastic Pinhole Assist app on my iPhone. In the app’s settings I select the model of my pinhole camera plus the film I’m shooting with. I then aim my phone’s camera at my subject and it tells me exactly how long I need to keep the shutter open, taking reciprocity failure for that particular film into account. It makes exposures an absolute breeze and I can’t recommend it enough.

Bonus features

Not content with just updating their original design with a new look, the Ondu team took the Mark III as an opportunity to add some entirely new features. One of these was the creation of the ‘Rise’ models. These have no fewer than three pinholes at different heights, allowing photographers to capture subjects such as architecture without converging vertical lines. Much as I love architectural photography, I wanted to stick with a simpler formula so I didn’t select this option.

The other handy addition is the ability to use filters. Film photographers often use coloured filters to control the way certain tones appear in their pictures – for instance using an orange filter to enhance a blue sky in monochrome images.  The Mark III Ondu makes filter use possible with the addition of a bracket containing a 58mm filter ring. This is attached magnetically, so if you don’t need filters it can stay in your camera bag. I haven’t tried using this yet, but it’s on my to-do list once I’ve bought some coloured filters.

A magnetic bracket to attach 58mm filters

Another small but handy tweak is the addition of two lugs and the inclusion of a shoulder strap with the Mark III. Like the filter mount, I haven’t felt the need to attach mine as it’s almost always mounted to a tripod, but for some people this will be really useful.

The final option I did plump for was a set of 3D printed adapters to enable me to shoot 35mm film in my new camera. While the smaller negatives will probably reduce the overall sharpness, shooting this film in a larger format camera will allow me to include the sprocket holes in my compositions. A small thing, but I will certainly give it a try sometime. The adapters added very little to cost and it seemed silly not to order them, just for the flexibility of format they offer me.

3D printed adapters to use 35mm film

Photography as a tactile experience

Modern cameras are fairly soulless creations, if I’m completely honest – boxes of plastic, metal and electronics. They function perfectly well but are hardly designed to move the emotions. In contrast, the Ondu is an absolute pleasure to handle. There’s something so tactile about wood that I find myself caressing my Ondu just to enjoy the grain of the ash and its beautifully crafted lines. Whenever I’ve been out shooting with either of my Ondu cameras they’ve received admiring looks and people will often come over to ask about them. That’s certainly not something you’d expect to experience with a digital camera!

A peak inside the camera, including a spool to which takes up the 120 fllm as you shoot. The camera back is attached with tiny but very strong magnets

Does the Ondu Mk III live up to expectations?

Absolutely! I’m still learning to get the best from pinhole photography, but even from the first roll of film I could see the benefits of shooting a larger format. Pinhole photos will never have the same degree of crispness as an image from a camera with a lens. But when viewed at a moderate distance the 120 negatives offer a very satisfying sharpness. I’ve shared some of my photos on social media recently, and on more than one occasion viewers haven’t even realised they were taken on a pinhole camera. That’s quite an achievement!

The complete Ondu Mark III kit - including a shoulder strap, fabric bag and a handy elasticated band to keep your shutter closed when not shooting.

Are they any negatives?

Please excuse the pun, but no negatives that the folks at Ondu are responsible for! The 6x6 camera has a ruby window in its back to help you track how many shots you have left when winding the film on. As a newbie to 120 film I had no idea how variable these frame numbers can be. Some (Fomapan for instance) are super clear and easy to see through the window when you open it. Others (Kodak film seems a particular offender) have numbers which are faint and small – almost invisible when looking through the ruby window in overcast light. My solution is to carry a small torch to illuminate things and help me wind on accurately. I wasn’t sure if this would affect my pictures, but four rolls in I’ve noticed no adverse effects and it makes life immensely easier!

The rear panel removed, showing the ruby window to keep track of frame numbers

The other challenge is how to frame pictures accurately. A pinhole camera has no viewfinder – just a built-in bubble level and some framing lines engraved on the camera to show roughly where the extremities of the image will be. With a focal length of around 25mm, I’m quickly learning that one has to get really close to a subject to make a photo with impact. If you step back, everything just looks very small! That’s just a matter of time and experience though, so I’m looking forward to seeing my latest negatives when they come back from being developed.

Who should try pinhole photography?

Everyone! Once you accept that you’re not going to achieve absolute critical sharpness in your pictures, there’s a lot to learn from pinhole photography. Not being able to see the composition either before shooting or immediately afterwards really makes you consider the important elements in your pictures. Before opening the shutter I carefully use the framing lines to work out my composition. With infinite depth of field, it’s also important to exclude unwanted elements from the frame – after all you can’t use a large aperture to blur the background! This can only help my compositional skills when I return to my digital camera.

The final verdict…

I’ve been delighted with my Ondu 6x6 Pocket Mk III. Not only is it a thing of beauty and a pleasure to handle, I love the photos it makes. They have an unmistakable pinhole look – total sharpness through the frame, while being slightly soft at the same time. In a review of a traditional camera that would be a big no-no, but here it’s a welcome feature!

The Ondu Kickstarter campaign may have long since finished, but you can still order cameras, from 35mm all the way up to 4x5 format from their website. As I mentioned earlier, they offer simple cameras like mine, as well as the more sophisticated Rise model. There are also panoramic models available for those who like to take a wider view of the world!

A selection of my photos from the camera so far - shot on a mix of Fomapan 100 and Kodak Portra 160 film. Click on any of the pictures to see them larger and scroll through the gallery.

If you fancy trying your hand at pinhole photography I can’t recommend Ondu cameras highly enough. If you don’t have the skills to build your own pinhole camera or, like me, just love the concept of a design beautifully crafted from wood, do consider an Ondu. Don’t hang around though – several models have already sold out and I’m sure the remaining ones will sell quickly!

Prime numbers

It’s now almost a year since I stopped my decade long 365 project. After taking a fresh photo every day for ten years I was ready for a break. It’s been liberating at times, knowing I don’t need to create a new image after a long day’s work. But in recent months I’ve missed using my camera so frequently. I always had a feeling that photographic addiction would be hard to shake off!

So what do I have planned to get me motivated again? Well, it’s a project that first occurred to me a few months ago, involving prime lenses.

What is a prime lens?

Put simply, a prime is a lens which shoots only at one focal length - as opposed to a zoom which can cover a range, from wide angle to telephoto. For a long while new cameras were sold with a prime lens, often a 50mm focal length. This was because zoom lens technology wasn’t great and prime lenses were invariably sharper. Over time zooms improved enormously and it’s now the norm for a kit lens to be a zoom of some sort.

So what’s so great about a lens which doesn’t zoom?

On the face of it, the restriction of a prime lens seems a disadvantage. After all, it means you have to walk to get closer to the subject of your photo, rather than simply turning your lens’s zoom ring. However, this very restriction can have benefits too.

When using a zoom it’s very easy to get rooted to the spot, using the lens to change your composition. This often makes us lazy and we work less hard to find the perfect image. It could be that moving a step or two sideways will make an infinitely better picture - for instance, it might mean the person you’re photographing no longer has a lamp post sticking out of their head!

Another factor people often overlook, or have no awareness of in the first place, is the effect different focal lengths have on the pictures we take. A wide angle lens is great for cramming loads of elements into a sweeping landscape photo, but it can make those elements seem distant and create an underwhelming end result. In contrast, a telephoto lens will appear to compress the scene, bringing compositional elements together. These factors mean the appropriate lens choice can be a very powerful tool. Using a zoom makes you less aware of your choice of focal length, whereas you make an active decision when selecting a prime lens to shoot with.

It’s worth mentioning at this stage that almost anyone who has taken photos with the camera on their mobile phone (unless you have one of the swanky new ones with multiple lenses!) has used a prime lens. The average smartphone camera has an effective focal length of about 28mm - fairly wide angle - so if you want to get closer you just have to walk!

Why do I use prime lenses?

I bought my first prime lens, a Canon 50mm f1.8, on a whim in our local camera shop back in about 2007. It was a twenty year old lens, costing just £59 and sounded like an angry bumble bee when focusing, but I loved it!

Prime lenses are simpler in design than zooms, so you tend to get a larger maximum aperture. This lets in more light and creates beautiful bokeh - that lovely creamy, blurred background effect. They also tend to be small and light and often cheaper too. Over the years I’ve accumulated a small collection of primes of different focal lengths and my camera bag will usually contain two or three of them at any one time.

My decision to use primes is largely as a result of seeing what they do for my pictures. As well as being able to creatively blur parts of the image, I find I think more creatively when using them. I’ll walk around a subject, using my viewfinder to locate the perfect spot to shoot from - the place where I get exactly the composition I’m after. After a while you learn to ‘see’ at the focal length of the lenses you use most, and I can predict fairly accurately how much I will get in the frame with a given lens from a certain distance.

I do still use zooms from time to time, although it tends to be in particular situations. For action or wildlife photography I use a long telephoto zoom lens - after all you can’t always walk closer to a bird or a speeding racing car! I’ll often choose zooms for event photography too, where I know I’ll be locked into one spot, unable to use my feet to zoom.

So what’s my big plan then?

Funnily enough it doesn’t require a big change to my shooting habits, but perhaps a more focused one.

As I’ve already said, each prime lens creates a different look and I want to exploit that more by using just a single lens. Occasionally I already leave the house with just one prime lens, but more often I’ll take a selection so I can swap when the mood takes me.

My plan for this project is to have at least one day each week when I use a single prime lens, making myself really utilise its individual qualities. I will use the same lens for a whole month so I can really understand it and learn to get the best out of it. Of course there will be some occasions when I just can’t limit myself to this single lens, so for this reason I’m only committing to a minimum of one day a week.

How long will this take?

At the moment I have six prime lenses, with effective focal lengths from 24 to 150mm. If I spend a month with each lens that should take me well into 2020. Some will be easy to use - 50mm for example. But the 150mm lens should challenge me significantly more. I’m starting off in November with my 25mm f1.4 lens (a 50mm equivalent for those who shoot on a full frame camera) - in fact I already started this afternoon.

How to follow my project…

If you want to see the photos that result from this project your best bet is to pop over to one of my two Instagram accounts: HelenHookerPhoto or HelenHookerArchitecture. I’ll label images with the hashtag #PrimeLensProject so you can also search for them that way. They’ll also be posted over on my Photoblog and you can search there with the same phrase.

This project isn’t as full on as committing to shooting every single day again - I’m not sure I’m quite ready for that yet! But it’ll give my photography a little more focus and will hopefully help me understand my lenses even better.

Why not join in?

If have a prime lens and fancy joining me on this adventure, please feel free to use the #PrimeLensProject on social media and I’ll create a post here every few weeks to let you know which focal length I’ll be using for the following month.

In case you’re wondering, the pictures dotted through this post are the first ones created for this project, taken during a visit to Audley End, with my 25mm lens. Who knows what I’ll aim it at next, but I’m already raring to go with this challenge!

One of those eureka moments

Don’t you just love it when you have one of those ‘eureka’ moments? That split second when a cracking idea springs into your mind and you think, “Aha!”.  I had one recently, while driving home from the supermarket, although, luckily for the world, unlike Archimedes it didn’t involve jumping out the bath and running down the street starkers!

Since I stopped putting pressure on myself to take and share a new photo every day I’ve been considering ways to give my photography more focus. Doing a 365 project (be it a single one, or ten on the trot as I did) you’re always grateful for those spontaneous shots that just appear unexpectedly. Days like that mean you don’t consciously have to seek out something to photograph and they’re always a bonus. They’re great opportunities, but they rarely result in meaningful, artistic images.

So how to stretch myself and give me more focus?

Well, I think it’s a matter of specialising.

Architecture

In recent years I’ve found an unexpected interest in architecture, especially historic buildings. Since 2014 I’ve been working my way around all the churches within the Square Mile of the City of London. I’ve really enjoyed documenting them, capturing the beautiful lines and telling their history through my photos. Throw in the huge number of historic places I’ve visited with my camera since I started working for the National Trust and that adds up to a fairly sizeable architectural portfolio.

Beautiful light in the library at Anglesey Abbey

Beautiful light in the library at Anglesey Abbey

That’s not to say I don’t appreciate modern architecture - it’s just that I encounter more historic buildings on my travels. I’ve recently read Tom Dyckhoff’s wonderful book The Age of Spectacle, all about iconic modern architecture and that’s got me itching to photograph more of it. Living within easy reach of London, that shouldn’t be too hard to achieve!

I’d already decided to try and develop my architectural photography, now I can take a more deliberate approach and plan my photo shoots with greater care. I spent some time before Christmas experimenting with using off-camera flash to add extra drama and illumination to a disused church near to home and I want to do more of that, as the results excited me.

Using off-camera flash in Chickney Church

Another area I’ve explored is using tilt-shift photography, to capture architecture as I want it to appear in-camera. Faced with a large building, the photographer’s first instinct is to grab a wide angle lens to fit it all in, and capture the drama. A logical choice, but one that almost always means you have to aim the camera upwards, to a greater or lesser degree. That results in vertical lines which converge, often giving the impression the building is about to fall over. It’s an interesting look, but not the impression the architect intended!

For the uninitiated, a tilt-shift lens employs a complicated mechanism of sliding and tilting elements, which allow you to line everything up in-camera. I won’t explain it in detail here - when I tried to enlighten my other half his eyes glazed over and he lost the will to live! If you have a desire to understand the physics, you can find a useful article here.

Unfortunately, the engineering in a tilt-shift lens makes them very expensive and certainly out of my budget. I hired one inexpensively over Christmas, but it was always going to be a short term love affair. Thankfully, I’ve found a less expensive solution, which allows me almost all of the performance at less than a quarter of the price - result!

The Lady Chapel at St. Albans Cathedral, shot using my budget shift lens

OK, so that gives me lots to be working on, but I can’t just photograph buildings....

Street photography

I’ve dabbled with street photography since attending a workshop with Richard Cannon in 2010. There’s nothing quite like engaging in a spot of people watching, with the added challenge of capturing what Henri Cartier-Bressan would have described as the ‘decisive moment’.

My early efforts were all about trying to catch that magic moment, or a particular expression. Since attending other workshops on the subject with Damien Demolder I’ve developed a taste for a more graphic look, using light and architecture to add drama to my images. Damien also encouraged me to get closer to the people I’m photographing, which takes nerve. It also gives me a huge thrill when I get that killer shot though!

(Click on any of the images below to see them larger)

My plan this year is to spend more time developing my street photography. I know the look I’m seeking, but it’s hard to achieve when you’re just snapping a few frames en-route to somewhere else. When the weather (strong sunshine or pouring rain are my favourites for this genre!) and time allows I intend to get out and shoot for whole days to really improve my street portfolio.

Back in January I spent a morning at Speakers’ Corner in London. This was wonderfully liberating. You’ve got lots of extrovert individuals who want to be seen and heard, and who generally don’t care whether you take their photo. Add in casual observers and the folks who actively engage with the speakers and you’ve got a heady mix for any street photographer!

How to focus my specialisms?

This was the eureka moment I had in the car, driving home from the supermarket.

I’ve been a member of our local camera club for nearly six years now, regularly participating in the many competitions. I’ve had some successes, but many failures too. Photography is such a subjective thing that one judge will love an image, and give it 20/20, while the next will hate it. Ultimately I’ve learnt that you have to enter images you enjoy and take the rough with the smooth.

Over the years I’ve entered everything in club competitions, from wildlife to motorsport, architecture to abstract. My plan for the coming year is to be more specialist, focusing on my favourite two genres - architecture and street photography. Who knows if it’ll be a successful strategy in terms of prizes, but at least it’ll enable me to get more feedback on the images I love.

Getting off to a good start

I employed my new strategy last month in our end of year exhibition competition, entering a mix of architecture and street images. Then I held my breath and hoped for the best! To my astonishment, my chosen pictures performed better than I’d expected and I won prizes with the three shown below. I doubt my luck will hold for the whole year, but I enjoyed focusing my selections in the two areas

So there’s my strategy for the coming year. Will it work? I’m hoping it will at least help me improve my skills in these two photographic genres. Creating new images every single day for ten years gave me a fantastic grounding, and taught me a lot. Now it’s time for me to hone my skills in a more deliberate way.

What next?

Well, I’m already planning a new project, which I’ll talk about in another post. I’ve also booked to attend a workshop with Astrid McGechan and Charlie Waite in Liverpool next month. The chance to learn from two photographers whose work I love, shooting architecture in a city I’ve always wanted to visit was too good an opportunity to pass up!

In the meantime, I’ll continue trying to produce ever better images and will do my best to care less about whether a competition judge likes them or not!

To follow my progress, please do subscribe to my blog, where I post new pictures regularly.

Looking back

It’s now three months since I completed my ten year long photo-a-day project, over on Photoblog. Since then I’ve unashamedly taken some time off, although it was a little while before I could do so without feeling guilty! I’m still taking plenty of photos, but it’s very liberating to know that if I have a particularly hectic day, or I’m simply running low on energy, I don’t have to find something to shoot.

Having had a little time to take stock, I’ve enjoyed the process of looking back through a decade of daily photos to see what I’ve learnt. I thought it might be an interesting exercise to share a selection of my favourite photos from the last ten years.

2008

I shared a mere 429 images during 2008 - just a fifth of the number I’ve published in 2018. Of course, I didn’t actually begin shooting something fresh every day until November 2008, but I thought I’d pick a selection from the whole year in any case.

2009

2009 saw me properly into the swing of shooting and posting every day. I’d shoot anything and everything, although wildlife and motorsport were already definite favourites.

So, what’s changed in a decade?

One thing that struck me was the change in the cameras I use. When I started my blog I shot with a Canon EOS 400D - an entry level DSLR. It did what I required of it then, but over the years I gradually upgraded, through faster, more powerful, DSLRs, culminating in a full frame Canon 5DIII in 2013.

Early in 2015 I bought my first mirrorless camera, a Panasonic GX7, and I quickly learned that bigger wasn’t always better. The smaller form factor was liberating and I gradually found myself using the smaller camera more than the bulky DSLR. As of early 2018 I’d ditched all my Canon gear and I now shoot with a duo of Panasonic cameras. They do different things well, so I choose my camera according to what I’ll be shooting on a given day.

Looking through my photos, I suspect most people would be hard pressed to tell which camera was used when - and that’s as it should be. After all photography should always primarily be about the photographer, not the gear used. However, there are photographic genres which demand a particular type of gear and I find the cameras I use now are the best tools for me.

Of course, the biggest change in ten years has been the quality of my pictures. Practising every day has had a very beneficial effect on my skills and eye. Yes, there’s plenty more still to learn, but I would like to think there’s been a distinct improvement in the quality of my pictures. 

2010

This was the year where I began to challenge myself a little more. In August I went on a course, with photographer Richard Cannon, focusing on people photography - something I’d always shied away from. Even today I don’t count myself as a portrait photographer, but I do a lot more candid people photography, some of which still stems from that course.

I also made my first forays into airborne action photography, be it aircraft or birds. Both hold their difficulties, but I still feel that birds in flight are one of the greatest technical challenges for any photographer.

2011

2011 saw me take my first real steps in street photography, a genre I enjoy more and more as the years go by. I love people watching and it’s a wonderful challenge to try and capture that extraordinary moment in an ordinary scene. Looking back I can see I still had a lot to learn about candid people photography but I’d made a start!

2012

By 2012 I’m beginning to see more architecture creeping into my output, alongside a whole host of other genres. In the summer I went to two events at the London Paralympics, including the track and field events at the Olympic Stadium, and I loved being able to capture some of the action.

A change of scenery

2013 brought a big change in my working life, as we relocated from Sussex to Essex. Losing most of my school teaching gave me time to explore, and for a long while it felt like one big holiday! Over the years since our big move I’ve gradually built up my freelance work, so I now travel around the country much more than I used to. This has proved very beneficial to my photography as I’m fortunate enough to have a never ending supply of new places to photograph.

2013

2014

This was something of a eureka year for me. I attended a workshop with wildlife photographer Andy Rouse at the British Wildlife Centre, where the main focus of the day was our autofocus skills. As a result of that day I changed my technique, which I feel has had a long term beneficial effect on my work. I also came away from the day with one of my all time favourite images - Frodo the fox giving me a very knowing look!

Personal projects

I also started a new personal project in 2014, which continues to this day. A friend shared some photos of a church in the City of London and this spurred me to do some reading. I learnt that there used to be as many as 75 churches within the square mile of the City of London, although many were destroyed or damaged during both the Great Fire of 1666 and the Blitz. Even so, over fifty remain today and I decided to photograph all of them. It’s been a fascinating experience and I still have a dozen or so to photograph before I complete my project. I hope to create a self-published book once I’ve finished, so watch this space for more information when I get that far!

2015

2015 was the year where I started to downsize my gear - mostly thanks to the National Trust! In 2014 I started a new job with the National Trust at Hatfield Forest. Having free access to all the National Trust’s beautiful places offered lots of photographic inspiration, resulting in many photos. Late that year I won the NT Staff and Volunteers photo competition, with prizes supplied by Panasonic. This led to me shooting with a Panasonic GX7 mirrorless camera, particularly when travelling, and I got hooked on the ‘less is more’ ethos of mirrorless cameras. Yes, a large DSLR camera will offer the ultimate image quality, but having the option of using a smaller, lighter camera made me more likely to be ready for unexpected photo opportunities and this is very liberating.

2016

Architectural beginnings

By 2017 I’d been working for the National Trust for three years, alongside my freelance music work. During my travels I’ve visited dozens of NT properties, from nature reserves to stately homes, taking photos along the way. I’ve gradually come to love the challenge of telling the story of places I visit through the pictures I take, and 2017 saw a big increase in the quantity of architecture in my annual output.

2017

2018

This was the year when I finally ditched my Canon DSLRs entirely. January saw the release of the Panasonic G9. I could see this was the camera I’d been waiting for, which would allow me to shoot action - previously the Canon DSLR I’d kept alongside my mirrorless camera had had the edge when it came to speed.

Once I’d bought a G9, there was no need to run two different systems, so my old Canon 7DII went to a new home - with my Dad! I now shoot with a brace of Panasonic bodies (the G9 and a smaller GX8), both of which use the same lenses. This smaller set up is perfect for when I’m travelling and I swap between them, depending on the subject I’m photographing.

Where next?

Since finishing my prolonged 365 project, I’ve been lucky enough to be featured in Amateur Photographer magazine, which was a wonderful way to start the new year!

I’m still taking photos regularly, although the pace has slowed considerably since the start of 2019. Rather than pressuring myself to take photos every day, I aim to have at least one day a week when I take some high quality images. I’ve been focusing more on architecture photography and have plenty of plans for the coming months.

Would I do it again?

Never say never! However, I’m quite happy concentrating on quality rather than quantity for the moment. I think the slower pace has already resulted in an improvement in my photography and I hope this will continue. There are days when I miss using my camera so much, but it’s still always in my bag so there will continue to be unexpected photo opportunities that I grab spontaneously! Here’s to the next ten years….

All things must change....

Think about your life over the last decade for a moment. Is there something you’ve done every single day, without fail? I’m not talking about mundane tasks, like cleaning your teeth or doing the washing up, but genuinely creative activities. I bet most people would be hard pushed to think of anything, unless they work in a creative industry or perhaps play a musical instrument.

This November will mark a significant anniversary in my photographic life. Back in 2008 I started a year long photo a day project. Ten years on, I’m still at it. That means for 3652 consecutive days I’ve taken at least one fresh photo and posted it on my blog!

Where did it all start?

I started my Photoblog in December 2007, initially posting sporadically. Over the months that followed I began to share photos more regularly, although not daily.

The first photo I ever posted to my Photoblog, taken at Marwell Zoo. Not great art, but you’ve got to start somewhere!

As a musician I’m used to the concept of practising regularly. To hone your technical and musical skills it’s important to play your instrument as often as possible, and I figured there was no reason why that shouldn’t apply to photography too.

Eventually I slipped into the habit of shooting and posting every day and 8th November 2008 was the the last time I didn’t share a daily photo. I never intended to do a 365 project (shooting every day for a year) but it was something I slipped into, almost by accident!

One year in...

During that first year I learnt a lot of photographic survival skills. Inevitably there were times when I lost motivation, but somehow I always found something to photograph, no matter how mundane. I reached November 2009 and considered whether to stop there. Despite the inevitable ups and downs I figured I’d miss the regular shooting so I simply kept going, with no finish line in mind.

So what did I learn?

As I suspected, my skills did indeed improve with daily practice.

Looking back through my blog, there are plenty of shots from 2008 I wouldn’t dream of sharing now. Today I like to think my photos have more polish thanks to improvements in both my technical and creative skills. Shooting regularly has also led me to try new genres of photography, sometimes with surprising results. Who’d have thought I’d get into street photography, but it’s now one of my favourite genres!

A few years ago I’d never have had the courage to get this close to strangers on the street - now I love street photography!

Along the way I’ve learnt lots of useful practical skills, many of which are useful to all photographers, regardless of whether you’re trying to maintain a 365 habit like me.

Always carry a camera

This one’s obvious when you think about it. Many people do this in any case, with a camera on their smartphone. Despite this convenience I still prefer to use a camera if possible, so I’ve got into the habit of always carrying at least a camera body and one lens. Over the years my camera kit has changed quite substantially, from a Canon DSLR to a much smaller mirrorless setup. This certainly helps when it comes to portability and I no longer have to lug around a huge bag!

I would never have been able to take this photo of Bosham Harbour if it weren’t for my habit of always carrying a camera. Quite by chance I was in the right place at the right time and had my little mirrorless camera with me.

Shooting every day doesn’t need to be time consuming

People often assume that taking and sharing a photo every day consumes a large part of my day. Yes, there are days when I choose to take more time, but it doesn’t have to. For instance, today I took a quick snap of a cosmos flower in our garden, spent a couple of minutes tweaking it in Lightroom. Combine that with writing a little text and posting to Photoblog - all done in no more than 15 minutes. I probably spend longer drinking coffee each day!

Photos can be found anywhere

I’ve been known to photograph all sorts of unlikely subjects to fulfil my daily picture remit, from forks to manhole covers! If you try hard enough, there’s a photo to be found in anything and everything.

There are days when I find myself travelling home from work, pondering the fact that I haven’t yet touched my camera, and something will jump out at me. For instance, on Sunday I noticed the moon as I drove home from a rehearsal, so I stopped to take a photo. A little local knowledge meant I knew of a suitable lone tree nearby so I stopped again further down the road to shoot that. A few minutes spent in Photoshop to combine the two when I got home, and I had a moonrise picture which wouldn’t have been possible if I hadn’t opened my mind to the possibilities as I was driving.

The art of editing

And I don’t mean editing in Photoshop!

Some days I’ll go out for the whole day to take photos, coming home with perhaps hundreds of images on my memory card. As the years have passed I’ve become much more efficient, and ruthless too, when it comes to selecting which of those pictures will be shared on my blog.

When you start out, every picture seems valuable and you’re reluctant to bin anything. As my photographic eye has developed I’ve come to recognise what makes one photo more successful than another. Yes, there will be some pictures that make the cut simply because of the emotional relationship I have with the circumstances surrounding the moment I shot them. There’s nothing wrong with that, but if you really want to develop you have to learn to be ruthless.

You only have to search Flickr to see people who share fifty incredibly similar photos, all telling the same story. I like to think I’ve moved away from that type of sharing now. Yes, I’ll come back from a shoot with several near-duplicate shots, but I’ll whittle them down to the very best one or two. This stops my audience getting bored and ensures I show just my very best work. I won’t necessarily delete all the rejects, but the world really doesn’t need to see dozens of almost identical meerkat photos!

A pair of courting fulmars from my trip to Orkney in March. I have lots of fulmar pictures, but this one made the cut because of the sense of tenderness between the two birds.

Not every photo has to be great art

Much as I’d love to share a piece of fine art every day, sometimes life just gets in the way. On those occasions I’ll find something that interests me, or perhaps document a little of what I’ve been doing that day.

This has got harder as the years have gone by and I’ve become pickier about the quality of my pictures. Some days I’ll come to the conclusion that I’m hopeless and my pictures are complete tosh. Then I look back to 2008 and see how far I’ve come and realise it doesn’t matter if I have the occasional off day! People often still find quite mundane photos interesting if there’s a story behind them, and sharing your failures can be helpful to others too.

I shared this picture recently to show how I digitise my film negatives. Not great art, but others found it helpful and it sparked quite a discussion on Facebook!

To continue or not....

This has been a difficult decision. At the end of year one I instinctively knew I’d miss it if I stopped there. Each time I reached an anniversary I thought long and hard as to whether to keep going. Five years might have been a sensible time to stop, but I was still enjoying myself so I kept going....

More recently the pressure of shooting every single day has begun to take its toll a little. My working life now consists of many more different elements (music, photography, writing and working for the National Trust to name a few) so I find myself juggling many more deadlines. I still enjoy photography enormously, but there are days, usually when I get home after a whole day of conducting somewhere far away, without a single photo in my camera when my heart sinks. I always find something to shoot though, even if I’d rather flop on the sofa with a cuppa!

Ten years seems a natural time to call a halt on shooting and posting every single day - after all, there are many crimes for which you’d do less time!

Why stop now?

Over the last few years I’ve been working on a long term project, photographing the dozens of churches in the City of London. I’ve really enjoyed this and would like to have more time to devote to projects. Freeing myself from the constraints of shooting something fresh every day will help with this.

The geometric staircase at St. Paul’s Cathedral - part of my City Churches project

I’d also like to work towards my LRPS qualification. For that I need to have a group of ten really strong images to display. Yes, I could dive into my sizeable archive for these, but they wouldn’t necessarily make up a coherent collection. By giving myself a little more free time I can really plan these images and make sure I achieve a better quality than I would if I shot things in a hurry, as I so often do.

Another recent enthusiasm is shooting on film again after a gap of fifteen years. I’ve got a small collection of film cameras I use and I’m really enjoying the results. However, film isn’t as instantaneous as digital. That means if I’m shooting on film I also have to carry a digital camera to take extra photos to share that day. I’m relishing the idea of having the occasional day when I shoot just with a film camera. Don’t worry - I’ll still share the photos (if they’re any good) but it may take a week or two before I get them developed!

A photo from a recent foray into film, taken on an old Olympus Trip 35 from the 1970s

What next?

Fear not, I won’t be disappearing from my Photoblog entirely!

Once I reach the ten year mark, on 9th November, I’ll still be posting new pictures very regularly. I may miss the odd day, and it may be that I don’t necessarily publish images the day they were taken.

I will still carry a camera with me everywhere I go as you never know when a photo opportunity will arise. After all, fortune favours the prepared mind, as Louis Pasteur once said!

Will I ever go back to my 365 project? Never say never - but I think it’s time for a break for now. Nothing in life should remain the same forever, especially not photography!

Learning to teach

As someone who’s spent their entire working life in education of one sort or another, the last few months have given me some fresh things to think about.

For a while now I’ve written photographic education articles here and www.photoblog.com but preparing for my photography workshops has made me think in a different way. Writing for education and actually teaching in person have subtle differences. If you stand me in front of a group of recorder players I can easily think on my feet and come up with multiple ways to help them achieve the best possible performance. After all, this is what I’ve done professionally for the last 25 years. In a written lesson, one can go into things in more depth, explaining technicalities, in the knowledge that students can come back and re-read things again at their leisure.

Education in action during my first workshop

Education in action during my first workshop

Photography is also something I’ve done for a long while - I received my first camera as a gift way back in 1981. However, for more than two decades I simply pointed my camera in the right direction and hoped for the best - there was absolutely no technical know-how or artistry involved! The turning point for me came with the advent of digital when I got my first camera in 2004.

I quickly realised I could learn from my mistakes much quicker with digital - the LCD screen’s instant feedback meant I could immediately tell if I’d ‘got the shot’.  This excited me and I quickly wanted to understand more about the technical side of photography. Gradually I picked up the basics, getting my head around the interaction between apertures and shutter speeds, and learning to actively compose my photos.

Over the years I’ve done lots of reading about photography, listened to what must be days-worth of podcasts on the subject, and been on a few weekend courses. Along the way I started a year long photo-a-day project which I’m still doing now, almost a decade later. But that’s a story for another day... It has taught me is that practice really does make perfect, or closer to perfect at least.

Taking control of my shutter speed enabled me to freeze the action here

Taking control of my shutter speed enabled me to freeze the action here

​My persistence means my skills have improved hugely, and I now have a really good grasp of how to make my camera do what I want rather than accepting what it presumes is correct for a given situation. I think this has put me in a good position to help others do the same.

Meeting the students on my first workshop a month ago, I saw an echo of myself 15 years ago. All were shooting using automatic mode, feeling bewildered by the myriad of settings their cameras offered. Modern cameras are basically small computers, with levels of sophistication that would have been unimaginable even 20 years ago. It’s no wonder it takes a while to get to grips with them!

At that moment I realised I’d been thinking along the right lines during my preparations for the workshop. I’d put myself back in my own shoes, all those years ago, asking myself what knowledge would have helped me to be a better photographer then. My conclusion was a mix of technical know-how and practical tips. So, I thought logically through the things we needed to cover and how to present them in a helpful order.

All along, my aim was to get my students off automatic mode so they could take control of their cameras and produce the pictures they wanted. This meant having at least as basic grasp of how apertures and shutter speeds work. I clearly recalled how I found apertures to be utterly illogical at first. The solution was to come up with a simple way to remember how they worked. In my case this was a rule telling me a small f number gave me very little in sharp focus and a big f number would give me lots of depth of focus. It may not be scientific but it was a simple way to remember cause and effect, which helped me at the time!

Another ‘must teach’ subject on my list was exposure compensation. Modern digital cameras will get things right on auto mode much of the time but they are designed to work best in certain situations. Try shooting a black cat in a dark place (something I often do!) on auto mode and a digital camera will probably give you a photo of a grey cat in a moderately lit place! The solution is to take control of the exposure and tell your camera that you really do want the photo to be dark.

Using some negative exposure compensation helped me ensure this scene came out as dark and atmospheric as my eyes saw it to be

Using some negative exposure compensation helped me ensure this scene came out as dark and atmospheric as my eyes saw it to be

​I quickly realised that giving my students all this technical info was all very well but I knew that in the same situation I would struggle to remember everything. A handout was needed. Putting all my thoughts into neat, easily digested bullet points for future reference was helpful to me too, clarifying how I would explain things in person.

So what about the thorny subject of composition? Talking to my students, it was clear that for many of them composition wasn’t something they thought about much. Once again, I saw myself in my youth, aiming my camera blindly, hoping something good would result. As often as not, my horizons were wonky and the subject of my photos were placed slap, bang in the centre of the frame with a lamp post poking out of their head!

From years of self education I now know there are some simple ‘rules’ one can use to create more satisfying photos. It may be the rule of thirds, or something as simple as scanning the frame for unwanted intrusive objects before pressing the shutter button but it’s not rocket science! In time my compositions have become more instinctive but those rules are still there if I need them.

Something as simple as placing your subject can give you a more interesting photo

Something as simple as placing your subject can give you a more interesting photo

My inner teacher knew that I needed some examples to illustrate my list of ‘rules’ and I spent a fascinating morning exploring my back catalogue for them. Going back, trying to figure out what was going through my head as I took a given photo was a sobering experience at times!

So have I learnt something through this process? Certainly! It’s made me look at the way I shoot with fresh eyes and become more aware of the times when I’m getting into a rut with my photography. It’s often said that you don’t really understand a subject properly until you have to teach it. It’s definitely been an educational experience for me and I hope my future students will benefit from this too.

I have two more workshops coming up at Hatfield Forest, on 13th June and 25th July. If you’re interested in taking better photos and getting to grips with your camera why not come along? Full details and booking info can be found here.

Panasonic LUMIX G9 Review

It’s not often I’m moved to review new equipment but, being an early adopter of the Panasonic G9 it seemed an interesting exercise and may be helpful to those now trying to decide whether to take the plunge and order one.

This won’t be a technical review, with charts and statistics but, instead, comments on my real world experiences of this camera. I’m very much a stills photographer so if you’re looking for comments on the video capabilities of the G9 please do look elsewhere. I may well try the video functions in time but for now I’ve focused entirely on its ability as a stills camera.

All the images are ones I've taken with the G9 over the last six weeks - please click on them to view them larger.

Before I start though, let me tell you a little of my background and my journey with mirrorless cameras...

Three years ago, I made my first foray into the world of mirrorless cameras. I loved my DSLR, a Canon 5DIII, but there were times when I wanted to travel lighter without compromising on quality. After shopping around, I plumped for the Panasonic GX7 with a 20mm prime lens. I gradually built up a small collection of prime lenses and loved the freedom the smaller form factor gave me. I subsequently upgraded to the GX8 and was grateful for the substantial improvements it brought.

Over time I found I used my mirrorless camera more and more, while my two Canon bodies sat unloved at home. Finally, I ditched the full frame camera in March 2017 but kept a Canon 7DII and a few long lenses for wildlife and action shooting. However, I could already see a moment coming when I would ditch DSLRs altogether and switch to an entirely mirrorless system - I just needed the autofocus and tracking abilities to catch up.

The new kid on the block

Fast forward to the 9th November 2017 when the G9 was announced and my hopes were raised.

I’d been hoping for an update to the GX8 which would fulfil my requirements as I love its rangefinder styling. But here was a DSLR shaped camera which apparently contained all the power I required. Some hard thinking was needed!

A chance to handle the G9 came later that month and Carol Hartfree, from Panasonic UK, did a great sales pitch, but not one I succumbed to at the time. I cogitated on the pluses and minuses for another month, all the time keeping an eye on photos being released by the Lumix Ambassadors. Ian Cook’s impressive sports photos were very persuasive, showing that if the camera could track a rugby player against a distracting background it would probably fare ok with my motorsport, aviation and wildlife shooting.

Finally, on Christmas Day, instead of watching the Queen’s speech, I went online and pre-ordered my G9!

Fast forward to early January and my new camera arrived from WEX - an exciting moment. I bought just the body as buying yet another lens seemed just too much of an extravagance.

First impressions and handling

My first impression was just how DSLR-like the G9 felt in my hands. Of course, it’s considerably lighter and less bulky than either of the Canons I owned. I think it strikes a really good balance between being compact, yet large enough for the spacing of the controls to work ergonomically. In terms of build quality, it’s sturdy and weather sealed. That said, I’ve used my GX8 in some pretty heavy downpours and it’s never missed a beat. I’m no fair-weather photographer so knowing I can continue to shoot in harsh weather without worry is great.


One feature of the G9 which has drawn a lot of publicity is its small LCD control panel on top of the camera. This feature is entirely normal on all but the most basic DSLRs but, so far, has been missing from mirrorless cameras. I know some people have raved about its addition, but I don’t have strong feelings either way. It’s handy to be able to check your current settings but I could cope quite easily if it weren’t there.


Another new feature on the G9 is its double decker mode dial. The top half is a normal mode dial, where you choose whether to shoot in aperture, shutter or manual mode. Beneath that is a smart red ring to show the camera’s flagship status – nothing practical about this but it does looks pretty! The lower deck features another dial, giving quick access to various settings which, on previous models, have been accessed via a menu. This gives me the ability to instantly pick continuous shooting mode, 6K mode, bracketing, timelapse or delayed shutter release. I love this feature, which means I can respond to changing conditions almost instantly. Each of these options can be personalised to suit the photographer.

Getting to grips with the G9

The new scroll wheel (bottom right) and joystick (top left)

The newly designed grip is excellent and it’s comfortable, even on long days spent shooting with a big telephoto lens. All my fingers fit onto the grip and the shutter button is nicely placed. The other buttons seem sensibly positioned, although I’ve had to rewire my muscle memory with some of them. The playback button, in particular, has taken a bit of getting used to. The inclusion of a scroll wheel is really handy for speedy adjustment of the focus point size. I generally move the focus point around with my right thumb on the touchscreen, but the newly added joystick gives a useful alternative means of doing this.


Custom function buttons

The G9 has almost endless ways to customise the buttons and dials, along with some ‘soft’ function buttons which are accessed via the LCD screen. The front of the camera (just beneath the lens release) is home to a lever which can be customised to quickly swap between two contrasting settings. I’ve left mine set, as it was from the factory, to alternate between mechanical and electronic shutter.

One of the first things I did was to reassign exposure compensation to my G9’s rear dial. Coming from a camera with a bespoke compensation dial I certainly didn’t want to have to use two controls to change the exposure of my images. The only slight niggle is the fact the original exposure compensation button can’t then be reassigned to something else. I guess the function of the three buttons on the top of the camera must just be hard wired in.

Touchscreen tribulations

For my hands the stretch to the G9’s screen is greater than on the GX8 but I’ve quickly learned to extend my hand to reach the nether regions of the screen. Having touchscreen focus set to Offset rather than Exact is helpful here, as it removes the need to reach the far left hand edge of the screen. Another frustration (albeit a first world one!) was the discovery that the cashmere flip-top gloves I normally use in winter don’t work with the G9’s touchscreen. On the GX8 there’s enough skin contact through the fabric to select my focus point but on the G9 they simply don’t work at all. I guess Panasonic must have used a different type of screen on the newer camera.

Luckily, I’ve found some alternative gloves which work a treat. They’re thin enough to be able to feel all the buttons, the touchscreen responds perfectly, and I can even wear fingerless gloves over the top if I need to. If only I had better circulation it wouldn’t have been such an issue!

A viewfinder to die for

When I first handled the G9 one of the wow factors was the enormous viewfinder. 

I know many DSLR purists are sniffy about electronic viewfinders, but I think this is generally because they’ve never tried one. The G9’s viewfinder is truly awesome. First impressions give you the sense you’ve almost climbed inside the camera, into an alternate reality - it really does feel immersive. There is a slight pincushion effect around the edge of the viewfinder image but not enough to cause concern and it certainly doesn’t translate into the images the camera produces.

The electronic viewfinder image is bright and I get no sense that I’m not seeing a true to life scene. The viewfinder’s refresh rate is very fast and I’ve noticed no lag. The other big advantage of using an EVF is its ability to show the picture as it will be captured. In an optical viewfinder you don’t see the real-time effect of any exposure compensation, making things more challenging when shooting very dark or light scenes. With an EVF you see the effect of any exposure compensation adjustments immediately, making it easier to achieve the right result without experimentation.

The G9 has so many thoughtful touches but there is one which will be particularly useful for those who regularly shoot in the dark. Panasonic have added a Night Mode, where the LCD screen and EVF can be set to only show red tones. While this can make colour photography a challenge, it does mean that your night vision won’t get ruined every time you check the viewfinder or screen.

Panasonic giveth and Panasonic taketh away....

One feature I do miss from my GX8 is its tilting viewfinder, but I guess one can’t expect to have everything! The G9 EVF does have a rather clever trick up its sleeve though. Because it’s so large Panasonic have added a button to the side which reduces the size of the image inside the viewfinder. This may seem odd, but for those who wear glasses it can be really helpful. Glasses move your eyes away from the viewfinder cup, making it harder to see the whole frame in one sweep. Reducing the size slightly makes this easier and, as a part time glasses wearer, this will be useful.

A shot like this would have been easier with a tilting viewfinder but the articulated LCD screen proved a worthy alternative!

As a final comment on the viewfinder, I have noticed that its placement on the camera is really helpful. The GX8 EVF is positioned on the left-hand side of the camera. For street photography this is useful as you can shoot with both eyes open, allowing you to scan the street for action that’s about to enter your frame. However, when shooting with an extreme telephoto lens, the fact that the viewfinder isn’t aligned with the lens makes it harder to locate distant subjects quickly. I’d never really thought about this until I used the G9, where viewfinder and lens are aligned.

A stealthy camera

Mirrorless cameras have one function which just isn’t possible on a DSLR - silent mode. The ability to switch to an electronic shutter is a huge bonus in situations where the click of a mechanical one would be intrusive - when photographing a concert, for instance. It’s not without its disadvantages though. Because the electronic shutter doesn’t capture the whole scene instantly, banding can occur under fluorescent light, which flickers at a regular speed. I’m wise to this now and if I think the lighting will cause problems I’ll take a couple of test shots before I shoot anything critical.

Fortunately, the G9 has another ace up its sleeve - an exceptionally quiet mechanical shutter. I didn’t really consider this until I took some photos in the peace of a church and it struck me how subtle the noise is. No, it’s not silent but it’s certainly quiet enough to be unobtrusive in all but the quietest of places.

Photographing in Thaxted Church made me realise just how quiet the G9's shutter button is

Speaking of the shutter, I don’t think I can recall ever encountering one as sensitive as that in the G9. Initially I found myself taking inadvertent photos of all sort of rubbish - mostly my feet - as I caught it by accident. Over time though I’m doing this less and the super-soft touch is a bonus at slow shutter speeds as the gentler shutter press movement is much less likely to cause camera shake.

Image quality

Having covered the practical matters of handling and usage, it’s time to assess the G9’s image quality.

In recent years micro four thirds cameras have improved enormously and now rival many DSLRs for image quality. The G9 doesn’t have an anti-aliasing filter, allowing for more detail and clarity than images from the GX8. The colours are beautiful and the clarity of images from the camera is astonishing.

I know many DSLR users will boast that their cameras have better dynamic range than those with smaller sensors. In my experience though I haven’t found this to always be the case.

In the days when I was shooting with the GX8 and a full frame DSLR I often found I could achieve a wider range of tones on the smaller camera. Frequently I’d be able to pull detail from highlight areas in GX8 RAW files where I’d have to shoot several different exposures and combine them to achieve the same result with my Canon 5DIII. This is certainly also the case with the G9 and I remain content with my choice to downsize.

I was able to pull plenty of detail out of an apparently bland grey sky here, thanks to the G9's dynamic range

Yes, there is a higher level of noise at extreme ISO settings on the G9, but I have yet to find this presents me with an insurmountable problem. My fast prime lenses allow me to keep the ISO settings lower much of the time, and when this isn’t possible, I’ll happily shoot up to ISO6400 - a full stop faster than on the GX8. The resulting images tend to be grainy in the shadow areas (which can be remedied in post processing) but detail is retained where it’s needed. I believe this is one area where Panasonic worked hard to retain more detail at high ISO settings on the G9, particularly in comparison to the videocentric GH5.

This was shot at ISO6400 but there's still plenty of fine detail in the bluetit's feathers

Stabilisation

Since switching to a mirrorless system I’ve really noticed how much easier it is to shoot at slower shutter speeds. A large part of this is the smaller, lighter form factor but in-body stabilisation (IBIS) helps too. The IBIS on the G9 is, frankly, phenomenal! I haven’t fully tested its limits yet but I’m aware of other photographers who are able to shoot exposures of more than a second and achieve sharp results. I really noticed the benefits when I was photographing the chapel at Gonville and Caius College in Cambridge soon after I took delivery of my G9.

The light levels were low and there were some shots which just weren’t possible with a tripod through lack of space. Shooting with a small (unstabilised) prime lens I was able to take crisp pictures at 1/5 of a second, allowing me to set a lower ISO and reduce the risk of noisy images. I’ve never been able to do this on any other camera.

Being able to hand hold the G9 at a stupidly slow shutter speed allowed me to shoot this at f8 and achieve a good depth of field, rather than having to shoot wide open.

When shooting with Panasonic lenses which are compatible with the manufacturer’s Dual IS 2 technology (such as the latest versions of the 12-35mm and 35-100mm f2.8 lenses) I have no doubt much slower exposures are possible too. When paired with such lenses the dual IS is reckoned to give no less than 6.5 stops of stabilisation. I understand this is as far as stabilisation can currently be stretched, as beyond that the rotation of the earth begins to counteract it!

The moment when Dual IS 2 really comes into its own is with super telephoto lenses, such as the Leica 100-400mm and the new 200mm f2.8 prime. I’m not lucky (or rich) enough to own the prime lens but the 100-400 pairs beautifully with the G9. For most images I shoot with this lens a high shutter speed it necessary because the subject is moving fast – for instance wildlife or motorsport. However, I was able to use a slower shutter speed than normal when photographing a Spitfire revving up its engine on the tarmac at Duxford recently. This blurred the propellers nicely but the aircraft (which was stationary) remained sharp.

Autofocus tracking

One of my reasons for buying a G9 was to consolidate my kit into one photographic system. I wasn’t prepared to do that until I was convinced a tool existed that could at least match my Canon 7DII for focus tracking and speed of shooting. I’d seen plenty of sample images online but there’s nothing quite like trying a camera for yourself so I took the plunge. I’m happy to say I haven’t been disappointed. I’ve now used the G9 to shoot wildlife, aviation and motorsport and in all three genres it behaves impeccably.

In common with any high-end camera designed for action shooting, the learning curve has been pretty steep. A chat with sports photographer Ian Cook gave me some useful pointers and I’ve comprehensively experimented with the myriad of focus settings. I’m now beginning to find out which modes work best for which genres of photography, although my methods will no doubt evolve further over time.

Settings for static subjects

For static subjects I invariably use a small single focus point and this works perfectly, as you would expect. In dark conditions, where I’m shooting handheld I will also engage AFC mode. This is a trick I learned in my Canon days from wildlife photographer Andy Rouse. The reason for this is that, while my subject (a statue in a dark corner of a church for instance) won’t move, I might do as I breathe. Using AFC allows the camera to adjust to any micro-movements and gives me a better chance of a sharp image. Obviously, if the camera is on a tripod and my subject is static this is not necessary. I’ll also use AFC when photographing a subject that’s a static distance from me, but which may move a little – for instance a bird sitting on a branch.

Shooting a black cat in a dark room is about as hard as it gets for autofocus but the G9 didn't miss a beat

Moving subjects

When it comes to action I’m still learning but I’ve established that the G9’s tracking mode just isn’t very good! For a single moving subject against an uncluttered background it can cope, but how often do we get that combination? Instead I generally choose between a single focus point or use a combination of multiple focus points, both in combination with AFC mode. A single focus point can be made any size you like so I’ll often set a pretty large one at the position where I want my subject to be in the frame. I then simply ensure I keep the subject beneath it and pan with the movement. This works really well for aircraft in flight and was a technique I used successfully on the GX8.

Another option I’ve tried is to select a group of focus points, deciding for myself how big a spread they cover. This works well, but gives a little less control over which points activate as I pan with the action. The final option is to use all 225 focus points and let the camera follow my subject across the viewfinder. This works really well for action where the background isn’t cluttered. I suspect it might struggle when faced with a busy background though. I can see I’m going to have to experiment further with this when I shoot motor racing at Goodwood next month.

The light has been uniformly awful since I bought my camera but, even so, I was able to track this Canada Goose taking flight. Roll on springtime....

The other parameter I’ve experimented with is using back button focus. I’d never used it before but Ian Cook strongly recommended it as the way forward. There have been times when I forgot my altered settings, leaving me wondering why the autofocus isn’t responding to my ever more frantic presses of the shutter button! Of course, that’s simply my inexperience of back button focus showing, and it doesn’t take me long to realise my mistake. Of course, the moral of that story is never to change your settings so radically for a critical shoot!

I’ve been impressed with the results of back button focus, but have found one flaw. I habitually use my right thumb to select my focus point on the touchscreen. Of course, this doesn’t work if my right thumb is also supposed to be on the AF/AE lock button to activate autofocus. That said, on occasions when I’m using a monopod it won’t be a problem as I can use my left thumb to set the focus point instead. I will continue to try both focusing methods and no doubt will come to a conclusion with more time and experience.

An extra setting I’ve modified for AFC mode is the focus/release priority, setting it to release. When shooting fast action there are always going to be moments when the camera simply can’t acquire focus quickly enough. With AFC set to focus the camera simply refuses to shoot until it can find focus, resulting in missed shots. Selecting release instead means you may get the occasional unfocused image but the camera quickly reacquires focus and invariably I’ll only lose one or two shots in a series of multiple frames.

This spinning car at Snetterton was one of a string of 28 frames I shot when things began to go wrong. Of the 28 shots there were only three which missed sharp focus.

The need for speed

With the G9 being marketed as a camera for wildlife and sports shooters, the subject of speed was always going to be crucial.

In terms of autofocus I can’t fault it. The focusing is quick and accurate, locking on pretty much instantaneously. The autofocus time is supposed to be 0.04 of a second but I have no way of checking that. All I know is it does everything I ask of it, incredibly quickly!

This robin, hiding from me in a beech hedge, should have challenged the G9's focusing abilities, with distractions all around, but it locked on swiftly and accurately.

As for continuous shooting speed, the possibilities are almost endless….

With the mechanical shutter in action and continuous autofocus engaged I can shoot up to nine frames a second, or twelve with single AF. The buffer can accommodate sixty RAW pictures before filling up so you’d have to be a pretty ardent ‘spray and pray’ merchant for that to be insufficient! Nine frames a second is plenty fast enough for most subjects I shoot but that’s not all this speed machine can do.

The mechanical shutter was more than fast enough to keep up with the cars on track at Snetterton

Engaging the electronic shutter opens up yet more possibilities. Once you’ve done this you can shoot no less than twenty frames a second with continuous autofocus and a mind boggling sixty with single AF. I’ve tried the slower of these two on a couple of occasions, but it was so hard to control how many shots I took that I ended up filling the buffer before I could say Jumping Jack Flash!

One situation where I may persevere with this is using an additional option called Pre-Shutter mode. Here the camera saves the eight frames before you fully depressed the shutter button as soon as you start shooting properly. It may seem a rather niche feature but when photographing birds it can be a helpful tool for catching the moment of take-off. Normally, by the time you realise a bird is taking flight and press the shutter button the moment has gone. This way you can respond as speedily as you are able, safe in the knowledge that the camera will also record eight frames before you react. It’s a slightly mind-bending concept but one that I will probably use occasionally.

A moment of avian bickering caught using the Pre-Shutter mode

Touch Shutter

One of my other favourite genres is street photography. With the G9 I’ve simply continued to use the same shooting habits I have with the GX8. On the street I select a largish single focus point, a fast enough shutter speed to freeze any movement, electronic shutter for stealth and the Touch Shutter setting. This way I can frame up my scene and wait for the right person to walk onto the stage I’ve set. When this happens I simply touch the LCD screen at the point where their face is and the camera focuses and activates the shutter in one seamless action. It works a treat and, because the camera isn’t up to my eye, my unsuspecting subject is usually oblivious to the fact that I’ve even taken their photo!

A candid moment caught on the streets of Cambridge

Looking at the larger picture

Panasonic made much of the G9’s high resolution mode in their marketing material at launch. This option uses the sensor’s ability to move (part of the IBIS functionality) to create larger files containing more detail. During the exposure the camera shoots eight separate frames, moving the sensor slightly between each one, and then stitches them together in camera to create either a 40 or 80-megabyte file. I’ve been impressed with the results, but it does have its limitations. All high res photos must be shot from a tripod as the camera has to be completely still. In addition, the camera automatically employs the electronic shutter (once again, to avoid any mechanical movement) so the longest exposure possible is one second. This limits the subjects you can shoot but for anyone who needs the ultimate resolution in something like still life or architecture it could be a real boon.

My first experiment with High Resolution mode - Gonville and Caius College Chapel, Cambridge

Conclusions

So, am I pleased with my purchasing choice? Absolutely! Given the specification of the newly announced GX9 I’m really pleased I didn’t wait the extra three months for that in the hope it would be everything I wanted.

The G9 has proved to be perfect for the enormous range of subjects I shoot. For architecture its image quality and increased ability in low light is wonderful. For action it has proved to be more than up to the task of tracking fast moving subjects and achieving an impressive hit rate.

There is one area where I will definitely continue to use my GX8 and that’s for street photography. The size and bulk of the G9 makes it more conspicuous on the street. I suspect for many people its form factor will lead to the assumption that the user is a professional and, therefore, someone to be suspicious of. By contrast, shooting with the GX8 makes me look more like a tourist so I can get away with more candid shots. Of course, people in the know understand it’s the photographer not the gear that counts but they’re generally not the people I’m aiming at!

I hope my journey with the G9 will be a long and fruitful one. I’m certainly enjoying using it and feel sure I will continue to find extra abilities hidden away in its menus for a long time to come.


Looking back at 2017

It's been a while since I did a review of my photographic year so I thought perhaps it was time to repeat the exercise.

In 2017 I continued to publish my daily photoblog and this means I have a huge number of pictures to choose from - I published no less than 1911 photos on my blog last year. While this gives me lots of images to choose from, when picking my best ten, it also makes the experience quite brutal. For every picture I select, there are nearly twenty I have to reject, which means I have to be very ruthless!

Making a first pass through my 2017 pictures, I selected a couple of hundred images which I then whittled down quite quickly. It was an interesting experience doing this, as it really gave me an insight into the sort of work I've done the most through the year. I've continued with lots of architectural photography, as well as plenty of animals but I found it interesting to see the rise in the amount of street photography I've been doing.

Traditionally I've never been a people photographer, and portrait photography is still something I find challenging. However, I relish the opportunity to go people watching and I love to capture those 'decisive moments', as Henri Cartier Bresson called them. A day workshop in street photography with Damien Demolder in December 2016 gave me some new techniques to try and helped build my confidence when it comes to capturing candid moments. This shows in my final ten images and I never expected my selection would include so many people!

Anyway, here's my selection as it stands today. Of course, being objective about one's own work is difficult and it could be that if I went through the process at another time I may come up with a different choice. I hope you enjoy my 'ten best'!

"The extrovert"

A day in London in January resulted in two of my chosen images, both of them from the street photography genre but very different in style. I found this girl hamming it up outside Hamleys toy shop in Regent Street and just love the contrast between her and the rather disapproving lady in the background!

"Unseen"

Trafalgar Square is a great place for people watching. Everyone has a camera in their hand, even if it's just their phone, so you can catch candid moments without being noticed. This piece of street art remained from the previous day, partly eroded by the passage of tourists' feet and I was struck by the way she was being trampled on, unseen by passersby. I had to wait a while for the right combination of feet to walk through the frame I'd prepared but my patience was rewarded.

"Shooting a reflection"

April saw me return to the motor circuit at Silverstone for the World Endurance Championships. Naturally, I photographed the action on track but this can be tricky at Silverstone because of the high fences. As we sat in the grandstand on the start/finish straight I started to look for unusual ways to shoot. I spotted these two photographers over in the pitlane, beside a mirrored wall, and knew immediately I just needed to wait for the right car to drive into my frame and create the reflection I was after. 

Ightham Mote

I visit a lot of National Trust places on my travels, but few of them got my photographic juices going in 2017 like Ightham Mote in Kent. This manor house has been lived in for over 700 years and it was fascinating to be able to see the history of the building through the changes made over the centuries. This particular view was my favourite of the day, with those weathered cobblestones leading you through the arch to the stables beyond.

"Reflections of Monet"

Hatfield Forest has continued to be an inspiration to me and my camera. I'm so lucky to work there and it's fascinating to observe this beautiful place through the seasons. I noticed this scene view while eating my lunch there over the summer and the combination of reflections and those glorious lilies made me think of Monet. No doubt most people would have focused on the lilies and trees but for me the reflections were the star of the show. 

My other life, as a musician, takes me all over the country so I get to visit lots of new places. Back in the summer I had a rehearsal in the Oxfordshire village of Watchfield and I went for a stroll at lunchtime with my camera. In the church I found this scene and was enchanted by the combination of that beautiful light and the exquisite arrangement of flowers by the window. Such a simple image but one that still delights me six months on.

"Here's that rainy day"

I continued my explorations in street photography on a rainy day at the end of August. When I say rainy, it was actually monsoon like at times, so it took real dedication to drag myself into London, knowing I'd get soaked! That said, I also knew there was the potential for some wonderfully atmospheric scenes, with shiny pavements and folks dashing to get out of the downpours. As it happens, one of my favourite images came towards the end of the day when the rain had eased off. I found this spot near St. Paul's Cathedral and immediately knew it had photographic potential. I carefully set my composition and patiently waited for the right character to walk onto the 'stage' I'd set. This chap, smartly dressed in a business suit, was the individual I was after and I was able to catch him at the perfect moment, mid-stride.

Racing into the night

One of my favourite events of the motor racing year is the Goodwood Racing Revival. There's something so photogenic about these old cars and it's immensely exciting to see classics (some of them worth millions of pounds) genuinely being raced wheel to wheel. On the first day of the 2017 Revival we had copious amounts of rain, but that wasn't going to dampen my spirits! I knew there was the potential for something magical at the first race of the meeting, which runs from day into night, with a wet track and the cars's headlights illuminated. Sure enough, as the field charged away from the start line, the air filled with spray and a Jaguar E-type slid gently off track. Suddenly it was worth getting soaked earlier in the day, having to tog up in full waterproofs and stay until the end of a very long day to get this shot!

"Rush hour in MId-Wales"

Every year I'm lucky enough to visit Llanerchindda Farm, near Llandovery, to teach on a music course. As well as being set in the beautiful Welsh countryside, the farm has this magnificent view down the valley towards the Cynghordy Viaduct. It's an endless source of fascination watching the weather and light change over the viaduct. The pleasure was also enhanced last because they'd finally completed a restoration of the stonework and all the scaffolding had gone. One morning I got up before dawn and waited patiently with my camera for the sun to emerge. My patience was rewarded with this scene - the perfect combination of warm dawn sunlight and mist. The addition of a train crossing the viaduct at precisely the right moment was the icing on the cake!

"Please Sir, can I have some more?"

I never tire of watching the natural world and it's an added bonus when you can get as close as I did to this robin. I regularly visit the RSPB reserve at Rainham Marshes, in Essex, where there is never any shortage of bird life to photograph. Before Christmas I'd heard there was a particularly tame robin living in the old cordite storage area so I went along armed with some mealworms. Sure enough, the robin was utterly fearless and I spent an hour or so watching and photographing his antics in return for some tasty treats, some of which he ate from straight from my fingers. Later that day I found one of the reserve's volunteers feeding the robin again and was lucky enough to catch this adorable picture, which reminds me of Oliver's request for more food in the musical of the same name!

Updates to Etsy store

As I mentioned back in November, my intention this year is to give my Etsy store a little more attention and keep it stocked up. I started that process this week, with a bunch of new greetings cards, which you can find here.

P1000577.jpg

As anyone who looks at my photos regularly will know, I photograph a wide range of subjects and I'm always open to suggestions about the sort of cards I produce. If you have a favourite from my photos (in my portfolio or anywhere else) that you'd like to see made into a card, print, canvas or anything else do get in touch. 

Likewise, if you know of friends who might be interested in my products do share the link to it on social media or by email. Word of mouth is a wonderful thing!